How Do I Prepare My Car for Touch-Up Paint Simple Guide
Preparing your car for touch-up paint is easier than most people think. You just need the right tools, a little patience, and a clean workspace. This guide walks you through every step to get smooth, lasting results that blend perfectly with your car’s original paint.
Have you ever noticed a small scratch or chip on your car and thought, “I should fix that”? You’re not alone. Car paint gets damaged all the time from road debris, parking lot dings, and weather exposure. The good news is that touch-up paint can make those little blemishes disappear. But here’s the thing most people get wrong. They skip the preparation. And preparation is where the whole magic happens.
When you prepare your car for touch-up paint the right way, the repair lasts longer and looks way better. A rushed job leads to peeling, bubbling, or an ugly visible patch. Nobody wants that. This guide breaks down the entire process in simple, easy-to-follow steps. Whether you’re a complete beginner or someone who has tried this before and struggled, you’ll find useful tips here. Let’s get your car looking great again.
The process of car paint repair at home might seem intimidating. But it really isn’t. You don’t need expensive equipment or professional training. You need the right supplies, a little time, and attention to detail. By the end of this article, you’ll know exactly what to do from start to finish. So grab a cup of coffee, and let’s dive in.
Key Takeaways
- Find your color code first: This ensures you get the exact right touch-up paint for your car.
- Clean and sand properly: Surface prep is the most important step for paint adhesion.
- Use primer on bare metal: This prevents rust and helps the paint stick better.
- Apply thin layers: Multiple thin coats look far better than one thick one.
- Buff and polish after drying: This gives your repair a smooth, professional finish.
- Work in the right conditions: Temperature and humidity matter more than you’d think.
- Avoid common mistakes: Skipping steps or rushing leads to poor results.
📑 Table of Contents
Why Proper Preparation Matters for Touch-Up Paint
You might wonder why preparation gets so much attention. Can’t you just dab some paint on a scratch and call it done? Well, yes and no. Touch-up paint that goes on without prep usually fails within weeks. It peels, chips, or stands out like a sore thumb. The reason is simple. Paint needs a clean, rough surface to bond with. Without that bond, it has nothing to hold onto.
Think of it like painting a wall at home. If you slap fresh paint on a dirty, greasy wall, it peels off, right? The same principle applies to your car. Surface preparation removes dirt, old wax, rust, and loose paint. It creates the ideal base for new paint to grip and hold. This step is what separates a repair that lasts years from one that lasts days.
Another reason preparation matters is paint matching. When you apply touch-up paint over a properly prepped area, the color blends more naturally. The surrounding paint isn’t damaged or discolored, so the new paint has a clean surface to match against. Skip prep, and you’re painting over a compromised area that might show the repair for all the wrong reasons.
The Science Behind Paint Adhesion
Your car’s paint system has multiple layers. There’s the base color coat, the clear coat on top, and the primer underneath. When a chip or scratch breaks through to bare metal, that metal needs protection. Without primer, moisture reaches the metal and causes rust. Rust spreads fast and causes much bigger problems than a small chip ever did.
Proper surface preparation also creates micro-abrasions. These tiny scratches give the new paint something to grip. That’s why light sanding is so important. It roughens the surface just enough for the paint to bite in. Too much sanding damages the surrounding paint. Too little sanding means poor adhesion. Getting this balance right is the key to a successful repair.
Gather Your Supplies Before You Start
Before you begin any automotive touch-up project, gather everything you need. Running back and forth to the store mid-project is frustrating. It also breaks your focus and can lead to mistakes. Having all your supplies ready keeps the process smooth and efficient.
Essential Supplies You’ll Need
- Touch-up paint pen or bottle: Make sure it matches your car’s exact color code.
- Automotive primer: For any areas where bare metal is exposed.
- Sandpaper (1500 to 2000 grit): Fine grit for smoothing the repair area.
- Rubbing compound and polish: For blending the repaired area with the surrounding paint.
- Microfiber cloths: Several clean ones for wiping and buffing.
- Tack cloth or wax and grease remover: For cleaning the surface before painting.
- Masking tape and plastic sheeting: To protect surrounding paint from overspray.
- Clear coat applicator: If your touch-up kit doesn’t include one.
- Rust converter or rust treatment: If any rust is present in the damaged area.
- Small brushes or toothpicks: For precise paint application in tight spots.
How to Find Your Car’s Color Code
Finding your car’s color code is one of the most important first steps. This code tells you the exact paint formula for your vehicle. Without it, you risk buying the wrong shade. The code is usually found on a sticker inside the driver’s door jamb. Some cars also list it on the firewall or in the owner’s manual.
Write down the code and use it when ordering touch-up paint. Many auto parts stores have color matching systems. You can also order touch-up pens directly from your car’s manufacturer. The extra few minutes spent finding the right code save you from a mismatched repair job.
Quick Tips for Gathering Supplies
- Buy a complete touch-up paint kit that includes primer, paint, and clear coat.
- Check the expiration date on all products before you start.
- Work in a well-ventilated area with moderate temperatures between 60 and 75 degrees Fahrenheit.
- Keep a bright work light nearby to spot imperfections easily.
Step-by-Step Surface Preparation Process
This is the heart of your paint prep work. Every step here directly affects how well the touch-up paint bonds and how the final result looks. Don’t rush through this section. Take your time and do each step carefully.
Step 1: Clean the Damaged Area
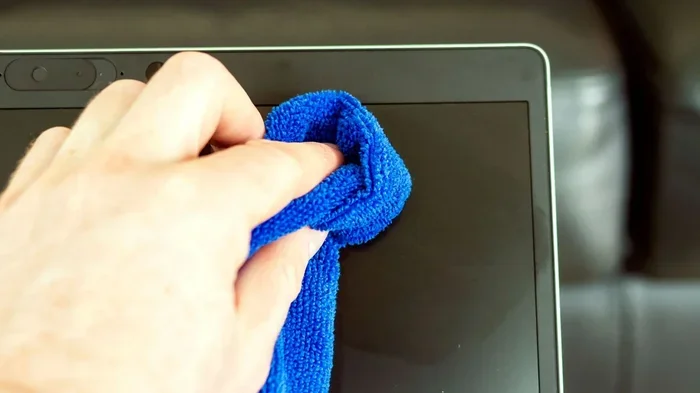
Start by washing the area around the damage with warm water and car soap. Use a gentle microfiber cloth. This removes loose dirt, road grime, and any debris stuck in the scratch or chip. Rinse thoroughly and dry the area completely with a clean towel.
Next, spray the area with a wax and grease remover. This cuts through any remaining oils or contaminants that soap alone won’t remove. Wipe it off with a fresh microfiber cloth. Let the surface air dry for a few minutes. You want the area completely clean and free of any residues before you move on.
Step 2: Sand the Damaged Area
Once the area is clean and dry, it’s time to sand. Use 1500-grit sandpaper wrapped around a small sanding block. This keeps your sanding even and prevents you from digging too deep. Sand the damaged area in small circular motions. You’re not trying to remove a lot of paint. You just want to create a slightly rough texture for the new paint to grip.
For deeper chips that reach bare metal, sand gently around the edges of the exposed area. This helps blend the repair zone with the surrounding paint. If you see any rust forming, use a rust remover or fine steel wool to treat it before moving forward. Wipe the area clean with a tack cloth after sanding to remove all dust particles.
Step 3: Apply Primer (If Needed)
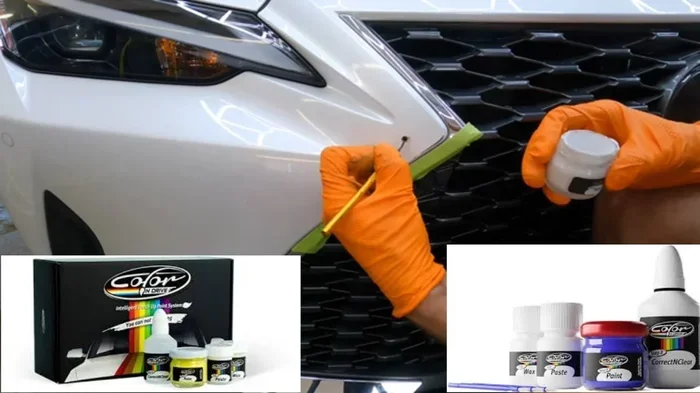
If your damage goes down to bare metal, you need primer before applying color paint. Primer protects the metal from moisture and gives the color coat something to stick to. Apply a thin, even layer of automotive primer using the small brush provided in most touch-up kits.
Let the primer dry completely. This usually takes about 30 minutes, but check the product instructions. The primer should be hard to the touch and completely dry before you apply paint. If you apply paint too early, it won’t bond properly and the repair will fail.
Step 4: Apply the Touch-Up Paint
Now comes the fun part. Shake your touch-up paint bottle or pen well. Apply the paint in thin, even layers. Use a small brush or the applicator tip to fill in the scratch or chip. Less is more here. Thick layers take longer to dry and are more likely to drip or bubble.
Let the first coat dry for about 15 to 20 minutes. Then apply a second thin coat if the first one looks translucent. Most touch-up repairs need two to three coats to build up enough color. Be patient. Rushing this step leads to an uneven finish that’s hard to fix later.
Step 5: Apply Clear Coat
After the color paint has fully dried, apply a thin layer of clear coat. This protects the color paint and gives it that glossy, factory-finish look. Apply it the same way you applied the color paint, in thin even layers. Let each coat dry before adding the next.
Most repairs need two coats of clear coat for a good finish. The clear coat is what makes your repair blend with the rest of the car’s surface. Without it, the touched-up area will look dull and flat compared to the surrounding paint.
Common Mistakes to Avoid During Preparation
Even with the best intentions, mistakes happen. Knowing what to avoid saves you time, money, and frustration. Here are the most common errors people make when prepping for touch-up paint.
Skipping the Cleaning Step
This is the number one mistake people make. They see a small chip and just start painting. Dirt, grease, and wax on the surface prevent the paint from bonding properly. Always clean the area thoroughly, even if it looks clean to the naked eye. Your tack cloth is your best friend here.
Using Too Much Paint at Once
It’s tempting to glob on the paint to cover the damage quickly. But thick paint application causes bubbling, dripping, and an uneven texture. Thin layers dry better, bond stronger, and look more natural. Multiple thin coats always beat one thick coat.
Painting in Bad Conditions
Don’t try to touch up your car in direct sunlight or on a very humid day. Heat causes paint to dry too fast, which leads to cracking and poor adhesion. Cold temperatures make the paint thick and hard to apply evenly. Aim for a shady spot with temperatures between 60 and 75 degrees Fahrenheit for the best results.
Forgetting to Sand Between Coats
If you notice any ridges or uneven spots after the paint dries, lightly sand with 2000-grit sandpaper before applying the next coat. This smooths out imperfections and helps each layer bond to the one below it. Skipping this step can leave your repair feeling rough to the touch.
Not Letting Paint Fully Cure
Touch-up paint needs time to fully cure before you buff or polish it. Most products need at least 24 to 48 hours to reach full hardness. If you buff too early, you’ll smear the paint and ruin the repair. Patience really is a virtue when it comes to car scratch repair.
Finishing Touches: Buffing and Polishing
Once your touch-up paint is fully dry and cured, it’s time for the finishing work. This step makes the repair nearly invisible and gives your car that showroom shine.
Start by applying a small amount of rubbing compound to a microfiber cloth. Gently rub the repaired area in circular motions. This blends the edges of the repair with the surrounding paint and removes any slight haze. Work slowly and check your progress often.
After the rubbing compound, switch to a finishing polish. Apply it with a clean microfiber cloth and buff the area until it shines. The goal is to make the repaired spot look identical to the rest of the car’s surface. When done correctly, most people won’t even know where the repair is.
Finally, apply a coat of car wax over the entire repaired area and the surrounding paint. This protects the new paint and helps it match the gloss level of the original factory finish. Waxing also adds a layer of protection against future chips and scratches.
Expert Insight: When to Seek Professional Help
While DIY car paint repair works great for small chips and scratches, some damage needs a professional. If the damage covers a large area, if the paint is peeling in sheets, or if rust has spread extensively, a professional body shop might be your best bet. Touch-up paint is perfect for cosmetic fixes, but it can’t solve structural paint problems.
Also, if you’re unsure about color matching or feel uncomfortable with the process, it’s okay to ask a professional for help. Many shops offer free touch-up estimates. Getting a pro to do the prep work while you handle the painting is another option some people prefer.
Key Takeaways
- Find your color code first: This ensures you get the exact right touch-up paint for your car.
- Clean and sand properly: Surface prep is the most important step for paint adhesion.
- Use primer on bare metal: This prevents rust and helps the paint stick better.
- Apply thin layers: Multiple thin coats look far better than one thick one.
- Buff and polish after drying: This gives your repair a smooth, professional finish.
- Work in the right conditions: Temperature and humidity matter more than you’d think.
- Avoid common mistakes: Skipping steps or rushing leads to poor results.
Conclusion
Preparing your car for touch-up paint doesn’t have to be complicated or expensive. With the right supplies and a little patience, you can make your car look as good as new. The key is taking the time to prep the surface properly. Clean it, sand it lightly, apply primer where needed, and build up the paint in thin layers.
Every step in this process serves a purpose. Skipping even one step can compromise the entire repair. So take it one step at a time, follow this guide, and you’ll be amazed at how well your car scratch repair turns out. The satisfaction of fixing your car yourself is a great feeling, and your wallet will thank you too.
Now that you know how to prepare your car for touch-up paint, you’re ready to tackle those small chips and scratches before they turn into bigger problems. Grab your supplies, find a good workspace, and get started. Your car will look better, and you’ll have the confidence of knowing the repair was done right.
Frequently Asked Questions
Can I use touch-up paint without primer?
You can, but only if the damage hasn’t reached bare metal. If the chip or scratch is just through the clear coat and color coat, primer isn’t necessary. However, if you see bare metal, always apply primer first. It prevents rust and ensures the paint sticks properly.
How long should I wait before driving my car after touch-up paint?
Let the paint cure for at least 24 to 48 hours before washing or driving in the rain. The clear coat needs this time to harden fully. Driving too soon can expose the wet paint to dirt and moisture, which ruins the repair. Check your product instructions for specific curing times.
What’s the best temperature for applying touch-up paint?
The ideal temperature range is between 60 and 75 degrees Fahrenheit. Avoid painting in direct sunlight, extreme heat, or cold. These conditions cause the paint to dry too fast or too slow, leading to cracking, bubbling, or poor adhesion. A shaded garage is the best workspace.
Will touch-up paint match my car’s paint perfectly?
It can come very close, especially if you use the correct color code. Over time, your car’s original paint may fade slightly due to sun exposure. This means a recent touch-up might look slightly different than an older repair. However, proper preparation and application make the repair much less noticeable.
How do I prevent rust after a paint chip?
Address chips and scratches as soon as possible. Apply primer immediately if bare metal is exposed. You can also use a rust converter on any small spots of rust before painting. Keeping your car waxed adds an extra layer of protection against moisture and road damage.
Can I wash my car after a touch-up repair?
Wait at least 48 to 72 hours before washing the repaired area. The paint and clear coat need time to fully cure. When you do wash it, use a gentle hand wash method and avoid high-pressure water near the repair. This protects the fresh paint and helps the repair last longer.