Can I Fix My Own Tire Pressure Sensor Without a Mechanic
Yes, you can fix your own tire pressure sensor in most cases. Whether your TPMS warning light is on due to a dead battery, a faulty valve stem, or a simple reset issue, this guide walks you through every step. You will learn how to diagnose the problem, use the right tools, and save hundreds of dollars on tire service visits.
Have you ever been driving down the road and suddenly spotted that little yellow light on your dashboard shaped like a horseshoe with an exclamation mark? That is your tire pressure warning light, and it can cause instant panic. The first thing most people think is, “How much is this going to cost me?” The second thing is, “Do I even need a mechanic for this?”
Here is the good news. In many cases, you absolutely can fix your own tire pressure sensor without ever leaving your driveway. Whether the issue is a dead battery inside the sensor, a loose valve stem, or a simple system reset, the fix is often straightforward and surprisingly affordable. This guide will show you exactly how to handle common TPMS problems on your own, step by step.
Your car’s Tire Pressure Monitoring System does one job and one job well. It watches the air pressure inside your tires and alerts you when something is off. When the system detects low tire pressure or a sensor malfunction, it triggers that dreaded dashboard warning. Understanding how this system works is the first step toward fixing it yourself.
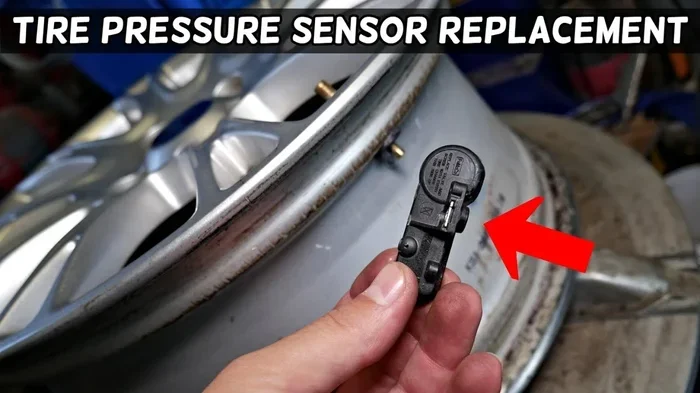
There are two main types of TPMS in modern vehicles. Direct TPMS uses a small sensor mounted inside each wheel, usually attached to the valve stem. These sensors measure the actual air pressure in each tire and send data wirelessly to your car’s computer. Indirect TPMS works differently. It does not have physical pressure sensors. Instead, it uses the wheel speed sensors from your anti-lock braking system to detect when a tire is spinning differently than the others. A tire with low pressure has a smaller rolling radius, which causes it to spin faster.
Most cars made after 2007 in the United States come equipped with direct TPMS. These are the systems where you will find a small sensor inside the wheel. If your car has indirect TPMS, the fix might involve recalibrating the system after a tire rotation or pressure change. Both types can trigger the same warning light, but the approach to fixing them differs.
Now that you understand the basics, let us talk about what actually goes wrong with these sensors. The most common culprits are surprisingly simple. A TPMS sensor battery dies. The valve stem core works loose. A sensor gets damaged from hitting a pothole or curb. Or the system simply needs a reset after you adjust your tire pressure.
Each of these problems has a solution you can handle yourself. The key is knowing what to look for and having the right tools on hand. Let us walk through the most common issues and their fixes in detail.
Key Takeaways
- DIY TPMS repair is possible: Many common tire pressure sensor issues can be fixed at home with basic tools and a little patience.
- Identify the problem first: Understanding whether you have direct or indirect TPMS helps you choose the right fix.
- Resetting is often the solution: A simple TPMS reset can clear the tire pressure light in many situations.
- Battery replacement is doable: Swapping out a dead TPMS sensor battery takes about 10 minutes per sensor.
- Know when to call a pro: Some issues, like module failures or wiring problems, need professional diagnosis.
- Prevention saves money: Regular tire pressure checks and seasonal resets keep your TPMS working reliably.
- Tools matter: A quality TPMS reset tool, tire pressure gauge, and OBD-II scanner make DIY repairs much easier.
📑 Table of Contents
- How to Diagnose Your Tire Pressure Sensor Problem
- How to Reset Your TPMS Sensor
- Replacing a TPMS Sensor Battery
- Common TPMS Mistakes and How to Avoid Them
- When You Should Call a Professional Mechanic
- Preventing Future TPMS Problems
- Quick Tips for Successful DIY TPMS Repair
- Key Takeaways
- Frequently Asked Questions
- Conclusion
How to Diagnose Your Tire Pressure Sensor Problem
Before you start wrenching on anything, you need to figure out what is actually causing the warning light. Diagnosing the problem correctly saves you time and prevents unnecessary part purchases. A tire pressure sensor diagnosis starts with a few simple checks you can do right now.
Check Your Tire Pressure First
This sounds obvious, but you would be surprised how many people skip this step. Grab a reliable tire pressure gauge and check all four tires, including the spare if your vehicle has one. Compare the readings to the recommended pressure listed on the sticker inside your driver’s door jamb. Do not rely on the numbers printed on the tire sidewall. Those are maximum pressure ratings, not recommended operating pressure.
If one or more tires are low, add air to the proper level. In many cases, this alone will turn off the tire pressure light. Some vehicles require you to drive a few miles at speeds above 30 mph for the system to recalibrate automatically.
Look for Visible Damage
Walk around your vehicle and inspect each tire visually. Look for nails, screws, cuts, or bulges in the sidewall. Check the valve stems for cracks or damage. A broken valve stem is a very common cause of slow leaks that trigger the TPMS warning. If you see a nail embedded in the tread, you likely have a puncture that needs repair before the pressure sensor will stop complaining.
Check for Temperature Changes
Cold weather is a sneaky trigger for the tire pressure warning light. When temperatures drop, the air inside your tires contracts, causing pressure to decrease. A sudden cold snap can drop your tire pressure enough to activate the sensor. If the light came on during a cold morning but disappeared after driving for a while, temperature is probably the cause. Simply adding a bit of air usually fixes this.
Use an OBD-II Scanner
For a more precise diagnosis, plug an OBD-II scanner into your vehicle’s diagnostic port. This tool reads trouble codes stored in your car’s computer. You can find a universal OBD-II scanner at any auto parts store for under $50. When you plug it in, look for codes starting with C0035 through C0044. These codes point to specific TPMS sensor failures by wheel position.
How to Reset Your TPMS Sensor
Resetting your TPMS sensor is the most common DIY fix and the one that solves the problem more often than people realize. After you correct low tire pressure or replace a sensor, the system needs a reset to recalibrate. The process varies by vehicle, but the general steps are similar across most makes and models.
Method 1: Use the TPMS Reset Button
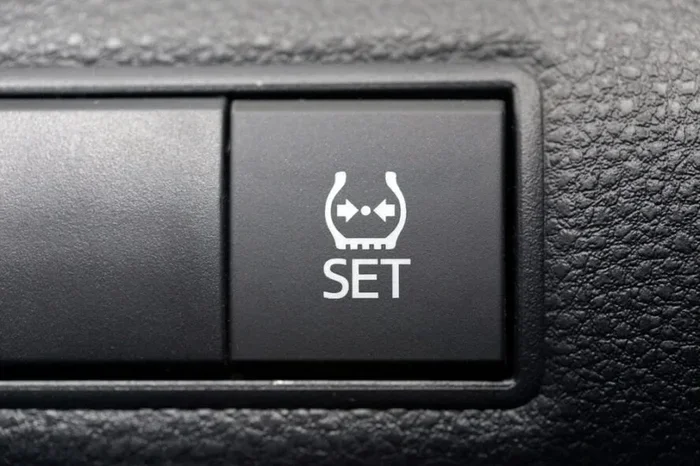
Many vehicles have a dedicated TPMS reset button. It is usually located beneath the steering wheel, near the driver’s side door, or in the glove box. Consult your owner’s manual to find the exact location. The process typically involves these steps:
- Make sure all tires are at the correct pressure.
- Turn the ignition to the “on” position without starting the engine.
- Press and hold the TPMS reset button until the warning light blinks three times.
- Start the engine and drive for at least 20 minutes at speeds above 30 mph.
- The system should recalibrate and the light should turn off.
Method 2: Use a TPMS Reset Tool
A TPMS reset tool is a handheld device that communicates directly with your vehicle’s TPMS module. These tools range from basic models under $20 to advanced ones costing $100 or more. The basic models work well for most reset procedures. You connect the tool to the OBD-II port, follow the on-screen prompts, and the tool sends a reset command to the system.
Some advanced TPMS tools can also read sensor IDs and battery status. This is incredibly helpful when you need to identify which specific sensor has a dead battery. Brands like Autel, Launch, and Foxwell make reliable options that work on most vehicles.
Method 3: Disconnect the Battery
As a last resort, you can try disconnecting your car battery for about 15 minutes. This clears the computer’s memory and can reset the TPMS system. However, this method also resets other settings like your radio presets and clock, so use it only when the other methods fail.
Replacing a TPMS Sensor Battery
The battery inside a direct TPMS sensor typically lasts between five and ten years. When the battery dies, the sensor stops transmitting, and your tire pressure light stays on. The good news is that replacing the battery is something you can do yourself without special training.
What You Will Need
- A replacement battery (usually CR1632 or CR2032, depending on the sensor)
- A TPMS sensor tool or a small flathead screwdriver
- A new valve core (sometimes included with the battery kit)
- A tire pressure gauge
Step-by-Step Replacement
- Remove the tire from the vehicle. You do not need to break the seal completely, but the wheel must be off the ground so you can rotate the sensor.
- Use the TPMS sensor tool to carefully pry open the sensor housing. These tools have a specific shape that fits into the groove on the sensor body.
- Pull out the old battery and note its orientation. The positive side usually faces up.
- Insert the new battery in the same orientation. Make sure it sits flush against the contacts.
- Snap the sensor housing back together and ensure the seal is tight.
- Install a new valve core if one was not already included in your battery kit.
- Reinstall the tire, inflate to the proper pressure, and reset the TPMS system.
The entire process takes about 10 minutes per sensor once you get the hang of it. Many online tutorials show this process in action for specific vehicle models, which can be very helpful if you are doing it for the first time.
When to Replace the Entire Sensor Instead
Sometimes the battery dies because the sensor itself is worn out. If the sensor housing is cracked, corroded, or damaged, replacing just the battery will not help. In these cases, you need a full TPMS sensor replacement. New sensors cost between $15 and $50 each for aftermarket parts. Many aftermarket sensors come pre-programmed and ready to install, which makes the DIY process much simpler.
After installing a new sensor, you will need to reprogram it into your vehicle’s system. Some vehicles auto-learn the new sensor ID when you drive above 20 mph. Others require you to use a TPMS reprogramming tool or visit a tire shop for the initial pairing.
Common TPMS Mistakes and How to Avoid Them
Even with the best intentions, DIY repairs can go wrong if you make avoidable mistakes. Learning from other people’s errors saves you time, money, and frustration.
Mistake 1: Ignoring the Light After Adding Air
Adding air to your tires does not always turn off the warning light immediately. The system needs time to recognize the corrected pressure. If the light stays on after you add air, perform a manual reset using the methods described earlier. If you do not reset the system, the light will continue to flash even though your pressure is correct.
Mistake 2: Using the Wrong Battery
Not all TPMS sensors use the same battery. Using the wrong type can damage the sensor or cause it to fail prematurely. Always check your vehicle’s service manual or the sensor model number before purchasing a replacement battery. The correct battery type is usually printed on the old battery itself.
Mistake 3: Forgetting to Replace the Valve Core
When you remove the sensor from the valve stem, the old valve core often becomes damaged or worn. Reusing it can cause a slow leak that triggers the TPMS warning again a few days later. Always install a new valve core when you remove or replace a sensor.
Mistake 4: Not Checking All Sensors
If one sensor battery is dying, the others are probably not far behind. TPMS sensor batteries tend to age at a similar rate since they are installed at the same time. When you replace one battery, it is wise to check the battery status of all four sensors. A TPMS diagnostic tool makes this easy.
Mistake 5: Skipping the Reprogramming Step
After replacing any sensor, the system needs to recognize the new part. Skipping the reprogramming step is one of the most common reasons DIY TPMS repairs fail. The light comes back a few days later, and people assume the new sensor is defective when really the system just was not properly initialized.
When You Should Call a Professional Mechanic
DIY repair is empowering, but knowing your limits is equally important. Some TPMS issues are beyond what a weekend mechanic can handle safely and effectively.
Wiring or Module Failures
If your OBD-II scanner shows codes related to the TPMS control module or wiring harness, the problem is likely electrical. Repairing wiring harnesses or replacing TPMS modules requires specialized knowledge and equipment. These repairs are best left to a professional.
Corroded Sensor Seats
If the sensor seat in the wheel rim is corroded or damaged, simply replacing the sensor will not fix the problem. The corroded seat needs to be cleaned or the wheel may need to be replaced. A tire shop has the equipment to handle this safely.
Persistent Warning Light with No Clear Cause
If you have checked your tire pressure, reset the system, and replaced the sensors, but the light keeps coming back, there may be a deeper issue. A professional mechanic with advanced diagnostic equipment can pinpoint problems that are not visible to the naked eye.
Preventing Future TPMS Problems
The best way to deal with tire pressure sensor issues is to prevent them from happening in the first place. A little regular maintenance goes a long way toward keeping your TPMS working reliably.
- Check your tire pressure monthly. Use a quality tire pressure gauge and compare readings to your vehicle’s recommended levels.
- Reset your TPMS after every tire rotation. This keeps the system calibrated and helps you catch problems early.
- Replace sensor batteries proactively. If your sensors are more than five years old, consider replacing the batteries before they die unexpectedly.
- Avoid hitting potholes and curbs. Physical impacts are the leading cause of TPMS sensor damage.
- Keep valve stem caps on at all times. These small caps prevent moisture and debris from entering the valve stem and damaging the sensor.
- Use a TPMS diagnostic tool annually. A quick check of sensor battery levels can alert you to potential problems before they leave you stranded.
Quick Tips for Successful DIY TPMS Repair
Tip 1: Keep Your Owner’s Manual Handy
Your vehicle’s owner manual contains specific TPMS reset procedures, sensor battery types, and diagnostic information. Before starting any repair, flip through the manual to find the relevant section. It will save you a lot of guesswork.
Tip 2: Invest in a Good Tire Pressure Gauge
A digital tire pressure gauge is more accurate than the pencil-style gauges found at gas stations. Accurate readings mean fewer false alarms and better tire wear. Look for a gauge that reads in PSI and BAR with a clear digital display.
Tip 3: Label Your Sensors
When you remove sensors from the wheels, label them with tape or a marker. This ensures you put each sensor back on the correct wheel. Mixing up sensor positions can cause confusing readings and unnecessary reprogramming.
Tip 4: Work on a Warm Tire
Check your tire pressure when the tires are cold, meaning the car has been parked for at least three hours. Driving heats up the air inside the tires and increases the pressure reading, giving you inaccurate results.
Tip 5: Keep a Maintenance Log
Write down when you checked your tire pressure, replaced batteries, or reset the system. This log helps you track patterns and catch issues before they become serious problems.
Key Takeaways
- DIY TPMS repair is possible: Many common tire pressure sensor issues can be fixed at home with basic tools and a little patience.
- Identify the problem first: Understanding whether you have direct or indirect TPMS helps you choose the right fix.
- Resetting is often the solution: A simple TPMS reset can clear the tire pressure light in many situations.
- Battery replacement is doable: Swapping out a dead TPMS sensor battery takes about 10 minutes per sensor.
- Know when to call a pro: Some issues, like module failures or wiring problems, need professional diagnosis.
- Prevention saves money: Regular tire pressure checks and seasonal resets keep your TPMS working reliably.
- Tools matter: A quality TPMS reset tool, tire pressure gauge, and OBD-II scanner make DIY repairs much easier.
Frequently Asked Questions
How much does it cost to fix a tire pressure sensor?
DIY repairs cost very little. A TPMS reset tool costs between $20 and $100, and replacement sensor batteries run about $5 to $10 each. If you take your car to a mechanic, you might pay $50 to $100 just for a diagnostic visit, plus the cost of parts. Doing it yourself can save you $100 or more per repair.
Can I drive with the TPMS light on?
You can drive short distances with the light on, but it is not recommended. The light means your tire pressure is either too low or too high, which affects handling, fuel economy, and tire wear. Check your tire pressure as soon as possible and address the issue before driving long distances.
How long do TPMS sensor batteries last?
Most TPMS sensor batteries last between five and ten years, depending on driving conditions and frequency of use. Cold climates tend to drain batteries faster. If your vehicle is more than five years old, it is a good idea to check sensor battery levels proactively.
Can I replace just one TPMS sensor?
Yes, you can replace a single sensor if only one has failed. However, many mechanics recommend replacing sensors in pairs, especially if they are the same age. If one battery is dying, the other is likely close behind, and replacing both at once saves you a second repair visit later.
Will the TPMS light reset itself after I fix the pressure?
In some vehicles, the light turns off automatically once the system detects correct pressure and you drive for a while. In others, you need to manually reset the system using the reset button or a diagnostic tool. Check your owner’s manual to find out which applies to your vehicle.
What causes a TPMS sensor to fail?
The most common cause is a dead battery, which typically happens after five to ten years. Physical damage from potholes, curbs, or road debris is the second most common cause. Corrosion, valve stem wear, and electrical failures in the sensor module can also cause premature failure.
Conclusion
Fixing your own tire pressure sensor is one of the most satisfying and practical DIY repairs you can do. It saves money, builds your mechanical confidence, and keeps your car safe on the road. Whether the fix is as simple as adding air and resetting the system or as hands-on as swapping out a sensor battery, the process is well within reach for most car owners.
The key is to start with a proper diagnosis. Check your tire pressure, inspect for visible damage, and use an OBD-II scanner if needed. Once you know what is wrong, the right fix is usually clear. With a TPMS reset tool, a quality tire pressure gauge, and a little patience, you can handle most TPMS sensor issues without ever stepping foot in a repair shop.
Remember, prevention is your best friend. Regular tire pressure checks, timely battery replacements, and seasonal system resets keep your Tire Pressure Monitoring System working reliably for years. The next time that yellow light comes on, do not panic. You have the knowledge and the tools to handle it yourself.