How to Take Off Maintenance Required After Oil Change
Knowing how to take off the maintenance required light after an oil change is a simple skill every car owner should have. Whether you drive a Toyota, Lexus, or another brand, the maintenance reminder can stay on even after your oil is fresh. This guide walks you through the exact steps to reset the light, explains why the light comes on, and shares tips to keep your car running smoothly between services.
So you just got your oil changed, and there it is — that little wrench light glowing on your dashboard. It is annoying, right? You know the oil is fresh, the filter is new, and everything is good. But the maintenance required light just will not turn off. This happens to millions of car owners every year, and the fix is almost always simpler than you think.
In this article, we will walk you through exactly how to take off maintenance required after oil change on most popular vehicles. We will cover why the light comes on in the first place, the step-by-step reset process for different car brands, common mistakes to avoid, and tips to keep your car maintenance on track. Whether you drive a Toyota, a Lexus, or another brand, you will find the answers you need right here.
The good news is that you do not need a trip to the dealership or a pricey mechanic to handle this. In most cases, you can reset the light yourself in just a few minutes. Let us get into it.
Key Takeaways
- Resetting the maintenance light is quick: Most vehicles let you turn off the maintenance required light in under five minutes.
- The process varies by brand: Toyota, Lexus, Honda, and other brands use different button combinations to reset the oil change reminder.
- You can do it yourself: No mechanic or dealership visit is needed in most cases to reset the maintenance light.
- Ignoring the light has risks: Driving with the maintenance required light on for too long may affect your warranty or service schedule.
- Regular oil changes matter: Staying on top of your oil change schedule prevents engine damage and keeps your car running strong.
📑 Table of Contents
- Why Does the Maintenance Required Light Come On?
- How to Take Off Maintenance Required After Oil Change
- Can You Ignore the Maintenance Required Light?
- Common Mistakes When Resetting the Maintenance Light
- Tips to Keep Your Oil Change Schedule on Track
- Can You Do an Oil Change Yourself?
- When Should You See a Professional?
- Key Takeaways
- Conclusion
Why Does the Maintenance Required Light Come On?
The maintenance required light is your car’s way of reminding you that it is time for routine service. It is not a warning about a broken part or a serious problem. Instead, it is a simple nudge based on your mileage or time since the last service.
Here are the most common reasons the light turns on:
- Oil change interval reached: Most cars track miles since the last oil change. When you hit the recommended mileage, the light pops on.
- Time-based reminder: Some vehicles use a time schedule, not just mileage, to trigger the maintenance light.
- Other service intervals: The light can also remind you about tire rotations, fluid checks, and other routine maintenance tasks.
- Reset not completed: If the light was on before the oil change and nobody reset it, it stays on after the service.
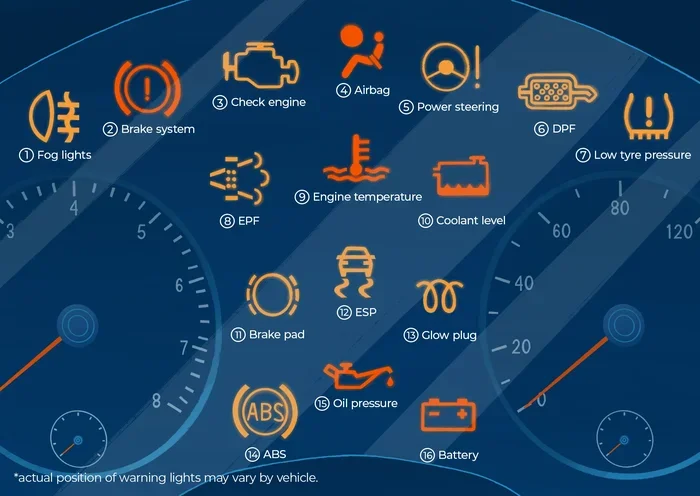
It is important to understand that the maintenance required light is different from a check engine light or a low oil pressure warning. Those signals mean something is wrong right now. The maintenance light simply means it is time for scheduled service. Still, you should not ignore it for too long.
How the Oil Life Monitor Works
Many modern vehicles use an oil life monitoring system instead of a simple mileage counter. This system tracks your driving habits, engine temperature, and other factors to estimate when the oil needs changing. The system then tells you when it is time for service. After you get the oil changed, you need to reset this monitor manually. That is where the maintenance required light reset process comes in.
How to Take Off Maintenance Required After Oil Change
The exact steps to reset the maintenance light depend on your vehicle’s make and model. Below, we cover the most common methods for popular brands. Pick the one that matches your car and follow along.
How to Reset the Maintenance Light on Toyota
Toyota vehicles are some of the most popular cars on the road, and the reset process is straightforward. Here is how to do it:
- Turn the ignition to the “ON” position without starting the engine. You do this by pressing the start button once or turning the key to the “ON” position.
- Use the trip meter button on the dashboard to scroll through the trip displays until you see the maintenance screen.
- Press and hold the trip meter button for about five seconds.
- The maintenance light should start flashing, then turn off.
- Turn the ignition off and then back on to confirm the light is gone.
For some Toyota models, you may need to hold the reset button while turning the key to the “ON” position. Check your owner’s manual if the steps above do not match your dashboard layout.
How to Reset the Maintenance Light on Lexus
Lexus vehicles share a similar process with Toyota since they are part of the same family. The steps are very close:
- Press the start button to turn the electrical system on without starting the engine.
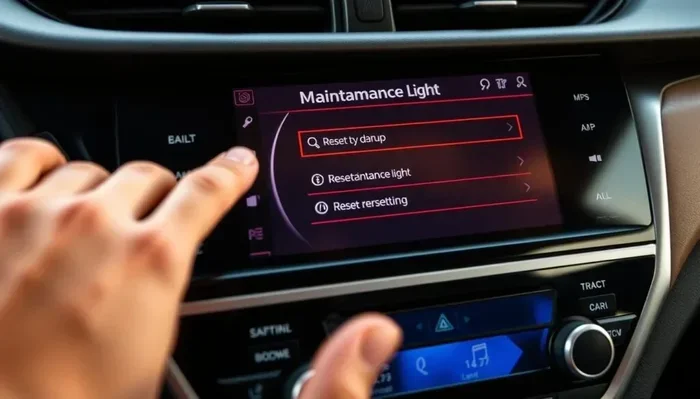
- Use the steering wheel controls or the infotainment system to navigate to the maintenance menu.
- Find the option to reset the maintenance reminder.
- Confirm the reset, and the light should turn off.
On older Lexus models, you can also use the trip odometer button method similar to Toyota. Hold the button down for several seconds while the ignition is in the “ON” position.
How to Reset the Maintenance Light on Honda and Other Brands
Honda uses a slightly different approach. For most Honda models, you hold the trip reset button on the dashboard while scrolling through the trip meter display until the maintenance miles reach zero. Then release the button, and the light should go off.
For other brands like Ford, Chevrolet, or Nissan, the process typically involves navigating through the instrument cluster menu to find the service reset option. Many newer cars let you reset the maintenance light through the infotainment screen under the “Vehicle Settings” or “Maintenance” menu.
When in doubt, your owner’s manual is your best friend. It will have the exact steps for your specific model. You can also search online for your year, make, and model plus “reset maintenance light.”
Can You Ignore the Maintenance Required Light?
Technically, yes — you can drive with the maintenance required light on. It does not affect how your car runs. But that does not mean you should ignore it. Here is why:
- It can affect your warranty: If you skip scheduled maintenance and something goes wrong, the manufacturer might deny your warranty claim. Keeping up with service records matters.
- It can lower resale value: Buyers look for a complete service history. A car with missed oil changes and a history of ignored maintenance lights is harder to sell.
- It can lead to bigger problems: Skipping oil changes for too long can cause engine wear, sludge buildup, and eventually serious engine damage.
If you are wondering whether you can safely ignore the light for a few extra weeks, the honest answer is that you probably can in a pinch. But do not make a habit of it. Get your oil changed on schedule and reset the light right away.
For more details on whether it is safe to drive with this light on, check out our article on can I ignore the maintenance required light. We break down the risks and timelines in detail.
Common Mistakes When Resetting the Maintenance Light
Resetting the maintenance light is simple, but people still make mistakes. Here are the most common ones to watch out for:
Resetting the Light Before the Oil Change Is Complete
This is the number one mistake. Some people reset the light before the mechanic or they themselves finish the oil change. The light turns off temporarily, but it will come back because the system still registers that the service was not done. Always reset the light only after the fresh oil and new filter are installed.
Using the Wrong Reset Method
Every car brand has its own reset procedure. Using the Toyota method on a Honda will not work, and vice versa. Make sure you follow the correct steps for your vehicle. If you are unsure, a quick search for your specific model should give you clear instructions.
Not Holding the Button Long Enough
Many reset procedures require you to hold a button for a full five to ten seconds. If you release too early, the light will not reset. Be patient and hold it until you see the light flash or the display change.
Forgetting to Check the Oil Level
After an oil change, always check the oil level with the dipstick before driving. Sometimes the oil needs a top-off after the engine settles. A low oil level can trigger the maintenance light or other dashboard warnings. If you are concerned about what the dashboard shows, read our guide on does low engine oil show on the dashboard to understand what your dash lights really mean.
Tips to Keep Your Oil Change Schedule on Track
Resetting the maintenance light is only half the battle. The real goal is staying on top of your oil change schedule so your engine stays healthy. Here are some practical tips:
- Set a phone reminder: Mark your calendar or set a recurring alarm for every 5,000 to 7,500 miles, depending on your vehicle and oil type.
- Track your mileage: Keep a log or use a phone app to record each oil change. This helps you know exactly when the next one is due.
- Use quality oil: Whether you use conventional, synthetic blend, or full synthetic oil, make sure it meets your manufacturer’s specifications.
- Check your oil between changes: A quick dipstick check once a month can catch low oil levels early. This is especially important if you drive in hot weather or tow heavy loads.
- Follow the severe service schedule if needed: If you drive in stop-and-go traffic, extreme heat, or dusty conditions, you may need to change your oil more frequently than the standard schedule suggests.
If you want to learn more about oil change timing and when to actually change your oil, our article on at what percent oil life should you change oil gives a detailed breakdown of oil life percentage and what it really means for your engine.
Can You Do an Oil Change Yourself?
Many car owners ask whether they can handle an oil change at home. The answer is yes — it is one of the most beginner-friendly DIY car maintenance tasks. All you need is the right oil, a new oil filter, a drain pan, a wrench, and about 30 minutes.
Here is a quick overview of the process:
- Warm up the engine for a few minutes to loosen the old oil.
- Jack up the car safely and place it on jack stands.
- Locate the oil drain plug and remove it. Let the old oil drain into a pan.
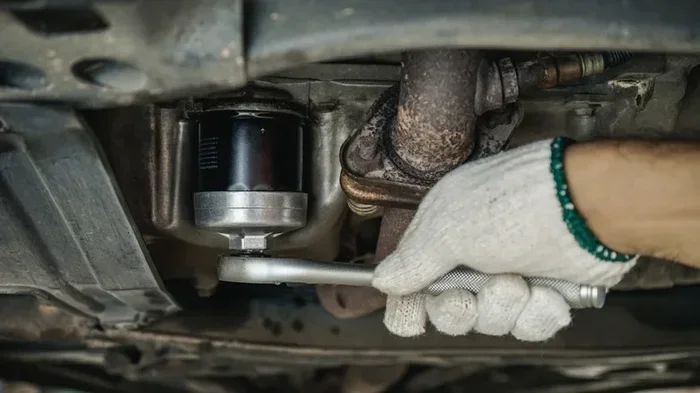
- Remove the old oil filter and install the new one with a thin coat of fresh oil on the gasket.
- Replace the drain plug and lower the car.
- Add fresh oil through the oil fill cap on the engine.
- Check the oil level with the dipstick and start the engine to look for leaks.
- Reset the maintenance light using the steps above.
For a more detailed walkthrough of the DIY oil change process, visit our guide on can you do an oil and filter change yourself. It covers everything from choosing the right oil to disposing of the old oil responsibly.
Doing your own oil change can save you money and give you a better understanding of your vehicle. Just make sure you use the correct oil grade and filter for your specific model. And always reset the maintenance light when you are done.
When Should You See a Professional?
Most of the time, resetting the maintenance light is a quick DIY job. But there are situations where you should let a professional handle it:
- The light will not reset: If you follow the correct steps and the light stays on, there may be a deeper electrical or sensor issue.
- Multiple warning lights are on: If the maintenance light comes with a check engine light or oil pressure warning, get your car checked right away.
- You are not comfortable doing it yourself: There is no shame in visiting a dealership or mechanic for a quick reset. Most will do it for free or a small fee.
- You are still under warranty: If your car is under warranty, it may be worth having the dealership perform the oil change and reset. This ensures everything is properly documented.
If you are considering a dealership oil change, you might wonder whether it is cheaper than an independent shop. Our article on are dealership oil changes cheaper explores the cost differences and helps you decide where to go.
Key Takeaways
- Resetting the maintenance light is quick: Most vehicles let you turn off the maintenance required light in under five minutes.
- The process varies by brand: Toyota, Lexus, Honda, and other brands use different button combinations to reset the oil change reminder.
- You can do it yourself: No mechanic or dealership visit is needed in most cases to reset the maintenance light.
- Ignoring the light has risks: Driving with the maintenance required light on for too long may affect your warranty or service schedule.
- Regular oil changes matter: Staying on top of your oil change schedule prevents engine damage and keeps your car running strong.
- DIY oil changes are doable: With basic tools and the right supplies, you can change your oil at home and reset the light in one session.
Conclusion
Learning how to take off maintenance required after oil change is one of those small car care skills that saves you time and money. The process is simple, takes just a few minutes, and works for almost any vehicle. Whether you drive a Toyota, a Lexus, or another brand, you now have the steps you need to reset that annoying maintenance light.
Remember, the maintenance required light is just a reminder — not an emergency. But staying on top of your oil changes and resetting the light afterward keeps your car in great shape and your service records clean. Make it a habit to reset the light every time you get fresh oil, and you will never have to deal with a stubborn dashboard warning again.
Keep up with your maintenance schedule, drive with confidence, and enjoy the peace of mind that comes with a well-cared-for vehicle. Your car will thank you for it.
Frequently Asked Questions
How do I turn off the maintenance required light after an oil change?
The process depends on your vehicle’s make and model. For most Toyota and Lexus cars, you turn the ignition to “ON,” scroll to the maintenance screen using the trip button, and hold the button for five seconds until the light flashes and turns off. Always refer to your owner’s manual for the exact steps for your specific vehicle.
Can I drive with the maintenance required light on?
Yes, you can drive safely with the maintenance required light on. It is not an urgent warning like a check engine light or low oil pressure light. However, you should get your oil changed on schedule and reset the light as soon as possible to keep your car in good shape and protect your warranty.
Why does the maintenance light stay on after an oil change?
The light stays on because the oil life monitor or maintenance reminder was not reset after the service. This is a common oversight, especially when you get your oil changed at a shop that does not reset it for you. Simply follow the reset procedure for your vehicle, and the light will turn off.
How often should I reset the maintenance required light?
You should reset the maintenance required light every time you get an oil change or complete any other scheduled service. This keeps your service records accurate and ensures the reminder system works correctly for the next interval.
Will resetting the maintenance light affect my car’s warranty?
No, resetting the maintenance light does not affect your warranty. However, failing to complete the recommended maintenance on time could potentially impact warranty claims if a related issue arises. Always keep records of your oil changes and services to protect your warranty coverage.
What if the maintenance light will not reset?
If the maintenance light will not reset after following the correct procedure, there may be an underlying issue with a sensor, the instrument cluster, or the vehicle’s computer system. In this case, it is best to visit a dealership or qualified mechanic who can diagnose the problem and reset the light properly.