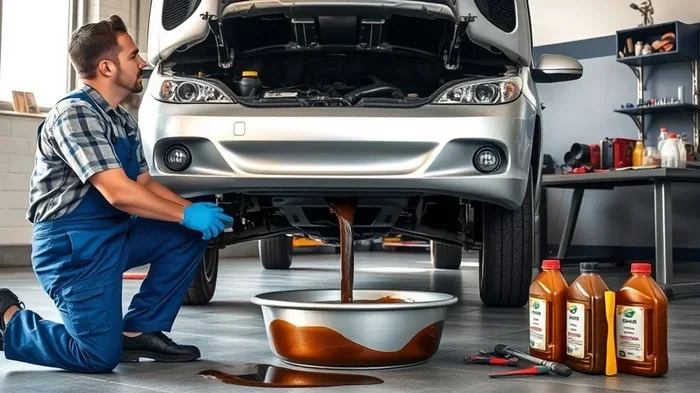
Can You Do an Oil and Filter Change Yourself at Home
Yes, you absolutely can do an oil and filter change yourself at home. With the right tools, a little patience, and this guide, you will save money and learn a valuable car maintenance skill. Changing your own oil is one of the simplest DIY car maintenance tasks, and it takes about 30 to 45 minutes once you know the process. This article walks you through every step, from gathering your tools to safely disposing of used oil.
There is something deeply satisfying about handling your own car maintenance. Maybe it is the sense of independence, or maybe it is just the thrill of saving money. Whatever the reason, doing an oil and filter change yourself is one of the most popular first DIY projects for car owners. You do not need to be a mechanic. You do not need a fancy garage. All you need is a flat surface, some basic tools, and about 45 minutes of your time.
Every car needs regular oil changes to keep the engine healthy and running strong. Oil lubricates the moving parts inside your engine, reduces friction, and prevents overheating. Over time, oil breaks down and gets dirty. When that happens, it stops doing its job properly. That is where the oil filter comes in. The filter catches dirt, metal particles, and other contaminants. But even the best filter gets clogged eventually. That is why both the oil and the filter need to be replaced on a regular basis.
If you have ever wondered whether you could skip the quick-lube shop and handle this yourself, the answer is a resounding yes. An oil and filter change yourself at home is easier than most people think. This guide will show you exactly how to do it, what tools you need, how to stay safe, and how much money you can save in the process. Let us get into it.
Key Takeaways
- You can save $25 to $75 per oil change by doing it yourself at home instead of visiting a shop.
- Basic tools like a socket wrench, oil drain pan, and jack stands are all you need to get started.
- Always check your vehicle manual for the correct oil type and filter model before you begin.
- Safety comes first — never work under a car supported only by a jack.
- Used oil must be recycled properly at a local auto parts store or recycling center.
- Changing your oil every 5,000 to 7,500 miles keeps your engine running smoothly and extends its life.
📑 Table of Contents
Understanding Why DIY Oil Changes Matter
Why People Choose to Change Their Own Oil
There are many reasons why car owners decide to change their own oil. The biggest one is cost. A typical oil change at a shop costs between $40 and $80 depending on where you live and what type of oil your car needs. When you do it yourself, you pay for the oil and filter only. That usually costs between $15 and $30. Over the course of a year, those savings add up fast. If you change your oil twice a year, you could save $50 to $100 annually.
But cost is not the only reason. Many people enjoy learning about their vehicles. There is a real sense of pride that comes from completing a maintenance task on your own. It also gives you a better understanding of how your car works, which helps you spot potential problems before they become expensive repairs. Plus, you do not have to wait in a crowded waiting room or worry about upsells for extra services you do not need. When you change your own oil, you are in complete control of the quality of every part and fluid that goes into your engine.
Another big reason is convenience. You do not have to drive to a shop, sit in a waiting area, or coordinate your schedule around their hours. You can change your oil on your own time, in your own driveway, at your own pace. For busy car owners, this flexibility alone is worth the effort. And once you have done it a couple of times, you will find that it becomes a quick and easy part of your regular car maintenance routine.
Understanding Your Vehicle Oil System
Before you start, it helps to understand the basics of how your car oil system works. The engine has oil passages that circulate oil throughout the engine block. The oil pump pushes oil through these passages, lubricating bearings, pistons, and camshafts. The oil filter sits in line with this system and traps debris before it can cause damage.
When you drain the old oil and replace the filter, you are essentially resetting the entire system. Fresh oil flows through clean passages, and the new filter starts trapping contaminants right away. This is why regular oil changes are so important. Dirty oil creates more friction, which leads to heat, wear, and eventually engine damage. Keeping up with your oil change interval is one of the simplest things you can do to protect your investment. Think of it as a small investment now that saves you from a big repair bill later.
Tools and Materials You Will Need
Essential Tools for the Job
Gathering your tools before you start is the most important step. If you do not have everything ready, you will end up running back and forth to the store halfway through the job. Here is what you need to have on hand before you begin:
- Socket wrench and the correct size socket — This is used to loosen the drain plug on the bottom of the oil pan.
- Oil drain pan — You need a pan large enough to catch all the old oil. Most cars hold between 4 and 6 quarts of oil.
- Jack and jack stands or ramps — You need to lift the car safely. Never rely on a jack alone. Always use jack stands or drive onto ramps.
- Oil filter wrench — This helps you remove the old oil filter, which can be tight and difficult to turn by hand.
- New oil filter — Make sure you buy the correct filter for your vehicle model and year.
- Funnel — A funnel makes it easy to pour new oil into the engine without spilling.
- Gloves and safety glasses — Protect your hands from hot oil and your eyes from splashes.
- Rags or paper towels — You will need these for cleanup and wiping parts.
- Torque wrench — This ensures you tighten the drain plug to the correct specification.
Most of these tools are inexpensive and reusable for future oil changes. A basic socket wrench set and an oil filter wrench will cost you under $30 if you do not already own them. The oil drain pan is also a one-time purchase that you can use every time. Investing in quality tools makes the job easier and safer, so it is worth spending a little extra on a good drain pan and a reliable torque wrench.
Choosing the Right Oil and Filter
Not all oil is the same. Your vehicle manual will tell you the correct oil weight and type. Common options include 5W-30, 5W-20, and 10W-30. The numbers refer to the oil viscosity, or how thick it is at different temperatures. Using the wrong oil can reduce engine performance and even cause damage over time. Always double-check your manual before purchasing oil.
When it comes to the oil filter, there are two main types: conventional and synthetic. Synthetic filters tend to last longer and filter better, but they cost a bit more. For most drivers, a quality conventional filter works perfectly fine. Just make sure it matches your vehicle specifications. If you are unsure, ask for help at your local auto parts store. They can look up the right filter and oil for your car based on the make, model, and year. It is a small step that makes a big difference in the quality of your oil change.
Step-by-Step Oil and Filter Change Process
Preparing Your Vehicle
Start by parking your car on a flat, level surface. Engage the parking brake and turn off the engine. It is best to change the oil when the engine is warm but not hot. Running the engine for about 5 minutes before you start will warm up the oil, which helps it flow out more easily and removes more contaminants.
Next, lift the vehicle using a jack and secure it with jack stands. If you have ramps, you can drive the front wheels onto them instead. Double-check that the car is stable before you get underneath. Never place any part of your body under a vehicle that is only supported by a jack. Jacks can slip, and the consequences can be severe. Taking this one extra step to secure the vehicle with jack stands could save your life.
Draining the Old Oil
Locate the drain plug on the bottom of the oil pan. Place your oil drain pan directly underneath it. Using your socket wrench, slowly loosen the drain plug by turning it counterclockwise. Be careful — the oil may be hot. Use a slow and steady motion to avoid splashing.
Once the plug is loose, remove it by hand and let the old oil drain out completely. This usually takes about 10 to 15 minutes. While the oil is draining, take a moment to inspect the drain plug for any signs of damage or wear. If the plug looks corroded or stripped, it is a good idea to replace it before you refill with new oil. Also, check the washer on the plug. If it looks worn or flattened, replace it with a new one to ensure a tight seal when you reinstall the plug.
Removing the Old Oil Filter
While the oil is draining, use your oil filter wrench to remove the old filter. Position the drain pan underneath the filter because there will still be some oil inside it. The filter may be tight, so use the wrench carefully. Turn it counterclockwise until it comes loose, then remove it by hand. Be prepared for some residual oil to spill out, so keep the drain pan close.
Before installing the new filter, use a rag to clean the surface where the old filter was seated. This removes any dirt or old gasket material that could cause a leak. Then, take your new filter and apply a thin layer of fresh oil to the rubber gasket on the top. This helps create a proper seal and makes future removal easier. It is a small step that many people skip, but it makes a real difference in preventing leaks and making your next oil change simpler.
Installing the New Filter and Adding New Oil
Screw the new oil filter onto the engine by hand. Tighten it snugly but do not overtighten. Most manufacturers recommend hand-tightening plus a quarter turn. Overtightening can damage the filter or make it nearly impossible to remove next time. If the filter feels extremely tight, you may have crossed the threads. In that case, remove it and start over carefully.
Now it is time to add the new oil. Locate the oil fill cap on top of the engine. Remove it and insert your funnel. Pour in the recommended amount of oil, which you can find in your vehicle manual. After adding the oil, wait a few minutes for it to settle, then check the level with the dipstick. Add more oil if needed, but do not overfill. Too much oil can cause pressure problems and leaks.
Once the oil level is correct, replace the fill cap, lower the vehicle, and start the engine. Let it run for about 30 seconds, then check underneath for any leaks around the drain plug and filter. If everything looks dry, you are done. Congratulations on your first DIY oil and filter change. The sense of accomplishment you feel is well worth the effort.
Safety Tips, Common Mistakes, and Proper Disposal
Safety Precautions You Should Never Skip
Safety should always come first when working on any vehicle. Hot oil can cause serious burns, so always let the engine cool slightly before you start. Wear gloves to protect your hands and safety glasses to protect your eyes. Make sure the car is securely supported on jack stands or ramps before you go underneath it. These are not optional steps. They are essential precautions that protect you from injury.
Dispose of used oil properly. Never pour it down a drain or onto the ground. Used oil is a hazardous material that can contaminate water and soil. One gallon of used oil can pollute up to one million gallons of fresh water. Most auto parts stores, including AutoZone and O’Reilly, will accept used oil for free recycling. Some even give you a small discount on your next purchase when you bring in used oil. Take advantage of these programs. They exist for a reason, and they make disposal easy and responsible.
Common Mistakes Beginners Make
One of the most common mistakes is forgetting to replace the drain plug washer. The small metal or rubber washer on the drain plug creates a seal. If you do not replace it, you may develop a slow leak. Another mistake is overtightening the drain plug or oil filter. This can strip threads or crack the oil pan, leading to much bigger problems and expensive repairs. Always follow the torque specifications in your vehicle manual.
Some people also forget to check the oil level after the change. Running the engine with too little oil can cause serious damage in a matter of minutes. Always check the dipstick after every oil change. And finally, do not skip the oil filter. Even if you change the oil, a clogged filter will still allow dirty oil to circulate through the engine. Both the oil and the filter work together to keep your engine clean and protected.
DIY vs Professional: Cost Savings and Benefits
Let us look at the numbers. A professional oil change at a dealership or quick-lube shop typically costs between $40 and $80 for conventional oil. Synthetic oil changes can cost $60 to $120. When you do it yourself, you pay for the oil and filter only.
Here is a quick comparison of what you can expect:
- Conventional oil change at a shop: $40 to $60
- Synthetic oil change at a shop: $60 to $120
- DIY conventional oil change: $15 to $30
- DIY synthetic oil change: $25 to $50
If you change your oil twice a year, doing it yourself can save you between $50 and $140 annually. Over five years, that is $250 to $700 in your pocket instead of going to a shop. The savings are even greater if you drive a vehicle that requires synthetic oil. But the savings go beyond just the oil change cost. When you do it yourself, you control the quality of the parts and fluids. You are not upsold on unnecessary services like transmission flushes or fuel system cleaning. You also learn valuable skills that can help you handle other maintenance tasks in the future.
Many car owners find that once they start doing their own oil changes, they become more confident about tackling other maintenance tasks too. It builds a foundation of mechanical knowledge and self-reliance that pays off in many ways. You start to understand your car better, notice small issues before they become big problems, and feel more connected to the machine you rely on every day.
Final Thoughts on Doing an Oil and Filter Change Yourself at Home
Doing an oil and filter change yourself at home is one of the most rewarding and practical skills any car owner can learn. It saves you money, gives you a better understanding of your vehicle, and takes only about 45 minutes once you have done it a couple of times. You do not need special training or expensive equipment. With the right tools, the correct oil and filter, and a little confidence, you can handle this task just like a professional.
Start small. Pick a weekend morning, lay out your tools, and follow the steps in this guide. The first time might feel a little intimidating, but by the second or third time, it will become second nature. And every time you do it, you will save money and feel proud that you took care of your car with your own hands. There is something genuinely empowering about knowing you can maintain your own vehicle.
Remember to always prioritize safety, recycle your used oil properly, and stick to your vehicle manufacturer recommended oil change interval. Your engine will thank you for it, and your wallet will too. Now go ahead and give it a try. You might just discover that you enjoy it, and that it opens the door to handling even more car maintenance tasks on your own in the future.
Frequently Asked Questions
How long does it take to change oil and filter yourself?
Most people complete a DIY oil and filter change in about 30 to 45 minutes. The first time might take a little longer as you get familiar with the process and locate all the components. Once you have done it a few times, you will likely get faster and more efficient, sometimes finishing in under 30 minutes.
What tools do I need for a DIY oil change?
You will need a socket wrench, oil drain pan, jack stands or ramps, an oil filter wrench, a new oil filter, the correct type of new oil, a funnel, gloves, safety glasses, and a torque wrench. Having all these tools ready before you start makes the process much smoother and safer.
Is it cheaper to change oil yourself or go to a shop?
Yes, changing oil yourself is significantly cheaper. A DIY oil change typically costs $15 to $50 depending on the oil type, while a professional oil change costs $40 to $120. Over time, the savings can really add up, especially if you change oil twice a year or more. The cost difference becomes even more noticeable with synthetic oil changes.
Can I reuse the old oil filter?
No, you should always use a new oil filter. Old filters are clogged with contaminants and debris that can damage your engine if they continue to circulate. A new filter ensures clean oil flows through your engine properly and protects all the internal components from wear.
What should I do with the used oil and filter?
Take the used oil to a local auto parts store, recycling center, or hazardous waste facility. Most of these locations accept used motor oil for free recycling. Never pour used oil down a drain, into a storm sewer, or onto the ground. Proper disposal protects the environment and keeps you in compliance with local regulations.
How do I know what type of oil my car needs?
Check your vehicle owner manual for the recommended oil weight and type. You can also look for this information on the oil fill cap or in the manual section under fluid capacities. If you are unsure, your local auto parts store can look it up using your vehicle information and help you choose the right product.