How to Get an Oil Filter Off Without a Wrench at Home
Removing an oil filter without a wrench is entirely possible with the right technique and a few common household items. Whether your oil filter wrench slipped, you lost yours, or you are dealing with a stubborn filter, this guide covers every method you need. You will learn safe, practical steps to remove and replace your oil filter at home without any special equipment.
There is nothing more frustrating than wanting to change your oil filter and realizing you do not have a wrench. Maybe you lost yours, maybe it slipped off the filter, or maybe you simply do not own one. Whatever the reason, you are not stuck. You can absolutely get an oil filter off without a wrench, and you can do it right at home with items you probably already have.
Changing your oil filter is one of the most important maintenance tasks you can do for your car. A clean filter keeps your engine running smoothly and extends the life of your engine oil. Skipping an oil change because you do not have the right tool is a mistake many car owners make. This guide will show you exactly how to handle that stuck oil filter using simple, proven methods that do not require any special equipment.
We will walk you through every step, from preparation to removal to reinstallation. You will also learn common mistakes to avoid and tips to prevent your filter from getting stuck again. By the end of this article, you will feel confident tackling this job on your own. Let us get into it.
Key Takeaways
- Multiple methods work: You can use rubber gloves, a strap, a screwdriver, or even your bare hands depending on the filter type.
- Preparation matters: Draining the oil first and applying penetrating oil makes removal much easier and safer.
- Preventive steps save headaches: Proper hand-tightening and gasket care keep your oil filter from getting stuck in the future.
- Safety comes first: Always let the engine cool and wear protective gear before attempting removal.
- Know when to call a pro: Some stuck filters need professional tools, and that is perfectly okay.
📑 Table of Contents
Why You Might Need to Remove an Oil Filter Without a Wrench
There are several reasons why you might find yourself without a wrench when it is time to change your oil filter. Understanding these situations helps you prepare better for the next time.
Common Scenarios
- Lost or broken wrench: Wrenches get misplaced, or the adjustable jaw breaks after repeated use.
- Wrong size wrench: Not all oil filters use the same size, and you might not have the correct one on hand.
- Emergency situation: You notice a leak while driving and need to address it quickly without specialized tools.
- Older vehicle: Some older cars have filters that are hard to reach or have seized over time.
- DIY preference: You prefer working with what you have rather than buying a tool you might rarely use.
No matter the reason, knowing alternative methods gives you confidence and independence. Many car owners successfully change their filters every time without ever using a dedicated oil filter wrench. The key is knowing the right technique for your specific filter type.
Tools and Alternatives You Can Use at Home
Before you start, gather a few items you likely already have around the house. You do not need a garage full of tools. Here is what works well for removing an oil filter without a traditional wrench.
Household Items That Work
- Rubber gloves: A tight pair of rubber or latex gloves gives you an excellent grip on the filter body. The rubber creates friction that helps you twist the filter loose.
- Rubber band or strap: A wide rubber band or a bungee cord wrapped around the filter provides extra grip when your hands slip.
- Flat-head screwdriver: For cap-style filters, a screwdriver can help pry off the cover gently.
- Penetrating oil: WD-40 or PB Blaster loosies a seized filter. Spray it on the base and wait 10 to 15 minutes before attempting removal.
- Pliers or channel-lock grips: These can grip the filter body and give you the leverage you need.
- A cloth or rag: Wrapping the filter with a thick cloth improves grip and protects your hands from sharp edges.
- Hot water: Warming the filter housing with hot water can expand the metal slightly, breaking the seal that holds a stuck filter in place.
Each of these alternatives works differently depending on the type of oil filter you have. Spin-on filters are the most common and usually respond well to grip methods. Cartridge-style filters require a different approach, usually involving the removal of a housing cap. Knowing your filter type before you start saves time and frustration.
Step-by-Step Guide to Removing an Oil Filter Without a Wrench
Follow these steps carefully to safely remove your oil filter without any wrench. This process works for most common filter types found in passenger vehicles.
Step 1: Prepare Your Vehicle
First, park your car on a level surface and turn off the engine. Let the car cool down for at least 15 to 20 minutes. Hot oil can cause burns, and a warm engine is safer to work around. If you have not already, drain the old oil through the drain plug. This reduces pressure and makes the filter easier to remove.
Place a drain pan or newspaper underneath the filter to catch any residual oil that drips out. Wear gloves and safety glasses to protect your hands and eyes from oil and debris.
Step 2: Locate the Oil Filter
Open the hood and refer to your owner’s manual if needed. Most cars have the oil filter located near the front or side of the engine. It usually looks like a metal cylinder attached to the engine block. Once you find it, check how it is mounted. Is it a spin-on type that you can twist by hand, or does it have a housing cap that needs to be unbolted?
Step 3: Apply Penetrating Oil
If the filter looks tight or corroded, spray penetrating oil around the base where the filter meets the engine. Let it sit for at least 10 minutes. This step is especially important for older vehicles or filters that have been in place for a long time. The penetrating oil works its way into the threads and breaks down the rust or grime holding the filter in place.
Step 4: Grip and Twist
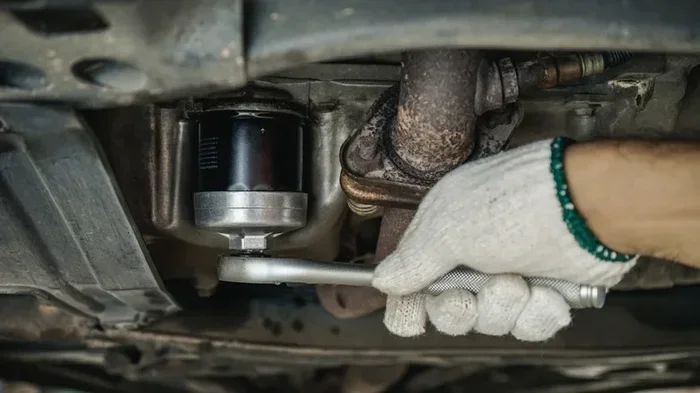
Put on your rubber gloves and wrap the filter with a thick cloth for extra grip. Place your dominant hand around the filter body and twist counterclockwise. Apply steady, even pressure. Do not yank or use sudden force, as this can damage the filter housing or break the gasket.
If the filter still will not budge, try using a rubber band looped around the filter body for additional grip. You can also use channel-lock pliers wrapped with a cloth to get a better hold. For cap-style filters, insert a flat-head screwdriver between the cap and the housing to gently pry it loose.
Step 5: Remove and Inspect
Once the filter starts to loosen, finish removing it by hand. Be prepared for a small amount of oil to drip out. Hold the filter over your drain pan. Inspect the old filter for any metal shavings, debris, or damage. Also check the gasket seal on the engine block to make sure it came off with the old filter. If it did not, carefully remove it with a flat tool to prevent leaks when you install the new filter.
For those who prefer a more structured approach to DIY maintenance, you might want to check out Can You Do An Oil And Filter Change Yourself? for additional tips on handling oil changes independently.
Step 6: Install the New Filter
Before installing the new oil filter, lightly coat the new gasket with a little fresh engine oil. This creates a better seal and makes future removal easier. Thread the new filter onto the housing by hand and tighten it snugly. Do not overtighten. Most manufacturers recommend hand-tightening the filter about three-quarters of a turn after the gasket makes contact. Over-tightening is one of the most common reasons filters become stuck in the future.
Common Challenges and How to Overcome Them
Even with the right approach, you might run into problems when trying to remove an oil filter without a wrench. Here are the most common issues and how to solve them.
Dealing With a Stuck Oil Filter
A stuck filter is the number one challenge people face. The filter may have seized due to heat, corrosion, or overtightening during the last installation. Here is what to do:
- Apply more penetrating oil: Give it another round of WD-40 or PB Blaster and wait another 15 minutes.
- Use heat carefully: A hair dryer or heat gun on a low setting can warm the housing and break the seal. Do not use an open flame near oil or fuel.
- Try a strap wrench: A rubber strap wrench costs a few dollars and provides incredible grip on smooth filter surfaces.
- Tap gently with a mallet: Light tapping around the base of the filter can help break the rust bond. Use a rubber mallet, not a metal hammer.
When the Filter Body Spins but Does Not Come Off
Sometimes the outer canister spins freely but the internal filter element remains stuck inside the housing. In this case, you need to remove the housing cap. Use a screwdriver or socket to carefully unbolt the cap. The internal cartridge will then come out freely. This is common in cartridge-style filter systems found in many modern vehicles.
Gasket Stuck to the Engine Block
If the old gasket stays on the engine block after you remove the filter, do not start the engine without removing it. A leftover gasket will cause an oil leak. Use a plastic scraper or an old credit card to gently peel it off. Avoid metal tools that could scratch the mounting surface.
Tips for Preventing a Stuck Oil Filter
Prevention is always easier than cure. Follow these simple tips to keep your oil filter removable during every future change.
- Hand-tighten only: Never use a wrench on a spin-on filter unless absolutely necessary. Hand tightness is usually sufficient for a proper seal.
- Lubricate the gasket: Always apply a thin coat of fresh oil to the new gasket before installation.
- Clean the mounting surface: Wipe the area where the filter seats before installing the new one. Remove any old gasket material or debris.
- Do not overtighten: Three-quarters of a turn past hand-tight is the golden rule for most spin-on filters.
- Replace filters on schedule: Changing your oil and filter at recommended intervals prevents buildup that can cause filters to seize.
Regular maintenance also means you should keep up with your oil change schedule. If you are wondering about how long you can go between changes, check out Can You Go Two Years Without Changing Synthetic Oil? for expert guidance on oil change intervals and what they mean for your engine health.
When to Call a Professional
There is no shame in calling a mechanic when a job feels beyond your comfort level. If you have tried all the methods above and the oil filter still will not budge, it is time to seek professional help. A stuck filter can sometimes indicate deeper issues like a warped housing or damaged threads.
Also, if you notice any of the following signs after installing a new filter, have a professional inspect your vehicle:
- Oil leaks around the filter: This could mean the gasket was not seated properly or the filter is not tight enough.
- Low oil pressure warning light: A loose or improperly installed filter can cause oil pressure drops.
- Engine overheating: If the filter is blocked or installed incorrectly, it can restrict oil flow and cause overheating. To learn more about what happens when oil levels drop dangerously low, read Can A Car Overheat With Low Oil?
- Unusual engine noises: Knocking or ticking sounds after an oil change may indicate a problem with the filter or oil flow.
A qualified mechanic has the right tools and experience to handle stubborn filters without causing damage. Regular professional inspections also help catch potential issues early before they become expensive repairs.
Key Takeaways
Removing an oil filter without a wrench is a practical skill every car owner should have. With the right grip methods, household tools, and a little patience, you can handle this job at home. Remember to always prioritize safety, prepare your workspace, and never force a filter that resists. Prevention through proper installation is your best defense against a stuck filter in the future.
Whether you are dealing with a routine oil change or an emergency situation, the methods in this guide give you the confidence to get the job done. Keep these tips in mind for your next maintenance session, and you will never be caught without the right tool again.
Frequently Asked Questions
Can I use my hands alone to remove an oil filter?
Yes, in many cases a tight pair of rubber gloves provides enough grip to remove a spin-on oil filter by hand. The rubber creates friction that helps you twist the filter counterclockwise. This works best when the filter is not severely seized or overtightened.
What should I do if the oil filter is completely stuck?
Start by applying penetrating oil and waiting 15 minutes. Then try using a rubber strap, rubber gloves, or channel-lock pliers wrapped in a cloth for extra grip. Gentle heat from a hair dryer can also help break the seal. If none of these work, it is best to consult a professional mechanic.
Is it safe to drive with a loose oil filter?
No, driving with a loose or improperly installed oil filter can cause oil leaks and lead to engine damage. Always ensure the filter is properly seated and tightened before starting the engine. Check for leaks after the first few minutes of driving.
How tight should I hand-tighten a new oil filter?
Most manufacturers recommend tightening the filter by hand until the gasket makes contact, then giving it about three-quarters of a turn. This is snug enough to create a proper seal without risking overtightening. Overtightening is the leading cause of stuck filters during future changes.
Can I reuse the old oil filter gasket?
No, always use the new gasket that comes with the replacement filter. The old gasket may be damaged, stretched, or stuck to the engine block, which can cause leaks. If the old gasket remains on the engine, carefully remove it before installing the new filter.
How often should I change my oil filter?
Most experts recommend changing the oil filter every time you change your engine oil, typically every 5,000 to 7,500 miles for conventional oil or every 7,500 to 10,000 miles for synthetic oil. Always refer to your vehicle’s owner manual for the manufacturer’s specific recommendation.
=== CONCLUSION ===
Knowing how to get an oil filter off without a wrench is a valuable skill that saves time, money, and trips to the auto parts store. With the methods outlined in this guide, you can handle virtually any oil filter removal situation using items you already have at home. From rubber gloves and straps to penetrating oil and gentle heat, these techniques work for most filter types and conditions.
Remember to always prioritize safety, take your time, and never force a filter that resists. Proper preparation and the right approach make all the difference. And when prevention is your goal, proper hand-tightening and regular maintenance keep your filters removable for years to come.
Whether you are a seasoned DIYer or a first-time car owner, these tips give you the confidence to tackle oil filter changes on your own terms. Keep this guide bookmarked for your next maintenance session, and you will be ready whenever the situation calls for it.