Can You Use Windex on Leather Seats Without Ruining Them
Using Windex on leather seats is a risky move that many car owners regret. The ammonia and chemicals in Windex can strip natural oils, cause cracking, and discolor your leather upholstery over time. This guide covers exactly why Windex harms leather, what happens when you use it, and the safe alternatives that actually protect your seats. You will learn proper cleaning steps, expert tips, and how to keep your automotive leather seats looking great for years.
Have you ever sprayed Windex on your leather seats and wondered if you just made a big mistake? You are not alone. Many car owners reach for this common glass cleaner when they see a smudge or stain on their leather upholstery. The problem is that Windex and leather do not mix well. In this article, we will explore whether you can use Windex on leather seats, what actually happens when you do, and what you should use instead. We will also share practical tips, common mistakes, and expert advice to help you keep your leather seats looking brand new.
Your car’s interior is one of the first things people notice. Clean leather seats give a vehicle a premium feel. But using the wrong cleaning product can ruin that look fast. Ammonia-based cleaners like Windex are designed for glass, not for the delicate surface of automotive leather. Understanding this difference is the first step toward protecting your investment. Let us dive deep into everything you need to know about cleaning leather seats the right way.
Key Takeaways
- Windex Damages Leather: The ammonia and harsh chemicals in Windex strip leather of its natural oils, leading to cracking and fading.
- Short-Term Use May Seem Fine: A one-time accidental wipe might not cause immediate damage, but repeated use worsens the problem.
- Better Alternatives Exist: Dedicated leather cleaners and conditioners are far safer and more effective for automotive leather seats.
- Proper Cleaning Matters: Using the right technique with gentle products extends the life and appearance of leather upholstery.
- Prevention Is Key: Regular conditioning and prompt stain treatment keep leather seats in excellent condition.
- DIY Solutions Work Too: Mild soap and water can safely clean leather without the risks of chemical cleaners.
📑 Table of Contents
- What Happens When You Use Windex on Leather Seats
- Why Leather Seats Need Special Care
- Safe Alternatives to Windex for Cleaning Leather Seats
- Step-by-Step Guide to Cleaning Leather Seats Safely
- Common Mistakes People Make When Cleaning Leather Seats
- Expert Tips for Long-Lasting Leather Seat Protection
- Frequently Asked Questions
- Conclusion
What Happens When You Use Windex on Leather Seats
Windex is a popular household cleaner. Most people trust it to make glass sparkle. But leather is a completely different material. It needs gentle, pH-balanced care. When you spray Windex on leather seats, several things start to happen that can cause long-term damage.
The Ammonia Problem
Most Windex products contain ammonia. Ammonia is a powerful degreaser. It works great on glass because it cuts through grease and grime. But on leather, ammonia strips away the natural oils that keep the material soft and supple. Over time, this leads to dryness. Dry leather cracks, fades, and becomes brittle. Once leather cracks, the damage is often irreversible without expensive professional restoration.
Chemical Reactions with Leather Dye
Leather seats in cars are dyed to achieve their color. The dyes used in automotive leather are sensitive to harsh chemicals. Windex can react with these dyes and cause discoloration. You might notice light spots, uneven coloring, or a washed-out appearance. This is especially true for darker leather seats where the contrast of damage is more visible. Even tinted Windex products can cause color bleeding or fading over repeated use.
The Drying Effect
One of the biggest issues with using Windex on leather is the drying effect. Leather needs moisture to stay healthy. The chemicals in Windex evaporate quickly, pulling moisture out of the leather as they dry. This leaves the surface dehydrated. Dehydrated leather loses its flexibility. Flexible leather is what feels smooth and looks luxurious. Stiff, dry leather feels rough and looks old, even on a relatively new vehicle.
Why Leather Seats Need Special Care
Leather is a natural material. It comes from animal hide and retains some of its organic properties even after tanning and processing. This means it reacts differently to cleaners than synthetic materials or glass. Understanding why leather needs special care helps you make better choices for your car’s interior.
The Structure of Leather Upholstery
Leather upholstery in cars has multiple layers. The top layer, called the grain, is the most visible and the most vulnerable. It has tiny pores that breathe and release moisture. When you apply a harsh chemical like Windex, you clog or damage these pores. The leather can no longer regulate its moisture levels properly. This disruption leads to a host of problems, from cracking to mold growth in extreme cases.
Automotive Leather vs. Furniture Leather
Automotive leather seats face unique challenges. They are exposed to direct sunlight through windows, extreme temperatures in summer and winter, and daily wear from sitting, shifting, and spilling. Car manufacturers use special tanning processes to make leather durable for vehicle use. But even with these treatments, automotive leather still needs gentle, purpose-made products. Furniture leather cleaners are not always safe for car seats either, because they may contain ingredients that attract dust or leave a slippery residue on seat surfaces.
How Often Should You Clean Leather Seats
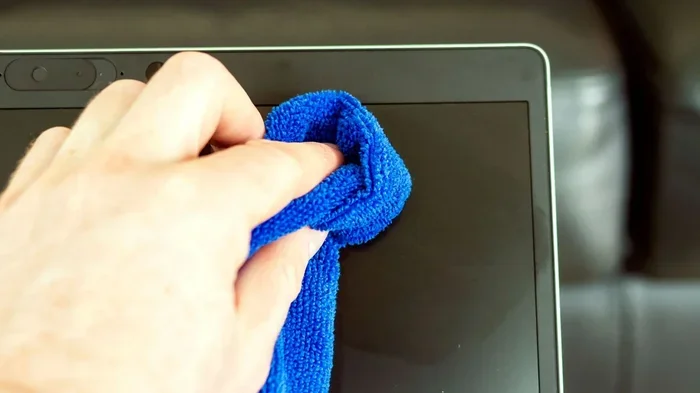
Regular cleaning is essential for maintaining leather seats. A quick wipe-down with a damp microfiber cloth once a week removes surface dust and dirt. A deeper clean with a proper leather cleaner should happen every four to six weeks. Conditioning should follow every cleaning session or at least once a month. This routine keeps the leather hydrated, prevents buildup, and preserves the color and texture of your seats.
Safe Alternatives to Windex for Cleaning Leather Seats
The good news is that you do not need Windex to get clean leather seats. There are many safe and effective alternatives that actually nourish the leather while removing dirt and stains. Let us look at the best options available.
Dedicated Leather Cleaners
Leather-specific cleaners are the gold standard for automotive leather care. Products like Leather Honey, Chemical Guys Leather Cleaner, and 303 Aerospace Protectant are formulated specifically for leather surfaces. They are pH-balanced and free from harsh chemicals like ammonia. These cleaners lift dirt and stains gently without stripping the natural oils. Most come with clear instructions and are safe for all leather types, including aniline, semi-aniline, and protected leather.
Mild Soap and Water
A simple solution of mild soap and warm water works surprisingly well for cleaning leather seats. Use a gentle, pH-neutral soap like castile soap or a dedicated car interior cleaner. Mix a small amount with warm water, dampen a microfiber cloth, and gently wipe the surface. Avoid soaking the leather. Excess water can seep through the stitching and cause mold or mildew. After cleaning, wipe the seats with a dry cloth and allow them to air dry naturally away from direct sunlight.
Vinegar and Water Solution
For tough stains, a diluted vinegar solution can be effective. Mix one part white vinegar with two parts water. Apply it sparingly with a soft cloth and gently rub the stained area. Vinegar is acidic, so it should be used sparingly and never in full strength. Always follow up with a leather conditioner after using any cleaning solution, even a mild one like vinegar. This restores moisture and protects the leather surface.
Baking Soda for Stain Removal
Baking soda is a gentle abrasive that can help lift stubborn stains from leather seats. Make a paste with a small amount of baking soda and water. Apply it to the stain, let it sit for fifteen to twenty minutes, and then wipe it away with a damp cloth. Baking soda is safe for most leather types, but always test it on a hidden area first. This method works well for food stains, ink marks, and general discoloration on automotive leather seats.
Step-by-Step Guide to Cleaning Leather Seats Safely
Now that you know what to avoid and what to use, here is a practical step-by-step guide to cleaning your leather seats safely. This method works with any dedicated leather cleaner or mild soap solution.
Step 1: Vacuum the Seats
Before applying any cleaner, vacuum your leather seats thoroughly. Use a soft brush attachment to remove dust, crumbs, and debris from the surface and crevices. This prevents dirt from turning into mud when you apply your cleaning solution. Pay special attention to seams and folds where dirt accumulates.
Step 2: Test Your Cleaner
Always test any cleaning product on a small, hidden area first. Choose a spot under the seat or behind the console where it will not be visible. Apply a small amount of the cleaner and wait twenty-four hours. Check for any discoloration, dryness, or adverse reactions. If the test spot looks fine, you are safe to proceed with the full cleaning.
Step 3: Apply the Cleaner
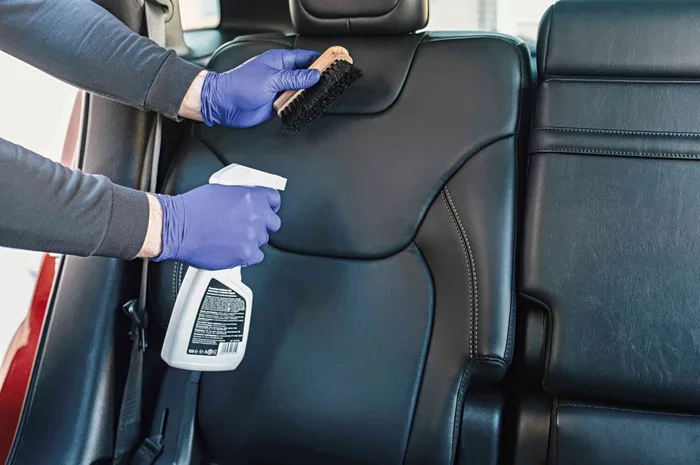
Spray your leather cleaner onto a microfiber cloth, not directly onto the seat. This gives you more control and prevents oversaturation. Gently wipe the leather in circular motions. Work on one section at a time, moving from top to bottom. Use light pressure and let the cleaner do the work. Avoid scrubbing aggressively, as this can damage the leather grain.
Step 4: Wipe Clean
After cleaning each section, use a separate damp cloth to wipe away any residue. Go over the entire seat surface to ensure no cleaner is left behind. Residue can attract dirt and create a sticky feeling on the leather. Dry any excess moisture with a clean, dry microfiber cloth.
Step 5: Condition the Leather
Conditioning is the most important step that many people skip. After cleaning, apply a quality leather conditioner evenly across all seats. Use a soft applicator pad or a clean microfiber cloth. Work the conditioner into the leather using gentle circular motions. Allow it to absorb for ten to fifteen minutes, then buff off any excess. Conditioning replenishes the oils that cleaning removes and creates a protective barrier against future damage.
Step 6: Let the Seats Dry Naturally
After cleaning and conditioning, let your leather seats air dry completely before sitting on them. Avoid using heat guns or direct sunlight to speed up drying, as this can cause the leather to crack. Open the car doors or windows to allow airflow. A proper drying process ensures the leather absorbs the conditioner fully and stays soft and supple.
Common Mistakes People Make When Cleaning Leather Seats
Even with the best intentions, car owners often make mistakes that damage their leather seats. Being aware of these common errors helps you avoid costly repairs and keeps your interior looking great.
Using Household Cleaners
The most common mistake is using household cleaners like Windex, Lysol, or all-purpose sprays on leather seats. These products are not designed for leather. They contain chemicals that strip oils, damage dyes, and dry out the material. Always reach for products specifically formulated for automotive leather care. Your leather seats will thank you for it.
Skipping the Conditioner
Many people clean their leather seats but forget to condition them afterward. Cleaning removes dirt, but it also removes some of the natural moisture in the leather. Without conditioning, the leather dries out and becomes vulnerable to cracking. Make conditioning a non-negotiable part of your leather seat maintenance routine.
Using Too Much Water
Over-saturation is a real danger when cleaning leather seats. Excess water can seep through the stitching and padding, leading to mold and mildew growth. It can also cause water spots that are difficult to remove. Always use a damp cloth, not a soaking wet one. Less is more when it comes to moisture and leather.
Ignoring Sun Damage
Sunlight is one of the biggest enemies of leather seats. UV rays fade the color and dry out the material over time. Even with proper cleaning, leather that is regularly exposed to direct sunlight will deteriorate faster. Use sunshades on your windshield and consider seat covers or tinting to protect your leather from UV damage.
Using Harsh Sponges or Brushes
Scrubbing leather with a rough sponge or stiff brush can scratch and damage the surface. Always use soft microfiber cloths or plush leather cleaning brushes with gentle bristles. The goal is to lift dirt, not to scrub it away aggressively. Treat your leather seats with the same care you would give a fine jacket or handbag.
Expert Tips for Long-Lasting Leather Seat Protection
Keeping leather seats in top condition goes beyond just cleaning. Here are some expert tips that help extend the life and beauty of your automotive leather seats.
Condition Every Month
Set a monthly reminder to condition your leather seats. Regular conditioning creates a protective layer that repels dirt and stains. It also keeps the leather soft and prevents cracking. A quality leather conditioner costs much less than leather seat replacement or professional restoration.
Address Stains Immediately
The longer a stain sits on leather, the harder it is to remove. Treat spills and stains as soon as possible. Blot the area with a clean cloth to absorb as much of the substance as you can. Then clean with a mild leather cleaner. Do not rub the stain aggressively, as this can spread it and push it deeper into the leather pores.
Keep a Cleaning Kit in Your Car
Invest in a small leather cleaning kit and keep it in your trunk. Include a microfiber cloth, a small bottle of leather cleaner, a leather conditioner, and a soft brush. Having these supplies on hand means you can address spills and messes immediately instead of letting them sit and worsen. This habit goes a long way toward preserving the look and feel of your leather seats.
Avoid Eating in the Car
It is convenient to eat while driving, but food crumbs and spills are leather enemies. Crumbs work their way into seams and crevices, attracting bacteria and causing odors. Spills can stain and discolor leather if not cleaned promptly. If you must eat in the car, use a towel or tray to protect your seats and clean up immediately afterward.
Get Professional Detailing Twice a Year
Even with regular home care, professional detailing offers deep cleaning that you cannot achieve on your own. A professional detailer has access to industrial-grade leather cleaning products and equipment. They can address deep stains, restore faded color, and apply protective coatings that last for months. Scheduling a professional detailing session twice a year keeps your leather seats in exceptional condition.
Frequently Asked Questions
Can I use Windex on leather seats in an emergency?
A single, accidental use of Windex on leather seats is unlikely to cause immediate catastrophic damage. However, you should wipe it off immediately with a damp cloth and follow up with a leather conditioner. Repeated use, even in emergencies, will cause cumulative damage over time. It is always better to use a proper leather cleaner, even if you have to buy one on the spot.
What is the best cleaner for automotive leather seats?
The best cleaner for automotive leather seats is a dedicated leather cleaner that is pH-balanced and ammonia-free. Products like Leather Honey Leather Cleaner, Chemical Guys Leather Cleaner, and Meguiar’s Gold Class Leather Cleaner are highly rated and widely recommended by automotive detailing experts. Always check the product label to confirm it is safe for leather upholstery.
Can Windex cause leather seat cracking?
Yes, Windex can contribute to leather seat cracking. The ammonia and harsh chemicals in Windex strip away the natural oils that keep leather supple. Without these oils, the leather becomes dry and stiff. Over time, dry leather loses its elasticity and develops cracks. This damage is often permanent and requires professional leather restoration to repair.
How often should I condition my leather car seats?
You should condition your leather car seats at least once a month. If you live in a dry climate or park your car in direct sunlight frequently, you may need to condition more often, every two to three weeks. Regular conditioning replenishes moisture, protects against UV damage, and keeps the leather looking and feeling its best.
Are homemade leather cleaners safe for car seats?
Some homemade solutions like mild soap and water or diluted vinegar are safe for leather car seats when used properly. However, avoid homemade solutions that contain harsh chemicals, abrasive ingredients, or high acidity. Always test any homemade cleaner on a hidden area first, and follow up with a leather conditioner to restore moisture after cleaning.
Will Windex discolor leather seats permanently?
Windex can cause discoloration on leather seats, especially with repeated use. The chemicals can react with leather dyes and cause light spots, fading, or uneven coloring. Whether the discoloration is permanent depends on the severity and how long the Windex has been in contact with the leather. Minor discoloration may be treatable with leather restoration products, but severe damage may require professional attention.
Conclusion
The answer to the question “Can you use Windex on leather seats” is clear: it is best to avoid it entirely. Windex contains ammonia and harsh chemicals that strip leather of its natural oils, cause discoloration, and lead to cracking over time. While a single accidental wipe may not destroy your seats, making it a habit will cause serious and often irreversible damage. Your leather seats deserve better care than a glass cleaner can provide. By switching to dedicated leather cleaners, following a regular cleaning and conditioning routine, and avoiding common mistakes, you can keep your automotive leather seats looking beautiful for years. Protect your investment, choose the right products, and enjoy the luxury of clean, soft, well-maintained leather seats every time you get behind the wheel.