How to Vinyl Wrap a Car and Give It a Fresh New Look
Want to give your car a completely fresh look without the high cost of a new paint job? Learning how to vinyl wrap a car is the best way to transform your vehicle’s appearance with a professional-quality finish. This guide walks you through every step, from choosing the right vinyl film to applying it like a pro. Whether you prefer a matte wrap, gloss wrap, or carbon fiber wrap, you will find practical tips and advice to make your wrap installation a success at home.
There is something incredibly satisfying about giving your car a brand-new look without spending thousands on a paint job. How to vinyl wrap a car has become one of the most popular DIY projects among car enthusiasts and everyday drivers alike. A vinyl wrap car allows you to change your vehicle’s color, add patterns, or protect the original paint, all with a material that is removable and reusable.
Whether you want a sleek matte wrap, a bold gloss wrap, or a stylish carbon fiber wrap, the process is more accessible than you might think. With the right vinyl wrap tools, a little patience, and this guide, you can achieve results that look like they came straight from a professional shop. Let us walk through everything you need to know about wrap installation from start to finish.
The beauty of a removable car wrap is that you are not making a permanent commitment. Want to switch colors next year? Simply peel it off. This flexibility makes vinyl wrap car projects ideal for anyone who likes to keep things fresh. Now let us dive into the details and get you started on your transformation.
Key Takeaways
- Vinyl wrapping is affordable: A DIY vinyl wrap car project costs a fraction of a professional paint job.
- Surface prep is critical: Proper cleaning and drying ensure the adhesive vinyl bonds perfectly.
- Heat and patience go hand in hand: A heat gun and squeegee are your best tools for smooth wrap installation.
- Avoid common mistakes: Rushing the process leads to vinyl wrap bubbles and uneven edges.
- Maintenance extends longevity: Regular car detailing keeps your removable car wrap looking fresh for years.
- Multiple finish options exist: From matte wrap to gloss wrap, you can customize any look.
- Start small if you are new: Practice on a panel before tackling the full vehicle.
📑 Table of Contents
Understanding Vinyl Wrap and Why People Choose It
A vinyl film is a thin, flexible layer of polyvinyl chloride that adheres to your car’s surface. It comes in many finishes, colors, and textures. The car wrap vinyl is designed to conform to curves, edges, and contours without cracking or peeling. This makes it perfect for wrapping everything from the hood to the door handles.
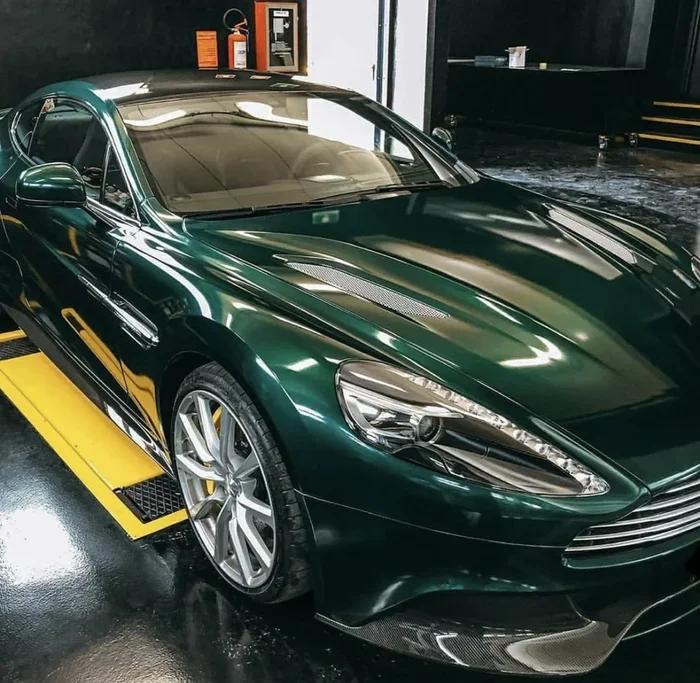
People choose to vinyl wrap a car for several reasons. Some want a color change wrap without damaging the factory paint underneath. Others use it as a form of paint protection film that shields the original finish from scratches, UV rays, and road debris. And many simply love the ability to customize their ride with unique designs and patterns.
The car wrap cost is another major factor. A professional paint job can easily run five to ten thousand dollars. A full vinyl wrap car kit, on the other hand, typically costs between one thousand and three thousand dollars depending on the material quality. Doing it yourself saves even more money. Plus, if you ever want to remove the wrap, the original paint underneath stays intact and protected.
Types of Vinyl Wrap Finishes
Not all wraps look the same. The finish you choose sets the entire tone of your vehicle. Here are the most popular options:
- Matte wrap: A flat, non-reflective finish that gives a modern, understated look. It hides minor imperfections well.
- Gloss wrap: A high-shine finish that makes colors pop. It looks sleek and polished on any car.
- Satin wrap: A middle-ground finish with a soft sheen. It is elegant without being too flashy.
- Carbon fiber wrap: A textured finish that mimics real carbon fiber. It adds a sporty, aggressive feel.
- Chrome wrap: A highly reflective, mirror-like finish that turns heads everywhere you go.
- Metallic wrap: Contains tiny metallic flakes that catch the light beautifully.
Each finish has its own charm. When you wrap car at home, you have the freedom to pick exactly the look that suits your personality. Pre-masked vinyl is also worth considering, as it comes with a protective layer already applied, making the installation process faster and cleaner.
Tools and Materials You Will Need
Before you start, gather everything you need. Having the right vinyl wrap tools on hand prevents frustration and delays. Here is a complete list of what you should have ready:
Essential Materials
- Car wrap vinyl roll (sized for your vehicle)
- Adhesive vinyl with air-release channels
- Pre-masked vinyl for easier handling
- Isopropyl alcohol (90% or higher)
- Microfiber cleaning cloths
- Plastic wrap or masking tape for masking off areas
Essential Tools
- Heat gun (or a household hair dryer on high setting)
- Squeegee with a soft edge to avoid scratching
- Utility knife or precision cutting tool
- Razor blade with a hook blade
- Application fluid spray bottle
- Rubbing alcohol spray bottle
- Soft cloths for buffing
- Measuring tape and scissors
A quality car wrap kit often includes many of these items bundled together. If you are new to DIY car wrap projects, a starter kit can save you the hassle of sourcing individual pieces. Look for kits that include a heat gun, squeegee, and application solution, as these are the tools you will use most frequently.
The wrap longevity of your project depends heavily on the quality of materials you choose. Cheap vinyl film may save money upfront but can peel, fade, or bubble within a year. Investing in a reputable brand ensures your wrap installation lasts five to seven years with proper care.
Preparing Your Car for Vinyl Wrap Installation
Surface preparation is the most important step in the entire process. If your car’s surface is dirty, greasy, or rough, the adhesive vinyl will not bond properly. This leads to peeling, lifting, and those dreaded vinyl wrap bubbles.
Step 1: Wash the Car Thoroughly
Start by giving your car a deep wash. Use a quality car shampoo and a microfiber wash mitt. Pay extra attention to areas where dirt builds up, like the wheel wells, door jambs, and lower panels. Rinse thoroughly and dry the car completely with a clean microfiber towel.
Step 2: Degrease the Surface
After washing, spray each panel with isopropyl alcohol. This removes any remaining oils, wax, or residues that could interfere with adhesion. Wipe the surface with a clean cloth and let it air dry for a few minutes. The surface should feel completely clean and slightly tacky before you apply the wrap.
Step 3: Inspect for Imperfections
Walk around the car and look for any dents, scratches, or rust spots. Small imperfections can be filled with a touch-up pen, but larger issues should be repaired before wrapping. The vinyl wrap will highlight every bump and dent, so a smooth surface is essential for a flawless finish.
Step 4: Mask Off Areas You Do Not Want to Wrap
Use masking tape and plastic wrap to cover areas like door handles, trim, emblems, and window edges. This protects these areas from adhesive residue and makes cleanup much easier after the wrap installation is complete.
Proper surface preparation cannot be overstated. Take your time with this step, and the rest of the process will go much more smoothly. A well-prepped surface is the foundation of a long-lasting, bubble-free color change wrap.
Step-by-Step Guide to Vinyl Wrap a Car
Now comes the exciting part. Follow these steps carefully, and you will have a professional-looking vinyl wrap car in no time. Work in a shaded, temperature-controlled area if possible. Direct sunlight and wind can make the process much harder.
Step 1: Measure and Cut the Vinyl
Measure each panel of the car and add about four to six inches of extra material on each side. This excess gives you room to handle the wrap without running short. Use a measuring tape and scissors or a utility knife to cut the vinyl film to size. Cutting straight lines is important, so use a ruler or straight edge for clean edges.
Step 2: Apply Application Fluid
Spray the car panel lightly with application fluid or a mixture of water and a few drops of dish soap. This creates a slippery surface that allows you to slide the vinyl into position before it sticks. It is a game-changer for beginners because it gives you time to adjust the placement.
Step 3: Apply the Vinyl
Peel back a small section of the backing paper and align the vinyl wrap with the top edge of the panel. Press it gently into place and slowly peel the backing paper away while pressing the vinyl onto the surface. Work from one side to the other in a smooth, steady motion.
Use your squeegee to push out any air bubbles as you go. Start from the center and move outward toward the edges. The heat gun comes in handy here, especially around curves and tight areas. A few seconds of heat softens the adhesive vinyl, allowing it to conform to the shape of the panel.
Step 4: Deal with Curves and Edges
Curved areas like bumpers, mirrors, and door handles require extra attention. Apply heat gently and slowly stretch the vinyl around the curve. Do not rush this step. If you see wrinkles forming, lift the vinyl slightly, reheat it, and smooth it back down. Edge sealing is crucial for a clean finish, so make sure the wrap wraps slightly over the edge and adheres smoothly.
Step 5: Trim the Excess Vinyl
Once the vinyl is in place, use a razor blade or precision knife to trim the excess material. Hold the blade at a shallow angle and cut carefully along the edges. A hook blade works especially well for trimming around curves and tight spots. Go slowly to avoid scratching the vinyl wrap or the car’s surface underneath.
Step 6: Repeat for Each Panel
Continue the same process for each panel of the car. Work methodically, one section at a time. Do not try to rush through multiple panels in one sitting, as the application fluid can dry out and make repositioning difficult. Take breaks when needed, and keep your workspace clean and organized.
Quick Tips for a Flawless Finish
- Keep the heat gun moving constantly. Holding it in one spot too long can damage the vinyl film.
- Use a second squeegee for stubborn bubbles. A second pass often eliminates them completely.
- Work in moderate temperatures between 60 and 80 degrees Fahrenheit for best adhesion.
- Have extra vinyl film on hand in case you make a mistake or tear a panel.
- Take your time. Rushing is the number one cause of vinyl wrap bubbles and uneven edges.
Common Mistakes to Avoid When Wrapping a Car
Even experienced DIYers make mistakes. Knowing what to avoid saves you time, money, and frustration. Here are the most common errors people make when they wrap car at home:
Skipping Surface Preparation
This is the number one mistake. If you do not clean and degrease the surface properly, the car wrap adhesive will not hold. The wrap may look fine for a few weeks, then start peeling at the edges. Always wash, degrease, and dry every panel before applying the vinyl wrap.
Using Too Much Heat
A heat gun is essential, but too much heat can warp the vinyl film or burn the adhesive. Keep the heat gun at least six inches from the surface and move it constantly. If the vinyl feels too hot to touch, you are applying too much heat.
Stretching the Vinyl Too Much
Over-stretching the adhesive vinyl causes it to thin out, which can lead to cracks and peeling over time. Let the heat do the work of conforming the wrap to curves. Gentle, gradual stretching is always better than forcing it into place.
Ignoring Edge Sealing
Edges are where most wraps fail first. If the wrap edges are not sealed properly, moisture can get underneath and cause the wrap to lift. Always press the edges firmly and use a little extra heat to ensure a tight seal.
Not Letting the Wrap Cure
After installation, give the wrap at least 24 hours to cure before washing the car or driving it in harsh conditions. The adhesive vinyl needs time to fully bond to the surface. During this curing period, avoid opening and closing doors near the wrapped edges as much as possible.
Choosing the Wrong Vinyl Quality
Cheap vinyl film might seem like a bargain, but it often leads to disappointing results. Low-quality material may fade, crack, or peel within months. Investing in a reputable brand with good reviews ensures better wrap longevity and a more professional finish.
Maintaining and Caring for Your Vinyl Wrap
Once your vinyl wrap car is installed, proper maintenance keeps it looking great for years. The good news is that caring for a wrapped car is not much different from caring for a painted vehicle. A little regular car detailing goes a long way.
Washing Your Wrapped Car
Wait at least 48 hours after installation before washing your car for the first time. After that, hand wash the car using a mild car shampoo and a soft microfiber mitt. Avoid high-pressure washers directly on the edges of the wrap, as the force can lift the vinyl wrap at the seams. Rinse thoroughly and dry with a clean, soft towel.
What to Avoid
- Automatic car washes with harsh brushes can damage the wrap edges and cause peeling.
- Aggressive chemical cleaners or solvents can degrade the adhesive vinyl and dull the finish.
- Waxing the wrap is generally not recommended, as it can reduce the adhesive bond.
- Parking under trees exposes the wrap to sap and bird droppings, which can stain the surface.
Dealing with Minor Damage
Small scratches or tears in the vinyl film can often be repaired with a vinyl repair patch or a small piece of matching car wrap vinyl. Heat the damaged area gently with a heat gun and press the patch firmly into place. For larger areas of damage, replacing that section of the wrap is usually straightforward and inexpensive.
How Long Does a Vinyl Wrap Last?
The vinyl wrap lifespan depends on several factors, including the quality of the material, how well it is maintained, and how much sun exposure the car gets. A high-quality removable car wrap typically lasts between five and seven years. With regular car detailing and proper care, some wraps can last even longer.
When the time comes to remove the wrap, it should peel off cleanly without damaging the original paint underneath. This is one of the biggest advantages of choosing a color change wrap over a permanent paint job. Your car’s resale value stays protected.
Conclusion
How to vinyl wrap a car is a rewarding project that gives your vehicle a completely fresh appearance without the enormous cost of a professional paint job. From choosing the right vinyl film and car wrap vinyl to preparing the surface and applying the wrap carefully, every step matters. The process requires patience, the right vinyl wrap tools, and attention to detail, but the results are well worth the effort.
Whether you opt for a bold carbon fiber wrap, a subtle matte wrap, or a classic gloss wrap, the key to success lies in proper preparation and careful execution. Avoid common mistakes like skipping surface cleaning, using too much heat, or rushing the process. And remember, maintenance is simple. A little regular car detailing keeps your wrap installation looking showroom-fresh for years.
Now that you know how to vinyl wrap a car from start to finish, it is time to gather your materials and start your project. The freedom to change your car’s look whenever you want is what makes this such an exciting option. Start small if you are new, learn as you go, and enjoy the satisfaction of transforming your ride with your own hands.
Frequently Asked Questions
How much does it cost to vinyl wrap a car?
The car wrap cost for materials typically ranges from one thousand to three thousand dollars for a full vehicle. DIY installation saves you the labor charges that professional shops charge, which can add another one thousand to five thousand dollars. Overall, a DIY vinyl wrap car project is one of the most affordable ways to completely transform your vehicle’s look.
Can you vinyl wrap a car at home as a beginner?
Absolutely. Many beginners successfully wrap car at home with patience and practice. Start with a small panel like a door or fender to get comfortable with the technique before tackling larger surfaces. Using pre-masked vinyl and plenty of application fluid makes the process much more forgiving for first-timers.
How long does a vinyl wrap last on a car?
A high-quality removable car wrap typically lasts between five and seven years with proper care. The wrap longevity depends on the vinyl quality, how often you wash the car, and how much direct sun exposure it receives. Regular car detailing and avoiding harsh chemicals will help maximize the lifespan of your color change wrap.
Will a vinyl wrap damage my car’s original paint?
No. When applied correctly and removed properly, a vinyl wrap does not damage the original paint. In fact, many people use paint protection film wraps specifically to shield the factory paint from chips, scratches, and UV damage. The key is to remove the wrap carefully and not let it sit for too long without maintenance.
What is the best type of vinyl wrap for a DIY project?
For beginners, a pre-masked vinyl with air-release channels is the easiest to work with. It reduces the risk of vinyl wrap bubbles and allows for repositioning during wrap installation. A medium-grade adhesive vinyl with good conformability is ideal for DIY car wrap projects, offering a balance of quality and affordability.
Can you wash a car after vinyl wrapping it?
Yes, but wait at least 48 hours after the wrap installation to allow the adhesive to fully cure. After that, hand wash the car with mild soap and a soft microfiber mitt. Avoid high-pressure washers near the wrap edges and skip waxing the wrapped surface, as it can reduce the adhesive bond and affect the finish of your vinyl wrap car.