How to Paint a Car With Spray Cans Your Complete Guide
Learning how to paint a car with spray cans is easier than most people think. This complete guide walks you through every step, from surface prep to the final clear coat. You will get practical tips, expert advice, and proven techniques that help you achieve a professional-grade automotive finish without spending a fortune.
Have you ever looked at a freshly painted car and thought, “I could do that”? Well, the truth is, you can. how to paint a car with spray cans is a skill that anyone can learn with the right tools, a little patience, and some solid guidance. Whether you are restoring a classic truck, fixing up a beat-up daily driver, or just giving your ride a fresh new look, spray cans offer an affordable and accessible way to get amazing results.
Many people assume that a professional-quality paint job requires an expensive paint booth and an air compressor setup. While those tools certainly help, they are not the only path to a great finish. spray paint car projects have become incredibly popular among DIY enthusiasts, and for good reason. You can achieve a smooth, even automotive finish right in your driveway with the right approach. This guide will show you exactly how to do it.
In this article, we will cover everything you need to know. From gathering your automotive paint supplies to mastering spray painting techniques that deliver professional results, you will find actionable steps you can follow right away. We will also talk about common mistakes to avoid, tips for a flawless finish, and how to maintain your new paint job for years to come. Let us get started.
Key Takeaways
- Proper preparation is the foundation: Sanding, cleaning, and masking make or break your paint job.
- Choosing the right spray paint matters: Not all automotive spray cans deliver the same quality finish.
- Multiple thin coats beat one thick coat: This simple rule prevents drips, runs, and uneven coverage.
- Wet sanding and buffing transform your finish: These steps take your paint from good to showroom quality.
- Patience between coats is essential: Rushing the process leads to peeling, bubbling, and poor adhesion.
- Safety equipment is non-negotiable: A respirator, gloves, and eye protection keep you safe during the painting process.
📑 Table of Contents
What You Need Before You Start
Before you pick up a single spray can, you need to gather your materials. Having everything ready saves time and prevents frustrating delays mid-project. Here is a complete list of what you will need for your car spray painting project.
Essential Supplies
- Automotive spray paint cans — Choose high-quality brands designed for exterior use. Rust-Oleum, Dupli-Color, and Montana are popular choices for automotive refinishing.
- Automotive primer spray cans — Primer helps paint stick to bare metal and creates a smooth base layer.
- Clear coat spray cans — This protects your color coat and adds that deep, glossy shine.
- Sandpaper (various grits) — You will need 800-grit, 1500-grit, and 2000-grit sandpaper for surface prep and finishing.
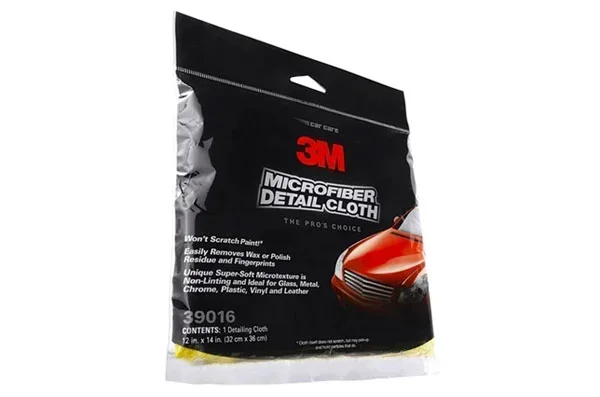
- Tack cloth or microfiber towels — These remove dust and debris before and between coats.
- Masking tape and plastic sheeting — Essential for protecting windows, trim, and areas you do not want painted.
- Automotive body filler (if needed) — For filling dents or imperfections in the surface.
- Rust converter (if needed) — Treats and neutralizes any rust spots before painting.
- Paint gun cleaning solution — Keeps your spray nozzles clear and working smoothly.
Safety Equipment
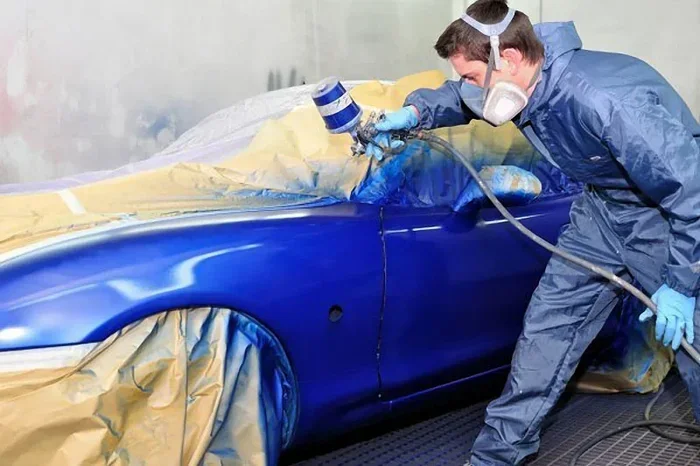
Paint fumes are no joke. Working with automotive spray paint indoors or in a garage requires proper safety gear. Here is what you should wear:
- Respirator mask with organic vapor cartridges — This is the single most important piece of safety equipment.
- Safety goggles — Protects your eyes from paint mist and fumes.
- Disposable gloves — Keeps chemicals off your skin.
- Paint suit or old clothes — You do not want overspray ruining your favorite shirt.
Also, make sure you work in a well-ventilated area. If you are working in a garage, open the doors wide and use fans to keep air circulating. A paint booth setup is ideal, but a clean, open space with good airflow works just as well for most projects.
Preparing the Car for Painting
Here is the secret that separates a good paint job from a great one: preparation. Most people rush through this step, and it shows in the final result. Surface preparation is where paint adhesion is won or lost. Take your time here, and everything else will go much smoother.
Step 1: Clean the Surface
Start by washing the entire car with soap and water. Remove all dirt, grease, and road grime. Pay special attention to areas around the door jambs, wheel wells, and lower panels where buildup tends to be worst. After washing, dry the car completely with a clean microfiber towel.
Step 2: Sand the Existing Paint
If the car has existing paint, you need to scuff it up so the new paint has something to grip. Use 800-grit sandpaper and work the entire surface lightly. You are not trying to strip the paint down to bare metal — just create a rough texture for better adhesion. Wipe down the surface with a tack cloth after sanding.
Step 3: Repair Imperfections
Fill any dents or scratches with automotive body filler. Apply it with a putty knife, let it dry completely, then sand it smooth with 1500-grit sandpaper. For rust spots, apply a rust converter first, let it cure, and then sand the area smooth.
Step 4: Mask Off Areas
Use masking tape and plastic sheeting to cover everything you do not want painted. This includes windows, mirrors, door handles, trim pieces, and any rubber seals. Take your time with this step. Clean lines make a huge difference in the final look of your car paint job.
Quick Tip: Always wipe down the masked car one more time with a tack cloth right before you start painting. Even tiny dust particles can ruin a smooth finish.
Choosing the Right Spray Paint for Your Car
Not all spray cans are created equal. When it comes to automotive spray paint, the quality of the product directly affects the quality of your finish. Here is what you need to know about selecting the right paint for your project.
Understanding Paint Types
Most automotive spray paint comes in three main categories:
- Single-stage paint: This is color plus clear coat in one can. It is the easiest to use and works great for beginners. You get good coverage and a decent finish without needing a separate clear coat.
- Base coat and clear coat systems: These require two separate cans — a colored base coat and a clear coat. The result is deeper color and better durability, but it takes more skill to apply evenly.
- Primer-only cans: These are essential for bare metal or repaired areas. They create a solid foundation for your color coat.
Color Matching Considerations
If you are painting a car that already has a color, you need to find a color match for the existing paint. Check the vehicle identification number (VIN) plate or the door jamb sticker for the factory paint code. Many auto parts stores can match this code to a specific spray paint product. Getting the right match saves you from repainting the entire panel later.
Brand Recommendations
Here are some trusted brands for automotive spray paint:
- Rust-Oleum Automotive: Affordable and widely available. Great for beginners and solid results.
- Dupli-Color: Known for excellent color matching and smooth application.
- Montana Automotive: Premium quality with vibrant color and strong coverage.
- VHT Spaymax: Popular among restoration enthusiasts for durable, high-gloss finishes.
Choose a paint that is specifically formulated for automotive use. General-purpose spray paint will not hold up against weather, UV rays, and road debris the way automotive-grade paint will.
Step-by-Step Spray Painting Process
Now comes the fun part — actually painting the car. Following the right process ensures an even, professional-looking finish. Here is exactly how to do it.
Step 1: Shake the Cans Properly
This sounds simple, but it is critical. Shake each spray can for at least two full minutes after the mixing ball starts rattling. This ensures the paint pigments are fully blended and the consistency is even. Automotive spray paint tends to settle quickly, so do not skip this step.
Step 2: Test Spray on a Scrap Piece
Before you ever touch the car, spray a test strip on a piece of cardboard or scrap metal. This lets you check the spray pattern, color accuracy, and coverage. Adjust your distance and speed until you get a consistent, even mist.
Step 3: Apply the Primer
Hold the spray can about 10 to 12 inches from the surface. Start spraying slightly off the edge of the panel and sweep across in a smooth, even motion. Overlap each pass by about 50 percent. Apply 2 to 3 thin coats of primer, waiting 10 to 15 minutes between coats. The primer should look smooth and uniform.
Expert Insight: Never apply primer too thick. Thick coats cause runs and take forever to sand smooth. Thin and steady wins the race.
Step 4: Wet Sand the Primer
Once the primer is fully dry (usually about 30 minutes), wet sand it with 1500-grit sandpaper and water. This creates an ultra-smooth surface for the color coat. Use a spray bottle to keep the sandpaper wet and work in gentle, circular motions. Wipe the surface dry with a microfiber towel when finished.
Step 5: Apply the Base Coat
Now it is time for the color. Hold the can 10 to 12 inches away and apply thin, even coats. Start at the top of the panel and work your way down. Overlap each stroke slightly. Apply 3 to 4 light coats rather than one heavy coat. Let each coat dry for about 10 minutes before applying the next.
The golden rule of spray painting techniques is this: multiple thin coats always produce a better result than one thick coat. Thick coats cause drips, runs, and uneven texture. Thin coats dry faster, adhere better, and create a smoother surface.
Step 6: Apply the Clear Coat
After the base coat has cured for at least 30 minutes, apply the clear coat using the same technique. Hold the can 10 to 12 inches away and spray in smooth, overlapping passes. Apply 3 to 4 thin coats of clear coat, allowing 10 to 15 minutes of drying time between each coat. The clear coat is what gives your automotive finish that deep, glossy shine and protects the color underneath.
Quick Tip: On your final clear coat, hold the can a little farther back — about 14 inches — and spray lightly. This creates an ultra-thin top layer that self-levels beautifully and reduces the need for heavy buffing later.
Step 7: Let the Paint Cure
Do not touch the car for at least 24 hours. Ideally, let the paint cure for 48 to 72 hours before handling or wet sanding. Paint curing is different from paint drying. Drying is when the surface feels dry to the touch. Curing is when the paint has fully hardened and reached its maximum durability and shine.
Tips for a Smooth, Professional Finish
Even with the best preparation and technique, getting a flawless finish takes practice and attention to detail. Here are some proven tips that make a real difference in your car spray painting results.
Control Your Environment
Temperature and humidity play a huge role in how your paint job turns out. The ideal conditions for spray painting a car are between 65 and 85 degrees Fahrenheit with humidity below 60 percent. Avoid painting in direct sunlight, on windy days, or in very humid conditions. These factors can cause dust to stick to wet paint, create uneven drying, and lead to a rough texture.
Keep a Consistent Distance
One of the most common mistakes beginners make is holding the spray can too close or too far from the surface. Too close causes runs and drips. Too far causes dry, patchy coverage. Practice maintaining a consistent 10 to 12-inch distance throughout the entire process. Keep your arm moving at a steady pace.
Use Even, Overlapping Strokes
Start each pass slightly before the edge of the panel and finish slightly after it. This overlap ensures full coverage and prevents visible lines where strokes meet. Keep your arm moving in a smooth, fluid motion — do not pause mid-stroke or the paint will build up in one spot.
Build Up Gradually
Patience is your best friend during this process. It is tempting to apply heavy coats to save time, but this almost always leads to problems. Build your coverage gradually with thin, even layers. Each layer bonds better to the one beneath it, creating a stronger and more attractive finish.
Buff and Polish After Painting
Once the paint has fully cured, use a dual-action polisher or hand buffing pad with polishing compound to bring out the shine. Start with a cutting compound to remove any minor imperfections, then follow up with a finishing compound for a mirror-like gloss. This step takes your automotive finish from good to absolutely stunning.
Key Takeaway: The difference between a mediocre paint job and a professional-looking one often comes down to the buffing and polishing stage. Do not skip it.
Common Mistakes to Avoid
Even experienced DIYers make mistakes when learning how to paint a car with spray cans. Here are the most common errors and how to avoid them.
Skipping Surface Preparation
This is the number one mistake people make. If you do not properly clean, sand, and prime the surface, the paint will not adhere correctly. It may look fine at first, but within weeks you will notice peeling, bubbling, and flaking. Always invest the time in proper preparation.
Applying Too Thick a Coat
Thick coats lead to runs, sags, and uneven drying. They also take much longer to cure and are more prone to cracking over time. Keep your coats light and build up gradually. It is better to apply five thin coats than two thick ones.
Not Enough Drying Time Between Coats
Rushing between coats is a recipe for disaster. If you apply the next layer before the previous one has dried, the solvents in the fresh paint will dissolve the layer underneath. This causes wrinkling, lifting, and poor adhesion. Always follow the recommended drying times on the paint can.
Painting in Poor Conditions
Cold temperatures, high humidity, and dusty environments all work against you. Paint applied in these conditions dries slowly, attracts dust, and produces a rough, uneven finish. Always check the weather before you start and choose the best possible conditions for your project.
Forgetting the Clear Coat
Some beginners apply a beautiful color coat and call it done. Without a clear coat, the paint is vulnerable to UV damage, scratches, and oxidation. The clear coat is what gives your paint job its durability and deep shine. Always finish with at least three coats of quality automotive clear coat.
Maintaining Your New Paint Job
Once you have put in the hard work, you want your finish to last. Proper maintenance keeps your car paint job looking great for years. Here are a few simple tips.
- Wash your car regularly with a pH-balanced automotive soap and a soft microfiber mitt.
- Apply a quality wax every 2 to 3 months. Wax adds a protective layer that shields against UV rays and environmental contaminants.
- Avoid automatic car washes with harsh brushes, especially in the first 6 months after painting. The paint needs time to fully harden.
- Park in the shade whenever possible. Prolonged UV exposure fades and dulls automotive paint over time.
- Address chips and scratches quickly. Touch up any damage promptly to prevent rust from forming under the paint.
With proper care, a spray-painted automotive finish can look fantastic for many years. The key is to protect your investment and keep the surface clean and polished.
Final Thoughts
How to paint a car with spray cans is a rewarding DIY project that saves money and builds real skills. By following the steps in this guide — from thorough surface preparation to careful paint application and final buffing — you can achieve a professional-quality finish that turns heads. Remember that practice makes perfect, and your first project might not be flawless. That is completely normal. Every painter gets better with each attempt.
The most important takeaway is this: preparation and patience are everything. Take your time, follow the process carefully, and do not rush any step. The result will be worth the effort. Now grab your spray cans, put on your safety gear, and get ready to transform your car with a stunning new finish. Happy painting!
Frequently Asked Questions
Can you really get a professional finish using spray cans?
Absolutely. Many professional detailers and restoration shops use spray cans for touch-ups and even full panel work. The key is proper preparation, thin even coats, and taking your time with the process. When done correctly, automotive spray paint can deliver results that rival spray gun applications.
How long does it take to paint a car with spray cans?
A full car spray painting project typically takes two to three days. This includes one day for surface preparation and priming, one day for applying the base coat and clear coat, and at least one full day for curing. Smaller projects like a single panel can be completed in a few hours if you work efficiently.
What is the best spray paint brand for cars?
Rust-Oleum, Dupli-Color, and VHT Spaymax are widely regarded as the top brands for automotive spray paint. Each offers excellent coverage, durable finishes, and good color matching. Montana is also a premium option known for vibrant colors and smooth application.
Do I need a primer before spray painting my car?
Yes, primer is essential for paint adhesion and a smooth finish. It creates a uniform surface that helps the color coat look even and last longer. Always use a primer specifically formulated for automotive use, especially on bare metal or repaired areas.
How many coats of spray paint does a car need?
For the base coat, you should apply 3 to 4 thin, even coats. Follow that with 3 to 4 thin coats of clear coat for protection and shine. The primer typically requires 2 to 3 coats. Applying multiple thin coats rather than one thick coat is the secret to a professional-looking automotive finish.
Can I spray paint my car outdoors?
Yes, but only under the right conditions. Choose a day with mild temperatures, low humidity, and no wind. Wind blows dust and debris onto wet paint, creating a rough texture. If outdoor conditions are not ideal, a well-ventilated garage with the doors open is a great alternative for car spray painting projects.