How Do You Turn Off the Check Engine Light After Oil Change
The check engine light often comes on after an oil change due to a loose gas cap, residual codes, or sensor resets. You can turn it off using an OBD-II scanner, disconnecting the battery, or visiting an auto parts store. Most causes are simple and fixable at home in minutes.
You just got your oil changed, and now the dreaded check engine light is glowing on your dashboard. It is frustrating, right? You might wonder if something went wrong during the service. The good news is that this happens more often than you think, and it is usually easy to fix.
In this guide, you will learn exactly how to turn off the check engine light after an oil change. We will cover the most common reasons this happens, the best tools to use, and simple steps you can do at home. Whether you are a DIY car owner or just want to understand what is going on, this article has you covered.
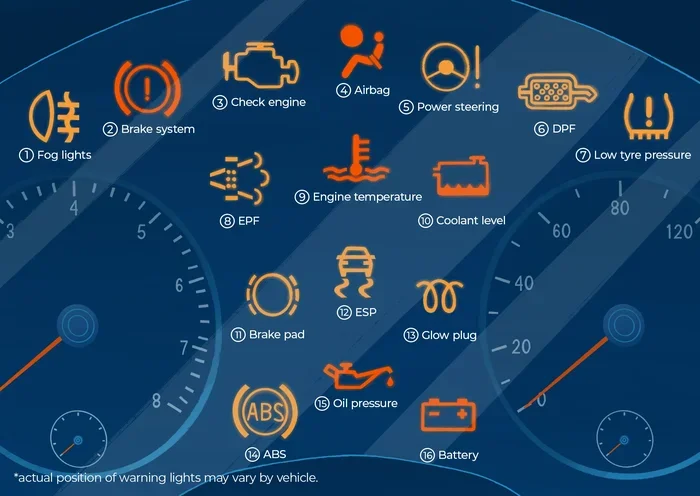
The check engine light is part of your car’s onboard diagnostics system. It alerts you when something in the engine or emissions system needs attention. After an oil change, several things can trigger this light, and most of them are not serious. Let us break it all down so you feel confident handling this situation.
Key Takeaways
- A loose gas cap is the most common reason the check engine light appears after an oil change.
- An OBD-II scanner lets you read and clear diagnostic trouble codes quickly.
- Auto parts stores like Autozone often check engine lights for free using their scanners.
- Disconnecting the battery is a simple reset method but may erase other car settings.
- Driving for a few days after fixing the issue can cause the light to turn off automatically.
- Low engine oil can trigger the dashboard warning even after an oil change if levels are not right.
- Knowing the root cause prevents the light from coming back repeatedly.
📑 Table of Contents
- Why Does the Check Engine Light Come On After an Oil Change?
- How to Turn Off the Check Engine Light After an Oil Change
- Common Mistakes People Make After an Oil Change
- When Should You See a Mechanic?
- Preventing the Check Engine Light After Future Oil Changes
- Quick Tips Summary
- Expert Insights on Check Engine Light Behavior
- Key Takeaways
- Frequently Asked Questions
Why Does the Check Engine Light Come On After an Oil Change?
Understanding the cause is the first step to fixing the problem. Several factors can make the engine warning light appear right after an oil change. Here are the most common reasons.
Loose or Improperly Seated Gas Cap
This is the number one culprit. When you get an oil change, the technician often removes the gas cap to check fuel levels or add fuel. If the cap is not screwed on tightly, it triggers a vacuum leak code. Your car’s system thinks fuel vapor is escaping, and the check engine light turns on.
A loose gas cap is a simple fix. Just twist it until you hear a click. Drive your car for a few minutes, and the light may go away on its own. If it does not, you may need to clear the code with a scanner.
Oil Cap or Oil Dipstick Not Seated Properly
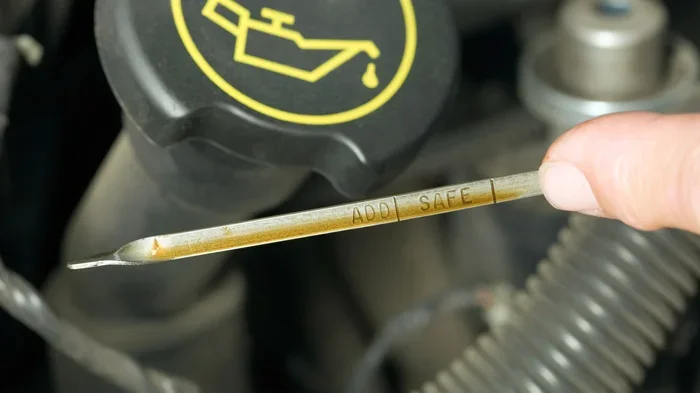
During an oil change, the mechanic removes the oil cap and the dipstick. If either one is not pushed back in all the way, it can cause a minor vacuum leak. Your car sensors detect this and flag it as a problem.
Open the hood and check both the oil cap and the dipstick. Make sure they are firmly seated. This small step solves the issue more often than people realize.
Residual Diagnostic Trouble Codes
Sometimes the light stays on because the old code was never cleared. Even after fixing the problem, the diagnostic trouble code remains stored in the car’s computer. The engine warning light will not go away until the code is erased.
This is where a scanner or reset tool comes in handy. More on that below.
Low Oil Level After the Change
If the oil level is slightly low after the new oil is added, the oil pressure sensor may trigger the dashboard light. This is why it is important to check the oil level with the dipstick after any oil change. Top it off if needed, and the light should respond.
You can also check whether low engine oil shows on the dashboard separately from the check engine light. Some vehicles have a dedicated oil warning symbol that looks different from the engine check light.
Reset Oil Life Indicator Without Clearing the Code
Many modern cars have an oil life indicator that needs to be reset after every oil change. If the technician forgets to reset it, or if the reset process triggers a minor system error, the check engine light may come on. This is common in vehicles like Toyota, Honda, and Ford models.
How to Turn Off the Check Engine Light After an Oil Change
Now that you know the common causes, let us look at the actual methods to turn off the light. You have several options, ranging from DIY fixes at home to professional tools.
Method 1: Use an OBD-II Scanner
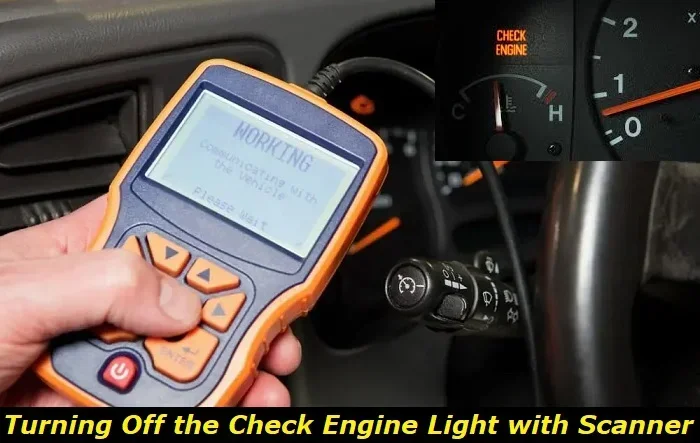
An OBD-II scanner is the best tool for this job. It plugs directly into your car’s diagnostic port, reads the stored codes, and lets you clear them. You can buy a basic scanner for under $30 at any auto parts store or online.
Here is how to do it:
- Locate your car’s OBD-II port. It is usually under the dashboard on the driver’s side.
- Plug the scanner into the port.
- Turn the ignition to the “on” position (do not start the engine).
- Wait for the scanner to connect and display any codes.
- Note the codes if you want to look them up later.
- Select the option to clear or erase the codes.
- Turn off the ignition and start the engine to see if the light is off.
If the underlying issue is truly fixed, the light will stay off. If it comes back, there may be a deeper problem you need to address.
Method 2: Visit an Auto Parts Store
Many auto parts stores offer free diagnostic scanning. You can drive to your local store, and they will plug in their scanner for you. They can read the codes and clear them right on the spot.
Can Autozone check engine light codes for free? Yes, they can. Most major chains like Autozone, O’Reilly, and Advance Auto Parts offer this service at no cost. It is a quick and easy option if you do not own a scanner.
Just keep in mind that some stores may not clear codes for certain vehicle models due to manufacturer restrictions. But for most cars, it works perfectly.
Method 3: Disconnect the Car Battery
Disconnecting the battery resets the car’s computer and clears stored codes. This method works, but it comes with a few downsides. You may lose your radio presets, clock settings, and other personalized features.
Here is how to do it safely:
- Turn off the engine and all electrical accessories.
- Open the hood and locate the negative battery terminal (marked with a minus sign).
- Use a wrench to loosen the cable clamp on the negative terminal.
- Remove the cable and let it sit disconnected for 10 to 15 minutes.
- Reconnect the cable and tighten it securely.
- Start the engine and check if the light is off.
This method is effective but should be your last resort. It does not fix the root cause, and the light may return if there is still an issue.
Method 4: Drive and Let the System Self-Correct
In some cases, the car’s computer will turn off the light on its own after a few driving cycles. A driving cycle means starting the car, driving it for a while, and letting it sit. If the problem that triggered the light is resolved, the system may clear the code automatically.
This works best when the cause was something minor like a loose gas cap. Just drive normally for a few days and watch the dashboard. The light may go away without any effort.
Method 5: Use a Reset Tool or Key Fob Combination
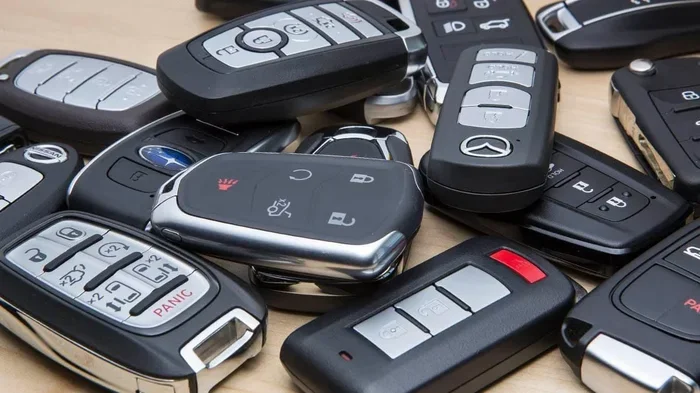
Some vehicles allow you to reset the check engine light using a specific key fob sequence or dashboard button combination. Check your owner’s manual for instructions. This method varies widely by make and model.
For example, some Toyota models let you cycle the ignition and press the odometer button to access a hidden reset menu. However, this method does not always clear engine codes, so it is best used alongside other methods.
Common Mistakes People Make After an Oil Change
Avoiding mistakes can save you time and money. Here are the most common errors people make after getting an oil change.
Ignoring the Light and Hoping It Goes Away
Some people see the light and simply ignore it. While it is true that some minor codes resolve on their own, ignoring the light can lead to bigger problems. If the issue is low oil pressure or a sensor malfunction, driving with it on can damage your engine over time.
Over-Tightening the Oil Cap or Drain Plug
It is tempting to crank down the oil cap or drain plug as tight as possible. But over-tightening can damage the threads or the sealing surface. This can cause oil leaks, which then trigger the check engine light for a different reason.
Hand-tighten the oil cap until you feel resistance, then give it about a quarter turn with a wrench. That is all you need.
Using the Wrong Oil or Filter
Using the wrong grade of oil or an incompatible filter can affect engine performance and trigger warning lights. Always check your owner’s manual for the correct oil specification and filter model for your vehicle.
Not Resetting the Oil Life System
Forgetting to reset the oil life indicator after an oil change can cause confusion. Some cars display a maintenance reminder that looks similar to the check engine light. Make sure you reset the oil life system according to your vehicle’s specific procedure.
Skipping the Gas Cap Check
It sounds too simple, but many people forget to check the gas cap after an oil change. A loose or missing gas cap is the leading cause of the check engine light after routine maintenance. Always give it a firm twist before you leave the shop.
When Should You See a Mechanic?
Most of the time, the check engine light after an oil change is nothing to worry about. But there are situations where you should seek professional help.
If the light comes back immediately after you clear it, there may be a deeper issue. If you notice any of the following symptoms, get your car inspected:
- Flashing check engine light instead of steady glow
- Strange engine noises like knocking or ticking
- Decreased fuel economy
- Rough idling or stalling
- Oil leaks under the car
- Smoke coming from the exhaust
These signs could indicate a serious problem that needs immediate attention. Do not try to clear the light and ignore it if you notice any of these symptoms.
Also, if you do not have access to a scanner or feel uncomfortable doing it yourself, a trusted mechanic can run a full diagnostic. They have professional-grade tools that read all systems in your car. Some people wonder whether the dealership can change my key fob battery or handle other small services too. While that is a different topic, dealerships and independent shops both have the equipment to handle check engine light diagnostics.
Preventing the Check Engine Light After Future Oil Changes
Prevention is always better than cure. Here are simple steps you can take to avoid the check engine light after your next oil change.
- Double-check the gas cap after the service is complete.
- Inspect the oil cap and dipstick to make sure they are seated properly.
- Verify the oil level with the dipstick before leaving the shop.
- Ask the technician to reset the oil life system.
- Request a code check if the light is already on before the oil change starts.
- Keep an OBD-II scanner in your glove box for quick checks at home.
Taking these small precautions can save you a trip to the auto parts store or mechanic. It also gives you peace of mind knowing your car is running properly after every oil change.
Quick Tips Summary
- Check the gas cap first — it is the most common cause.
- Use an OBD-II scanner for a fast and accurate reset.
- Visit a free diagnostic station at your local auto parts store.
- Drive for a few days after fixing the issue to see if the light turns off naturally.
- Do not ignore a flashing light — it signals a serious problem.
- Keep your owner’s manual handy for model-specific reset procedures.
Expert Insights on Check Engine Light Behavior
Automotive experts agree that the check engine light after an oil change is usually a minor issue. According to certified mechanics, the most common scenario involves a loose gas cap or an uncleared code from a previous sensor event. The onboard diagnostics system in modern vehicles is designed to be sensitive, which means even a tiny vacuum leak can set off the light.
Experts also recommend keeping a basic OBD-II scanner in your car. These tools are affordable and easy to use. They give you the power to understand what your car is telling you without visiting a shop. If the light does come on, you can quickly determine whether it is something you can handle yourself or if it needs professional attention.
Another expert tip is to pay attention to the oil life indicator and the check engine light separately. They serve different purposes and may require different reset procedures. Understanding this distinction helps you respond appropriately to each warning.
Key Takeaways
- A loose gas cap is the most common reason the check engine light appears after an oil change.
- An OBD-II scanner lets you read and clear diagnostic trouble codes quickly.
- Auto parts stores often check engine lights for free using their scanners.
- Disconnecting the battery is a simple reset method but may erase other car settings.
- Driving for a few days after fixing the issue can cause the light to turn off automatically.
- Low engine oil can trigger the dashboard warning even after an oil change if levels are not right.
- Knowing the root cause prevents the light from coming back repeatedly.
Frequently Asked Questions
How long does it take for the check engine light to go off after an oil change?
If the cause was a loose gas cap, the light may go off within a few minutes of driving. For other issues, it may take two to three driving cycles, which usually takes a few days. Using a scanner to clear the code will turn it off immediately.
Can I drive with the check engine light on after an oil change?
In most cases, yes. If the light is steady and not flashing, and your car is running normally, it is generally safe to drive a short distance. However, you should get it checked as soon as possible to avoid potential engine damage.
Will disconnecting the battery damage my car after an oil change?
No, disconnecting the battery will not damage your car. It simply resets the computer system. You may lose some settings like your radio presets and clock, but those are easy to restore.
How much does it cost to reset the check engine light?
If you use a scanner at home, there is no cost. Many auto parts stores reset the light for free. If you visit a mechanic, you might pay between $50 and $150 for a diagnostic scan and reset, depending on your location and vehicle.
Why does my check engine light keep coming back after I reset it?
If the light returns after resetting, the underlying problem is not fully fixed. There may be a persistent vacuum leak, a sensor issue, or an oil level problem. You will need to address the root cause for the light to stay off.
Can low oil cause the check engine light to come on?
Yes, low oil can trigger the check engine light. Insufficient oil pressure activates the oil pressure sensor, which sends a signal to the car’s computer and illuminates the warning light. Always check your oil level after an oil change to prevent this.
Now you know exactly how to handle the check engine light after an oil change. Whether you use a scanner, visit an auto parts store, or simply check your gas cap, the solution is almost always straightforward. The key is to act quickly and identify the root cause. A little attention goes a long way in keeping your car running smoothly and your dashboard warning lights off.
Remember, the check engine light is your car’s way of communicating with you. It is not something to fear, but something to understand. With the right knowledge and a few simple tools, you can handle this situation like a pro every single time.