Remote Control Car Project Complete Guide for Beginners
This complete guide walks you through every step of a remote control car project, from choosing the right kit to hitting the road. You will learn about essential RC car parts, assembly techniques, and common mistakes to avoid. Whether you are a total beginner or a hobby enthusiast, this guide has practical tips to help you succeed.
Have you ever dreamed of building your own remote control car project from scratch? It is one of the most rewarding hobbies you can pick up. Whether you want a fast racing machine or a sturdy off-road crawler, a DIY RC car lets you customize every single detail.
A remote control car project is not just about fun and games. It teaches you real skills like electronics, mechanical assembly, and problem solving. You will understand how motors, batteries, and circuits work together to bring a machine to life.
Many beginners feel overwhelmed when they start. There are so many parts, tools, and choices to make. But here is the good news. With the right guidance, anyone can complete a remote control car project successfully. This guide breaks everything down into simple, easy-to-follow steps.
By the end of this article, you will know exactly how to choose a kit, assemble your car, and get it running smoothly. You will also learn common mistakes to avoid and expert tips that save time and frustration. Let us dive in and start building.
Key Takeaways
- Choose the Right Kit: A quality RC car kit saves time and ensures all parts fit together properly for your remote control car project.
- Gather Essential Tools: Having the right tools on hand makes assembly smoother and prevents frustrating delays.
- Understand Key Components: Knowing how the motor, battery, transmitter, and chassis work helps you troubleshoot issues quickly.
- Follow Step-by-Step Assembly: Taking your time during assembly reduces errors and improves the final performance of your RC car.
- Test and Tune Carefully: Proper testing and adjustments after assembly make your remote control car project run better and last longer.
- Avoid Common Mistakes: Skipping steps or rushing assembly are the top reasons beginners run into problems with their RC car build.
📑 Table of Contents
Why Start a Remote Control Car Project?
A remote control car project offers benefits that go far beyond the driveway. It is a hands-on learning experience that builds confidence and practical knowledge. Here are some of the top reasons to start your own RC car build today.
It Builds Real Technical Skills
When you work on a DIY remote control car, you learn about electronics, soldering, and mechanical design. These skills transfer to other areas of life and even future careers. Many engineers and technicians credit their hobby with sparking their interest in technology.
It Saves Money in the Long Run
Buying a ready-to-run RC car can cost a lot. But building your own radio controlled car from a kit often costs less. Plus, you learn how to fix and upgrade parts yourself. Over time, this saves a significant amount of money on repairs and replacements.
It Is Incredibly Fun and Rewarding
There is nothing quite like watching your own creation zoom across the floor. The sense of accomplishment from completing a remote control car project is hard to beat. You will feel proud every time you drive the car you built with your own hands.
Choosing the Right RC Car Kit
The first and most important step in any remote control car project is picking the right kit. A good kit includes all the essential parts you need. It also saves you the hassle of shopping for individual components one by one.
Types of RC Car Kits
Not all RC car kits are the same. Different types serve different purposes and skill levels. Here are the most common options you will encounter.
- Toy-Grade Kits: These are affordable and great for absolute beginners. They come mostly assembled and require minimal setup. However, they offer limited customization and lower performance.
- Hobby-Grade Kits: These kits provide a much better experience for serious builders. They include higher-quality RC car parts and allow for upgrades. A hobby-grade RC car kit is the best choice for a true remote control car project.
- Scratch-Build Kits: These are for advanced builders who want to design everything from the ground up. They require more knowledge and tools but offer total creative freedom.
What to Look for in a Kit
When choosing a kit for your remote control car project, pay attention to a few key factors. First, check the quality of the RC car chassis. A sturdy frame makes the car more durable and easier to work with. Second, look for a kit that includes a remote control car battery and charger. Third, make sure the RC car motor matches your goals. If you want speed, choose a high-performance motor. If you want off-road capability, look for a kit with strong suspension.
| Kit Type | Price Range | Best For | Customization |
|---|---|---|---|
| Toy-Grade | $20 – $60 | Young beginners, casual fun | Low |
| Hobby-Grade | $100 – $350 | Serious hobbyists, builders | High |
| Scratch-Build | Varies widely | Advanced builders, engineers | Maximum |
Essential Parts and Components
A successful remote control car project depends on understanding each part. When you know what every component does, assembly becomes much easier. Here is a breakdown of the essential parts you will need.
The Chassis and Frame
The RC car chassis is the skeleton of your vehicle. It holds everything together and determines the car’s shape and strength. Most beginner kits come with a pre-cut chassis. Look for one made from durable plastic or aluminum. A lightweight but strong frame improves speed and handling.
The Motor and Speed Controller
The RC car motor provides the power that makes your car move. There are two main types: brushed motors and brushless motors. Brushed motors are simpler and more affordable. Brushless motors offer better speed and efficiency but cost more. The RC car speed controller regulates how much power goes to the motor. Together, these two components are the heart of any remote control car project.
The Transmitter and Receiver
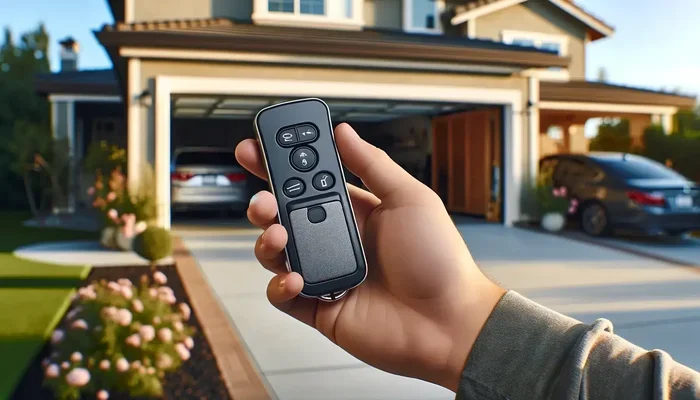
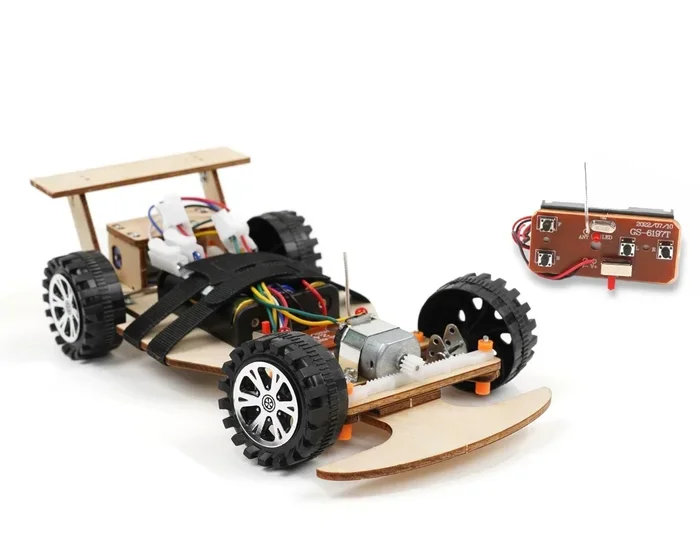
The RC car transmitter is the handheld controller you hold in your hand. The RC car receiver is a small device inside the car that receives signals from the transmitter. They work as a pair to control steering and speed. Always choose a transmitter with a good range and responsive controls for the best experience.
The Battery and Power System
The remote control car battery is what powers everything. Most modern RC cars use lithium polymer (LiPo) batteries because they are lightweight and hold a strong charge. Always follow safety guidelines when charging and storing LiPo batteries. A bad battery can ruin your RC car project ideas and even pose a safety risk.
Wheels, Tires, and Suspension
Do not underestimate the importance of RC car wheels and tires. The right tires make a huge difference in traction and handling. For off-road builds, choose knobby tires with deep treads. For on-road speed, smooth tires work best. The RC car suspension absorbs bumps and keeps the car stable. Good suspension is essential for any hobby-grade RC car that will face rough terrain.
Tools You Will Need for Assembly
Before you start your remote control car project, gather all the tools you need. Having everything ready prevents frustrating delays. Here is a practical list of must-have tools.
- Screwdriver Set: Both flathead and Phillips head sizes are essential for assembling most RC car kits.
- Hex Driver Set: Many RC cars use hex bolts. A quality hex driver set makes tightening and loosening parts quick and easy.
- Needle-Nose Pliers: These help with small parts, wire management, and holding components in place during assembly.
- Soldering Iron: You may need to solder wires to the motor or speed controller. A basic soldering iron is a worthwhile investment.
- Wire Strippers and Cutters: Clean wire cuts and proper stripping ensure solid electrical connections in your RC car electronics.
- Super Glue and Epoxy: These adhesives help secure parts that screws cannot reach. Use them carefully and sparingly.
- Multimeter: This tool helps you test electrical connections and troubleshoot issues during your RC car assembly.
Quick Tip
Organize your screws and small parts in a muffin tin or a small compartment box. It sounds simple, but it saves a ton of time and prevents lost parts during your remote control car project.
Step-by-Step Assembly Guide
Now comes the exciting part. Putting your remote control car project together. Follow these steps carefully and do not rush. Taking your time during assembly is the best way to avoid problems later.
Step 1: Unbox and Inventory All Parts
Open your kit and lay out all the parts on a clean, flat surface. Check each item against the parts list included in the box. If anything is missing or damaged, contact the seller right away. It is much easier to solve problems before you start building.
Step 2: Build the Chassis and Drivetrain
Start by assembling the RC car frame. Attach the axles and gears according to the instruction manual. Make sure all screws are tightened firmly but do not overtighten them. Overtightening can crack plastic parts and cause alignment issues with your RC car wheels.
Step 3: Install the Motor and Speed Controller
Mount the RC car motor in its designated spot. Connect the wires to the RC car speed controller following the wiring diagram in your kit. Use your soldering iron if needed for secure connections. Double-check every wire before moving on. A loose connection here will cause problems later.
Step 4: Set Up the Receiver and Transmitter
Install the RC car receiver inside the chassis. Bind it to your RC car transmitter according to the manufacturer’s instructions. Test the controls before fully closing the chassis. Make sure steering and throttle respond correctly. This step is critical for any successful remote control car project.
Step 5: Install the Battery and Finalize Wiring
Secure the remote control car battery in its compartment. Connect all remaining wires and double-check for any loose connections. Use zip ties to organize cables neatly. Clean wiring not only looks better but also prevents parts from getting caught or pulling loose during driving.
Step 6: Attach the Body and Wheels
Mount the wheels and tires onto the axles. Attach the body shell if your kit includes one. Make sure everything is aligned properly. The car should sit flat on the ground with no wobbling or uneven gaps.
Expert Insight
Experienced builders recommend doing a “dry fit” before applying any glue or final tightening. This means placing all parts together without securing them permanently. It lets you check alignment and fit before making anything permanent. This simple habit saves many beginners from costly mistakes.
Testing, Tuning, and Improving Your RC Car
Once your remote control car project is assembled, it is time to test it. But do not just hit the throttle right away. A little preparation goes a long way toward a great first drive.
Initial Power-On Check
Before placing the car on the ground, turn on the transmitter and then the receiver. Check that all controls respond correctly. Test the throttle forward and reverse. Test steering left and right. Listen for any unusual sounds from the motor. This quick check can catch problems before they cause damage.
Tuning for Better Performance
After the initial test, you may notice areas that need improvement. Here are some common adjustments to make.
- Steering Trim: If the car pulls to one side, adjust the steering trim on your transmitter. This is a simple fix that makes a big difference.
- Throttle Calibration: Make sure the car responds smoothly to throttle input. If it jerks or hesitates, recalibrate the speed controller.
- Suspension Adjustment: If the car bounces too much or feels unstable, adjust the shock absorbers. Softer suspension works better for rough terrain, while stiffer suspension suits smooth surfaces.
- Tire Pressure and Grip: Check that all tires are properly seated on the wheels. For better traction, consider swapping to different tire types based on your driving surface.
Upgrades to Consider
Once your basic remote control car project is running, you can start thinking about upgrades. Here are popular improvements that enhance performance and fun.
- Upgraded Motor: Swapping to a brushless motor significantly increases speed and efficiency.
- Better Battery: A higher-capacity remote control car battery gives you longer run times between charges.
- Improved Suspension: Upgraded shock absorbers and springs provide better handling on rough terrain.
- Light Kits: LED light kits add a cool visual element and make nighttime driving more fun.
- Body Upgrades: A new body shell can completely change the look of your DIY remote control car without affecting performance.
Common Mistakes to Avoid
Even with the best guide, beginners can stumble during a remote control car project. Knowing what mistakes to avoid saves time, money, and frustration. Here are the most common errors and how to prevent them.
Skipping the Manual
It is tempting to dive right in and figure things out as you go. But the instruction manual contains valuable information specific to your kit. Skipping it often leads to parts being installed backwards or in the wrong order. Always read through the manual before starting assembly.
Using the Wrong Battery
Not all remote control car battery options are compatible with every kit. Using the wrong voltage or battery type can damage the motor, speed controller, or receiver. Always check the specifications recommended by the manufacturer before purchasing a battery.
Rushing the Assembly
One of the biggest mistakes beginners make is rushing. They want to see their car running as fast as possible. But rushing leads to missed steps, loose screws, and misaligned parts. Take your time. A careful build today means fewer problems tomorrow.
Ignoring Electrical Safety
LiPo batteries store a lot of energy and need proper care. Never overcharge them. Never let them discharge completely. Store them in a fire-safe bag when not in use. Following basic electrical safety rules protects both you and your RC car electronics.
Not Testing Incrementally
Do not wait until the car is fully assembled to test it. Test each subsystem as you go. Check the motor and wheels before installing the body. Test the steering before finalizing the wiring. Incremental testing catches problems early when they are easy to fix.
Inspiring Remote Control Car Project Ideas
Once you complete your first build, the possibilities are endless. Here are some exciting RC car project ideas to try next.
- Off-Road Crawler: Build a tough, high-ground-clearance machine designed to climb rocks and navigate rough trails.
- Speed Racer: Focus on aerodynamics and a powerful motor for maximum straight-line speed on smooth surfaces.
- Drift Car: Modify the drivetrain and tires to create a car that slides beautifully around corners.
- Rock Crawler: Build a slow but incredibly powerful machine with extreme articulation for conquering obstacles.
- Custom Display Model: Focus on aesthetics and detail. Paint a stunning body and add realistic features for a show-worthy piece.
Each of these builds teaches new skills and deepens your understanding of how radio controlled car systems work. Start with one that matches your interests and skill level, and grow from there.
Conclusion
A remote control car project is one of the most enjoyable and educational hobbies you can pursue. From choosing the right RC car kit to testing your finished build, every step teaches something valuable. You gain hands-on experience with electronics, mechanics, and design. You also get the thrill of driving something you created with your own hands.
Remember to take your time, follow the steps carefully, and enjoy the process. Do not be afraid to make mistakes. Every error is a learning opportunity that makes you a better builder. Start with a beginner-friendly kit, follow this guide, and you will be amazed at what you can accomplish.
Now is the perfect time to start your remote control car project. Gather your tools, pick a kit, and bring your dream RC car to life. The road ahead is full of fun, learning, and countless hours of enjoyment. Happy building!
Frequently Asked Questions
What is the best RC car kit for a beginner?
A hobby-grade kit from a reputable brand is the best choice for beginners. Look for kits that include a sturdy chassis, a reliable motor, and clear instructions. Popular brands like Traxxas, Arrma, and Team Associated offer excellent options for first-time builders.
How long does it take to complete a remote control car project?
For most beginners, a remote control car project takes anywhere from 4 to 10 hours to complete. The time depends on the complexity of the kit and your experience level. Simple toy-grade kits can be assembled in a few hours, while more detailed hobby-grade builds may take longer.
Do I need soldering skills for an RC car project?
Not always. Many kits come with plug-and-play connections that require no soldering. However, learning basic soldering is helpful for making stronger connections and troubleshooting. It is a simple skill to pick up with a little practice.
What type of battery is best for a remote control car?
Lithium polymer (LiPo) batteries are the most popular choice for modern RC car electronics. They are lightweight, powerful, and rechargeable. Always use a LiPo-compatible charger and follow safety guidelines for charging and storage.
Can I upgrade my RC car after building it?
Absolutely. One of the best parts of a remote control car project is the ability to upgrade over time. You can swap out the motor, add better suspension, upgrade the battery, or install a new body shell. Upgrades let you customize performance and appearance as your skills grow.
Is building an RC car expensive?
The cost depends on the kit you choose. Toy-grade kits start around $20 to $60. Hobby-grade kits typically range from $100 to $350. You can also find great deals on used kits and parts online. Starting with a mid-range hobby kit offers the best balance of cost and quality for a first build.