Can You Rebuild an Alternator at Home With Basic Tools
Can You Rebuild an Alternator at Home is an essential topic that provides valuable insights.
Key Takeaways
- Understanding Can You Rebuild an Alternator at Home: Provides essential knowledge
📑 Table of Contents
- Why Rebuild Your Alternator at Home?
- Tools and Materials You Will Need
- Step-by-Step Alternator Rebuild Process
- Common Mistakes to Avoid During an Alternator Rebuild
- When Should You NOT Rebuild at Home?
- How to Test Your Rebuilt Alternator After Installation
- How Long Does a Rebuilt Alternator Last?
- Key Takeaways
Why Rebuild Your Alternator at Home?
Before we get into the how-to, let us talk about why this project is worth your time. A new alternator can cost anywhere from $150 to $500 depending on your vehicle. A remanufactured unit might save you some money, but you do not really know what quality control it went through. When you rebuild it yourself, you control every single part that goes back inside.
Here are the main reasons people choose to do a car alternator repair at home:
- Cost savings: A rebuild kit costs $20 to $60, compared to hundreds for a new unit.
- Learning experience: You understand how your charging system works inside and out.
- Quality control: You replace every worn part with new components.
- Convenience: No waiting for parts to ship or a shop to open.
- Confidence: You gain mechanical skills that help with other car repairs.
The alternator core — the main body of the unit — is often still in good shape even when internal parts wear out. Rather than throwing it away, you give it a second life. That is both smart and environmentally friendly.
Understanding Your Alternator’s Role
Your charging system has a simple but important job. The engine drives the alternator through a belt. Inside the alternator, a spinning rotor creates a magnetic field. This field generates electricity in the stator windings. The rectifier diodes convert that electricity from AC to DC. The voltage regulator then controls the output to keep it steady at around 13.5 to 14.5 volts.
When any of these components fail, the whole system suffers. That is why a proper alternator rebuild addresses every potential weak point, not just the obvious problem.
Tools and Materials You Will Need
One of the best things about this project is that you do not need fancy equipment. Most people already have the basics in their garage. Here is what you need for a successful alternator disassembly:
- Socket set (metric and standard sizes)
- Wrench set (combination wrenches)
- Screwdrivers (flathead and Phillips)
- Pliers (needle-nose and regular)
- Multimeter for alternator testing
- Wire brush for cleaning
- Soldering iron for connection repairs
- Safety glasses and gloves
- Rebuild kit specific to your alternator model
- Clean workspace with good lighting
Your rebuild kit is the most important purchase. It typically includes new brushes, slip rings, bearings, a voltage regulator, and sometimes a rectifier. Make sure you buy the correct kit for your alternator model. Look up your vehicle’s year, make, and model to find the right part number.
Quick Tips for Tool Prep
Before you start, organize your tools on a clean workbench. Lay out a towel or mat to protect the alternator housing from scratches. Have a small container ready for all the bolts and small parts — they are easy to lose. Take photos at every disassembly step so you can reference them during reassembly.
Step-by-Step Alternator Rebuild Process
This is the heart of the guide. Follow these steps carefully, and you will have a fully rebuilt alternator overhaul in about two to three hours.
Step 1: Remove the Alternator
First, disconnect the negative battery cable. Safety always comes first. Then, locate the alternator in your engine bay. It is usually mounted near the front of the engine with one or two bolts and a belt tensioner.
Disconnect the electrical connector and the wiring harness. Note which wire goes where — take a photo if needed. Loosen the serpentine belt using a tensioner tool. Remove the mounting bolts and carefully pull the alternator free. Set it on your workbench.
Step 2: Disassemble the Alternator
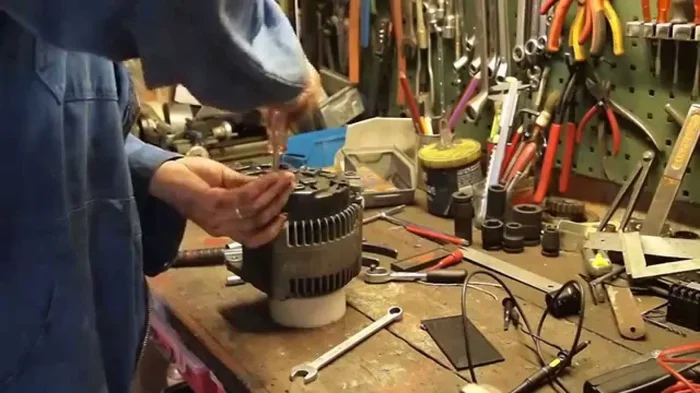
Now comes the detailed work of alternator disassembly. Start by removing the rear housing bolts. Carefully separate the two halves of the alternator case. You will see the rotor, stator, rectifier, and voltage regulator inside.
Remove the brush holder assembly. Take out the slip rings and rotor shaft bearings. Be gentle with the stator winding — the copper wire is delicate. Label every part and keep them organized. A muffin tin works great for holding small components.
Step 3: Inspect and Test Each Component
Use your multimeter testing to check each part. Here is what to look for:
- Stator windings: Check for continuity. You should see low resistance. An open reading means a damaged winding.
- Rotor: Test the field coil for continuity. Check the slip rings for smoothness and corrosion.
- Diodes: Use the diode setting on your multimeter. Test each rectifier diode in both directions. A short or open diode means the rectifier needs replacing.
- Bearings: Spin them by hand. They should rotate smoothly without grinding or wobbling.
- Voltage regulator: This small component controls the output. If it is faulty, your car alternator repair will fail even with new other parts.
If any component tests bad, it goes into the replacement pile. This is exactly why rebuilding beats replacing with a mystery remanufactured unit.
Step 4: Clean All Components
Use a wire brush to clean the alternator housing inside and out. Remove all carbon buildup from the slip rings. Clean the brush holders thoroughly. Wipe down every part with a clean cloth. Dirty contacts cause poor electrical connections, which can ruin a rebuild fast.
Step 5: Install New Parts from the Rebuild Kit
Now it is time to build your alternator back up with fresh components. Start with the rear bearings — press them in carefully using a bearing press or a socket that matches the inner race. Do not hammer them directly — you can damage the bearing races.
Install the new slip rings if they are included in your kit. Replace the brushes in the brush holder. The new voltage regulator mounts to the housing with small screws or clips. Install the new rectifier diodes — note the polarity markings and solder them in place carefully.
Inspect the stator winding for any signs of heat damage or broken insulation. If it looks good, you are ready for reassembly.
Step 6: Reassemble the Alternator
Put the two halves of the alternator case back together. Align them carefully and bolt them up snugly. Reinstall the rotor shaft and make sure it spins freely. Reattach the brush holder and all electrical connections.
Before you put it back on the vehicle, do a quick spin test. Rotate the shaft by hand. It should turn smoothly with no grinding or resistance. If something feels off, open it back up and check your work.
Step 7: Test Before Installation
Here is a step many people skip, but it is critical. Hook your multimeter testing leads to the alternator output terminals. Spin the shaft with a drill or by hand (carefully). You should see a steady voltage reading between 13 and 14.5 volts. If the voltage is erratic or zero, something is wrong. Go back and recheck your connections and components.
Common Mistakes to Avoid During an Alternator Rebuild
Even experienced DIYers make mistakes. Knowing what to watch out for saves time and frustration.
Mistake 1: Skipping the multimeter test. Some people rebuild based on symptoms alone. But internal damage can be hidden. Always test before and after the rebuild to confirm the fix worked.
Mistake 2: Using the wrong rebuild kit. Alternators vary widely between models. A kit for a Ford alternator will not fit a Chrysler unit. Double-check your part number before ordering.
Mistake 3: Forcing parts during reassembly. If a component does not fit easily, stop and figure out why. Forcing it can crack the housing, damage windings, or misalign components.
Mistake 4: Neglecting the wiring harness. Corroded or damaged connectors at the alternator plug can mimic alternator failure. Clean or replace the connector before reinstalling.
Mistake 5: Not torquing bolts to spec. Loose bolts cause vibrations, which lead to premature bearing wear and electrical issues. Use a torque wrench when possible.
Expert Insights on Alternator Repairs
According to experienced auto electricians, most alternator failures come down to three causes: worn brushes, bad voltage regulators, and overheated diodes. If you address all three during a car alternator repair, the rebuilt unit should last another 100,000 miles or more.
One pro tip from seasoned mechanics: always replace the serpentine belt at the same time. An old belt puts extra strain on the alternator and can cause premature failure of your fresh rebuild.
When Should You NOT Rebuild at Home?
Not every alternator problem is suited for a home rebuild. Here are situations where you should seek professional help:
- Severe stator damage: If the stator winding has shorted or burned out badly, rewinding requires specialized equipment and skills.
- Cracked housing: The alternator case must be intact. A cracked housing cannot be reliably repaired at home.
- No multimeter: Without proper testing tools, you cannot verify the rebuild is successful.
- Complex integrated units: Some modern vehicles have alternators built into the engine assembly or paired with advanced computer systems. These are best left to professionals.
In these cases, buying a quality remanufactured alternator or a new unit is the smarter choice. But for most common alternator symptoms like whining noises, dim lights, or a dead battery, a home rebuild is very doable.
How to Test Your Rebuilt Alternator After Installation
Once you have the rebuilt unit back on the vehicle, it is time to verify everything works. Start the engine and let it idle. Use your multimeter testing leads on the battery terminals. You should see about 13.5 to 14.5 volts with the engine running.
Turn on the headlights, air conditioning, and rear defroster. The voltage should stay steady or only drop slightly. If it drops below 13 volts, the alternator is not charging properly. Check the connections and re-test.
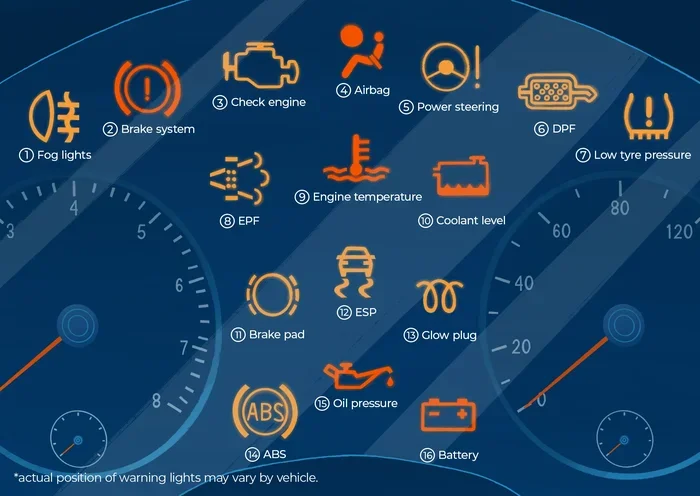
Take the car for a short drive. Pay attention to the dashboard warning lights. If the battery or alternator light comes on, pull over safely and recheck your work. Most issues after a rebuild come from loose connections or a missed component.
Quick Tips for Post-Rebuild Testing
- Let the engine idle for at least 15 minutes before testing under load.
- Test the battery voltage with the engine off first — it should read 12.4 to 12.6 volts.
- Test again with the engine on — it should read 13.5 to 14.5 volts.
- Rev the engine to 2,000 RPM and check that the voltage stays stable.
- Monitor the voltage for several days after the rebuild to catch any slow issues.
How Long Does a Rebuilt Alternator Last?
A properly rebuilt alternator with a quality rebuild kit and good stator winding and rectifier diodes should last between 80,000 and 150,000 miles. This is comparable to a new alternator in most cases.
The key factors that affect longevity include:
- Quality of the rebuild kit components
- Proper installation and torquing
- Clean electrical connections
- Condition of the serpentine belt
- Driving conditions and climate
Keep the connections clean and check the belt tension periodically. A little maintenance goes a long way toward protecting your alternator overhaul investment.
Key Takeaways
- Rebuilding an alternator at home is absolutely doable with basic tools and a rebuild kit costing under $60.
- Multimeter testing before and after the rebuild ensures you have properly fixed the charging system.
- Common alternator failures include worn brushes, bad voltage regulators, and failed rectifier diodes — all replaceable with a standard kit.
- Avoid common mistakes like skipping tests, using the wrong kit, or forcing parts during alternator disassembly and reassembly.
- A properly rebuilt alternator can last 80,000 to 150,000 miles with basic maintenance.
- Not all alternator problems suit a home rebuild — cracked housings and severe winding damage need professional attention.
- Post-installation testing is critical — always verify voltage output at the battery before considering the job complete.
Frequently Asked Questions
Can a beginner really rebuild an alternator at home?
Yes, absolutely. The process is straightforward and well-documented. If you can use a wrench and a multimeter, you can handle a car alternator repair at home. Start with a simple rebuild and follow each step carefully. Many beginners complete their first rebuild in an afternoon and feel confident doing it again.
How much does a rebuild kit cost?
Most alternator rebuild kits range from $20 to $60. The price depends on the kit quality and which components it includes. A quality kit with brushes, bearings, slip rings, a voltage regulator, and rectifier diodes is a small investment compared to the cost of a new alternator.
What are the signs my alternator needs rebuilding?
Common alternator symptoms include dimming headlights, a dead battery, whining or grinding noises from the engine bay, and the battery warning light on the dashboard. If your charging system is not holding a steady 13.5 to 14.5 volts, it is time to inspect the alternator closely.
Do I need any special tools beyond basic hand tools?
The most important special tool is a multimeter for testing. You also need a bearing press or matching socket for bearing installation. A soldering iron helps with rectifier diode replacement. Beyond that, standard sockets, wrenches, and screwdrivers are all you need for a proper alternator overhaul.
How long does the entire rebuild process take?
Most people complete a car alternator repair in two to three hours the first time. Experienced DIYers can do it in under 90 minutes. The disassembly and inspection take the most time. Reassembly and testing go faster once you know the process.
Is it worth rebuilding an old alternator or buying a new one?
For most vehicles, a rebuild kit is the best value. The cost is a fraction of a new alternator, and you get to keep the original alternator core which is often high quality. If the housing is cracked or the stator winding is severely damaged, buying new makes more sense. Otherwise, rebuilding is the smart and economical choice.
=== CONCLUSION ===
Can you rebuild an alternator at home with basic tools? The answer is a resounding yes. You now have all the knowledge needed to tackle this project confidently. From alternator disassembly to multimeter testing to final installation, every step is within reach for a motivated DIYer.
Rebuilding your alternator saves real money and teaches you valuable skills about your vehicle’s charging system. You will understand exactly what is inside that mysterious box bolted to your engine and why each component matters. The next time someone tells you to just buy a new alternator, you will know better.
Grab your tools, order the right rebuild kit, and give it a try. You might be surprised at how satisfying it feels to bring an old alternator back to life with your own hands.