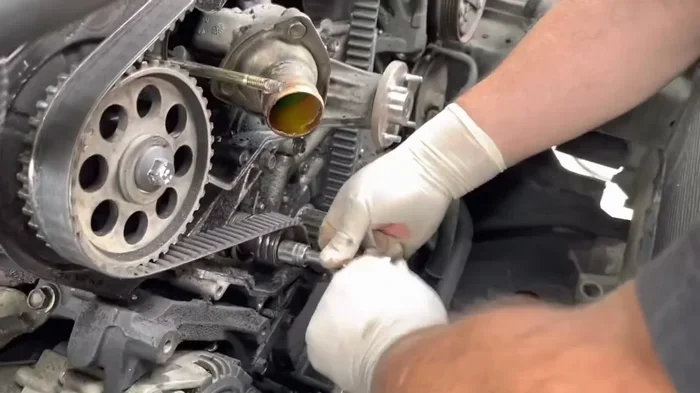
Can a Beginner Change a Timing Belt Without a Mechanic
Can a beginner change a timing belt without a mechanic? Yes, with the right tools, patience, and this step-by-step guide. A timing belt replacement is one of the most rewarding DIY car repair jobs you can do at home. It saves significant money and builds real mechanical confidence. This guide covers everything from timing belt symptoms to installation, common mistakes, and when to seek help.
Can a beginner change a timing belt without a mechanic? The answer is a confident yes — but only if you prepare properly. Changing a timing belt is one of the most important DIY car repair skills you can develop. It saves hundreds of dollars in labor costs and gives you a deeper understanding of how your engine works. In this complete guide, we walk you through every step of the process in simple, easy-to-follow language. Whether you have never turned a wrench or have basic experience, this article gives you the knowledge and confidence to get the job done right.
Your timing belt is a critical component that keeps your engine running smoothly. It synchronizes the rotation of the crankshaft and camshaft, ensuring that your engine valves open and close at the right time. When a timing belt wears out or breaks, the results can range from a frustrating breakdown to total engine failure. That is why knowing how to replace it yourself is such a valuable skill. Let us walk you through everything you need to know, from recognizing timing belt symptoms to completing the full timing belt replacement in your own garage.
Key Takeaways
- Yes, beginners can do it: A timing belt replacement is achievable with basic tools and careful attention to detail.
- Know your engine type: Interference engines and non-interference engines require different levels of caution during the process.
- Use the right kit: Always choose a quality timing belt kit that includes the belt, tensioner, and gaskets.
- Follow torque specifications: Incorrect torque specifications are one of the most common beginner mistakes.
- Watch for warning signs: Recognizing timing belt symptoms early prevents costly engine damage.
- Know when to call a pro: Complex engine layouts and lack of experience are valid reasons to seek professional help.
📑 Table of Contents
What Is a Timing Belt and Why Does It Matter
How the Timing Belt Works
The timing belt is a strong, toothed rubber belt located inside the engine. It connects the crankshaft to the camshaft and keeps them rotating in perfect sync. Think of it like the conductor of an orchestra — it makes sure every part moves at the right time. When the crankshaft turns, the timing belt transfers that motion to the camshaft, which controls the opening and closing of your engine valves.
If the belt stretches, cracks, or breaks, the engine timing goes out of alignment. Valves may open at the wrong moment, leading to valve damage or even pistons bending into the cylinders. This is why regular inspection and timely replacement are so important. Most manufacturers recommend replacing the timing belt every 60,000 to 100,000 miles, but always check your engine manual for the specific maintenance schedule for your vehicle.
Timing Belt vs Serpentine Belt
Many beginners confuse the timing belt with the serpentine belt. They are completely different parts with different jobs. The serpentine belt is the long, ribbed belt on the outside of the engine that powers accessories like the alternator, power steering pump, and air conditioning compressor. The timing belt, on the other hand, is hidden inside the engine and controls internal engine timing.
Understanding this difference is essential before you start any timing belt replacement. You do not want to be working on the wrong belt and still have engine problems. Always refer to your vehicle service manual to identify which belt you are dealing with. If you are unsure, a quick search for your vehicle model and year online will give you clear diagrams to follow.
Signs Your Timing Belt Needs Replacement
Warning Sounds and Visual Clues
Your vehicle often gives you clues before a timing belt fails completely. One of the most common timing belt symptoms is a ticking or ticking noise coming from the engine area. This sound usually happens when the belt starts to wear out and loses proper tension. You might also notice rough idling, difficulty starting the engine, or a misfire that comes and goes.
Visually, you may spot cracks, fraying, or glazing on the belt if you can access it. Some vehicles have a transparent timing cover that allows you to inspect the belt without removing it. If you notice any of these signs, do not wait. A worn timing belt can snap without warning, leading to severe engine damage. Addressing the problem early is always cheaper and safer than dealing with a broken belt on the road.
Mileage and Maintenance Intervals
Mileage is one of the most reliable indicators for timing belt replacement. Most car makers recommend replacing the belt somewhere between 60,000 and 100,000 miles. However, some vehicles have intervals as low as 40,000 miles. The best source for your specific vehicle is the owner manual or the maintenance schedule section in the engine manual.
Even if you have not hit the mileage mark, age matters too. Rubber degrades over time, and a belt that sits for years can become brittle regardless of how many miles are on the odometer. If you buy a used car with unknown maintenance history, it is wise to replace the timing belt as a precaution. It is a small cost compared to the expense of a rebuilt engine.
Tools and Materials You Will Need
Essential Tool List
Before you start any timing belt replacement, gather all the tools and materials you need. Having everything ready prevents frustrating interruptions mid-project. Here is what you will typically need:
- Socket set (metric and standard sizes)
- Wrench set including torque wrench
- Timing belt kit (belt, tensioner, idler pulleys, and gaskets)
- Harmonic balancer puller
- Breaker bar and ratchet
- Screwdrivers (flathead and Phillips)
- Pliers and needle-nose pliers
- Jack and jack stands or ramps
- Penetrating oil (such as WD-40) for stuck bolts
- Shop rags and drain pan
- Engine manual for your specific vehicle
Investing in a quality timing belt kit is one of the most important steps. These kits usually include everything you need beyond the basic hand tools. They also ensure that all components are compatible with each other. Do not try to mix and match parts from different manufacturers — this can lead to fitment issues and improper belt tension.
Quick Tips for Tool Preparation
- Always check that your torque wrench is properly calibrated before use.
- Lay out all tools and parts on a clean workbench before starting.
- Take photos at every step of disassembly for reference during reassembly.
- Use penetrating oil on bolts that have been in place for years to prevent snapping.
- Keep a dedicated container for small hardware like bolts and clips.
Step-by-Step Guide to Changing a Timing Belt
Preparing the Vehicle
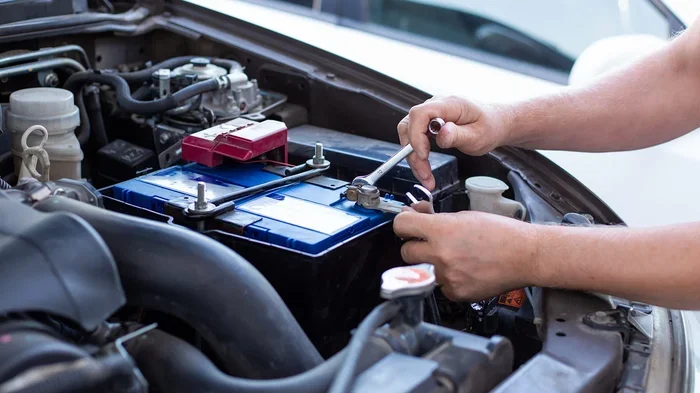
Start by parking your vehicle on a flat, level surface. Engage the parking brake and disconnect the negative battery terminal for safety. You need access to the timing cover, which is usually located at the front of the engine. Remove any covers, shields, or accessories that block your path to the timing belt area.
Before removing the old belt, rotate the engine to the top dead center (TDC) position on the crankshaft. This is the position where the pistons are at their highest point and the valves are fully closed. Your engine manual will show you exactly how to find TDC for your specific engine. Align the timing marks on the crankshaft and camshaft sprockets before you do anything else. This alignment is critical for proper engine synchronization when you install the new belt.
Removing the Old Belt
Once the engine is at TDC and the marks are aligned, release the timing belt tensioner. This allows you to slacken the belt so you can remove it. Carefully take off the old belt and inspect the camshaft and crankshaft sprockets for any damage or excessive wear. Also check the timing belt tensioner and idler pulleys. If these components show signs of wear, replace them as part of the same job.
Clean the area thoroughly with a shop rag. Remove any old gasket material or debris from the timing cover surface. This ensures a clean seal when you install the new gasket. Lay out all the new parts from your timing belt kit and compare them to the old parts to confirm everything matches.
Installing the New Belt
Now comes the most important part of the timing belt replacement. Start by positioning the new belt around the crankshaft sprocket first. Then route it around the idler pulleys and the camshaft sprocket. Make sure every tooth on the belt seats properly in the sprocket grooves. Take your time with this step — rushing it is the number one cause of mistakes.
Once the belt is in place, release the tensioner slowly to apply proper belt tension. The belt should feel firm but not overly tight. Use your torque wrench to tighten all bolts to the manufacturer’s torque specifications. These numbers are critical and can be found in your engine manual. After tightening, rotate the engine by hand two full revolutions and recheck that all timing marks are still aligned.
Reassembly and Final Checks
Reinstall the timing cover, any accessories you removed, and the battery terminal. Before starting the engine, double-check that all bolts are torqued to specification and that the belt is seated properly on all sprockets. Start the engine and listen carefully for any unusual noises. A smooth idle and responsive acceleration are good signs that your timing belt replacement was successful.
Take your vehicle for a short test drive and monitor the engine temperature and performance. If everything feels normal, you have completed a successful timing belt replacement as a beginner. Record the mileage and date of the replacement so you can track the next maintenance schedule interval.
Common Mistakes Beginners Make
Misalignment Issues
The most serious mistake beginners make is misaligning the timing marks during timing belt replacement. Even a single tooth off can cause poor engine performance, loss of power, or in an interference engine, bent valves and pistons. Always take extra care to align the marks precisely before and after installing the new belt.
If you are unsure about the alignment, consult a repair guide specific to your vehicle model. Online forums and video tutorials can also provide visual references that make the process clearer. Never guess when it comes to engine synchronization — precision is everything.
Skipping the Tensioner and Other Wear Parts
Many beginners replace only the timing belt and ignore the tensioner and idler pulleys. This is a costly mistake. If the old tensioner was weak, the new belt will wear out quickly under improper belt tension. Always replace the tensioner and any pulleys that show wear as part of the same job. A quality timing belt kit includes all of these components for a reason.
Another common error is forgetting to replace the water pump if it is driven by the timing belt. On many vehicles, the water pump is located behind the timing belt cover. Replacing it during the same service saves significant labor since you already have everything disassembled. This is one of the best DIY car repair tips you can follow.
Ignoring Torque Specifications
Over-tightening or under-tightening bolts can cause serious problems. Always use a torque wrench and follow the torque specifications in your engine manual. Every bolt on the engine has a specific value, and guessing can strip threads, crack components, or create improper sealing. Do not rely on “feel” — use the numbers.
Can a Beginner Change a Timing Belt? Understanding Your Engine Type
The answer to the question can a beginner change a timing belt depends largely on your engine type. Engines fall into two main categories when it comes to timing belt replacement: interference engines and non-interference engines. Understanding the difference is essential before you start the job.
Interference Engines
In an interference engine, the valves and pistons share the same space in the cylinder at different times. If the timing belt breaks, the pistons can collide with the open valves, causing severe damage. This type of engine requires extreme precision during timing belt replacement. Even a small timing error can result in bent valves, damaged pistons, and an expensive repair bill.
If you have an interference engine, take extra time to verify alignment at every step. Double-check all timing marks before you start the engine. The stakes are higher, but the process is still manageable for a careful beginner who follows the instructions precisely.
Non-Interference Engines
A non-interference engine has more clearance between the valves and pistons. If the timing belt breaks, the valves and pistons do not collide. While this means less catastrophic damage, the engine will still stop running and you will be stranded. Timing belt replacement on a non-interference engine is generally more forgiving for beginners since a slight timing error is less likely to cause physical damage.
| Factor | Interference Engine | Non-Interference Engine |
|---|---|---|
| Damage if belt breaks | Severe (bent valves, pistons) | Minimal (engine stops, no collision) |
| Timing precision required | Extremely high | Moderate |
| Beginner-friendly? | Yes, with extra caution | Yes, more forgiving |
| Typical cost if belt fails | $2,000 – $4,000+ | $500 – $1,500 |
| Timing belt replacement difficulty | Advanced beginner | Intermediate beginner |
When to Call a Professional Instead
Complex Engine Designs
Not every vehicle is suitable for a beginner timing belt replacement. Some engines have complex layouts, tight spaces, or unique access requirements that make the job extremely difficult without professional equipment. If your vehicle has a timing chain instead of a timing belt, the process is different and often requires specialized tools.
If you find yourself stuck at any point during the job, do not force anything. Consult a repair manual, watch expert tutorials, or reach out to a mechanic for guidance. There is no shame in asking for help. The goal is to do the job safely and correctly, not to prove you can do it alone.
Cost vs DIY Savings Analysis
A professional timing belt replacement typically costs between $500 and $1,000 for labor, depending on your vehicle and location. The parts for a timing belt kit usually cost between $100 and $300. So a DIY approach can save you $300 to $700 in labor costs. However, if you make a mistake and damage the engine, those savings disappear quickly.
Consider your experience level, the complexity of your engine, and the tools you have available. If you are a true beginner with no mechanical experience, it may be worth paying a professional to do the first timing belt replacement while you observe and learn. You can always tackle the next one yourself with more confidence and knowledge.
Can a beginner change a timing belt without a mechanic? Yes, absolutely — but preparation and patience are the keys to success. A timing belt replacement is one of the most valuable skills you can add to your DIY car repair toolkit. It saves money, teaches you about your engine, and gives you confidence for future projects.
Remember to always consult your engine manual, use a quality timing belt kit, follow torque specifications precisely, and never rush the alignment process. Check for timing belt symptoms regularly and stay on top of your maintenance schedule. Whether you have an interference engine or a non-interference engine, the principles remain the same: precision, care, and attention to detail.
If you follow the steps in this guide and take your time, you will complete a successful timing belt replacement and join the ranks of confident home mechanics. Start with your next scheduled timing belt replacement and experience the satisfaction of maintaining your own vehicle. You have got this.
Frequently Asked Questions
Is it hard for a beginner to change a timing belt?
It can be challenging but is not impossible for a beginner. The difficulty depends on your engine layout, the tools you have, and your mechanical experience. With a clear guide, the right timing belt kit, and patience, most beginners can complete the job successfully. Practice on a simpler engine first if possible.
How long does it take a beginner to change a timing belt?
A beginner should expect to spend anywhere from 3 to 8 hours on a timing belt replacement. The time varies based on engine accessibility, your experience level, and how many additional components need to be removed. Do not rush the process — taking your time reduces the risk of mistakes.
What happens if the timing belt is installed incorrectly?
An incorrectly installed timing belt can cause poor engine performance, misfires, or catastrophic damage in an interference engine. Bent valves and damaged pistons are common consequences of improper engine synchronization. Always verify timing mark alignment before starting the engine after a timing belt replacement.
Can I replace just the timing belt without the tensioner?
It is not recommended. The timing belt tensioner works with the belt to maintain proper belt tension. If the old tensioner is worn, it will wear out the new belt quickly. Always replace the tensioner and idler pulleys as part of the timing belt replacement, especially if they show any signs of wear.
How much does a timing belt replacement cost if done by a mechanic?
A professional timing belt replacement typically costs between $500 and $1,000 for labor, with parts adding another $100 to $300. The total timing belt cost varies based on your vehicle model, engine type, and local labor rates. Doing it yourself as a beginner can save you a significant portion of that amount.
What are the most important timing belt symptoms to watch for?
The most common timing belt symptoms include a ticking noise from the engine, rough idling, difficulty starting the vehicle, and visible cracks or fraying on the belt. Other signs include engine misfires and the check engine light coming on. If you notice any of these symptoms, inspect the timing belt immediately to prevent further damage.