How to Replace the Alternator on a 2013 Hyundai Elantra
Replacing the alternator on a 2013 Hyundai Elantra is a doable DIY repair that saves you hundreds of dollars. This guide walks you through every step, from spotting the symptoms to testing the new part. You will need basic tools about two hours to finish the job safely and correctly.
Your car depends on the alternator to keep the electrical system running. Without it, your battery drains fast and your engine stalls. If you own a 2013 Hyundai Elantra and suspect the alternator is failing, you are in the right place.
This guide gives you everything you need to replace the alternator yourself. We cover the symptoms, the tools, and each step in detail. You do not need to be a mechanic to do this repair. Just follow along and take your time.
The 2013 Hyundai Elantra uses a straightforward setup that makes alternator replacement manageable at home. Most people finish in about two hours. The key is preparation and patience. Let us get started.
Key Takeaways
- Know the warning signs: Dim lights, dead battery, and dashboard alerts often point to a failing alternator.
- Gather the right tools first: A socket set, wrench, and serpentine belt tool make the job much easier.
- Disconnect the battery before starting: Safety always comes first when working on the electrical system.
- Test the new alternator after installation: A voltage check confirms everything is working properly.
- Know when to call a pro: If you feel unsure, a certified mechanic can prevent costly mistakes.
- Keep your receipts: Save parts and labor records for future vehicle maintenance reference.
📑 Table of Contents
Signs Your Alternator Is Failing
Spotting the problem early saves you from getting stranded. The alternator symptoms on a 2013 Hyundai Elantra are pretty easy to notice once you know what to look for.
Dim or Flickering Headlights
Your headlights rely on the charging system for power. When the alternator weakens, the lights dim especially at idle. This happens because the alternator cannot produce enough voltage to keep up with demand.
Dead or Weak Battery
A dead battery often gets blamed for starting problems. But the real culprit might be the alternator. If your battery keeps dying even after a fresh charge, the alternator is probably not charging it properly.
Dashboard Warning Lights
The battery-shaped warning light on your dashboard is a clear signal. It usually means the charging system has a problem. You might also see other dashboard warning lights behave strangely when the alternator fails.
In some cases, a bad alternator can cause engine overheating. If you notice temperature spikes, check your alternator and belt right away. For more on this connection, see our article on can a bad alternator make your car overheat.
Strange Noises from the Engine Bay
A whining or grinding sound often means the alternator bearing is worn out. Do not ignore this noise. It will only get worse and lead to a complete failure.
Tools and Parts You Will Need
Having everything ready before you start makes the job smooth. Here is a complete list of what you need for this DIY repair.
Tools Required
- Socket set (10mm, 12mm, 13mm, 14mm, 15mm)
- Wrench set (8mm, 10mm)
- Serpentine belt tool or a long breaker bar
- Torque wrench
- Multimeter for testing voltage
- Ratchet and extensions
- Pliers and screwdrivers
- Jack and jack stands or ramps
Parts Required
- Alternator (OEM or quality aftermarket part for the 2013 Hyundai Elantra)
- Drive belt (if the old belt is worn or cracked)
- Electrical contact cleaner
- Anti-seize compound
Always double-check the part number before ordering. The 2013 Hyundai Elantra may have different alternator specs depending on the trim level and engine option. A quick check with your owner manual or a parts catalog saves time and frustration.
Step-by-Step Alternator Replacement
Now for the main event. Follow these steps carefully and you will have a new alternator installed in no time.
Step 1: Disconnect the Battery
Safety first. Always disconnect the negative battery terminal before working on any electrical component. Use a 10mm wrench to loosen the nut and pull the cable off. Tuck the cable away so it cannot touch the terminal during the job.
Working on the electrical system without disconnecting the battery is dangerous. It can cause shorts, fry fuses, or even hurt you. Do not skip this step.
Step 2: Remove the Serpentine Belt
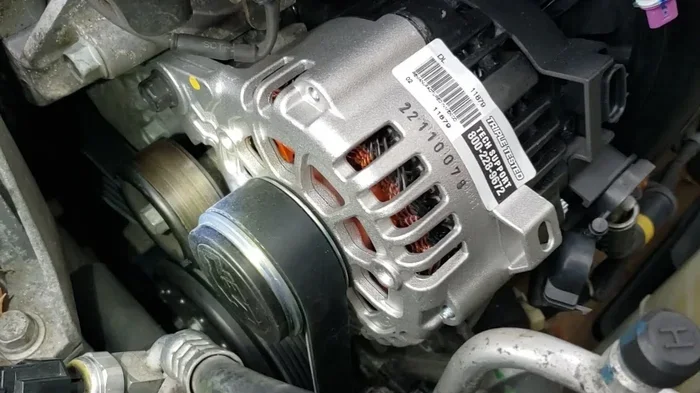
The serpentine belt drives the alternator and other accessories. Use your serpentine belt tool to release the tension on the belt tensioner pulley. Slide the belt off the alternator pulley and set it aside.
Take a photo of the belt routing before you remove it. This makes reinstallation much easier. The belt path on the 2013 Elantra is straightforward but having a reference picture helps a lot.
Step 3: Disconnect the Electrical Connections
The alternator has two main electrical connections. One is a large power cable secured with a 13mm bolt. The other is a smaller plug connector. Press the locking tab and pull the connector straight out. Remove the power cable and set the connectors aside safely.
Clean any corrosion off the connectors with electrical contact cleaner. Dirty electrical connections can cause charging problems even with a new alternator.
Step 4: Remove the Alternator Mounting Bolts
The alternator is held in place by two or three bolts. Use your socket set to remove them. The bolts may be tight, so apply steady pressure. A breaker bar works well here.
Once all bolts are out, carefully wiggle the alternator free. It may take a little maneuvering since the engine bay of the Elantra is fairly compact. Be gentle around the hoses and wiring nearby.
Step 5: Install the New Alternator
Position the new alternator in place and hand-start the mounting bolts. Make sure the pulley aligns with the belt path. Tighten the bolts to the factory torque specification, which is typically around 25 to 30 foot-pounds.
Reconnect the electrical connectors in reverse order. Push the plug in until it clicks. Secure the power cable with the 13mm bolt and tighten it firmly.
Step 6: Reinstall the Serpentine Belt
Use your serpentine belt tool to rotate the tensioner pulley. Slide the belt onto the alternator pulley and release the tensioner. The belt should sit snugly on all pulleys without any slack.
Double-check the belt routing against your photo. A misrouted belt will cause noise and poor charging performance.
Step 7: Reconnect the Battery
Reattach the negative battery terminal and tighten the nut. Make sure the connection is secure. You should hear a click when the electrical system reinitializes.
Now comes the exciting part. Start the engine and listen for any unusual sounds. A smooth idle means everything is in the right place.
Testing the New Alternator
Do not skip this step. Testing confirms your repair was successful and the charging system is working correctly.
Voltage Test
Set your multimeter to DC voltage. Touch the red probe to the battery positive terminal and the black probe to the negative terminal. With the engine off, you should read about 12.6 volts.
Now start the engine. The voltage should rise to between 13.8 and 14.4 volts. This confirms the new alternator is charging the battery properly. If the voltage stays below 13.5 volts, something is not right and needs further investigation.
Load Test
Turn on the headlights, the blower fan, and the radio. Check the voltage again. It should stay above 13.5 volts under load. A significant drop means the alternator is struggling.
After your repair, keep an eye on your gauges during the first few drives. If you notice any unusual readings, it is worth investigating further. For tips on understanding your vehicle’s warning systems, check out our guide on does low engine oil show on the dashboard to better understand what your dashboard is telling you.
Common Mistakes to Avoid
Even experienced DIYers make mistakes. Here are the most common ones when replacing an alternator on the 2013 Hyundai Elantra.
- Forgetting to disconnect the battery: This is the number one cause of electrical shorts. Always disconnect the negative terminal first.
- Reusing a worn serpentine belt: An old belt will slip and cause charging issues. Replace it if it shows any cracks or glazing.
- Under-torquing the mounting bolts: Loose bolts cause vibration and can damage the alternator over time. Use a torque wrench.
- Ignoring corrosion on connectors: Dirty terminals lead to poor electrical contact and charging problems.
- Not testing before finishing: Always run the voltage test after installation. Catching a problem early saves you from a second trip.
One thing people often overlook is the belt tensioner pulley. If the tensioner is weak, the new belt will not seat properly. Inspect the tensioner before you finish the job.
After Replacement: Tips for Long Lasting Performance
Your new alternator is installed and working. Now let us make sure it stays that way.
- Inspect the drive belt every 10,000 miles. Look for cracks, fraying, or glazing. A worn belt puts extra stress on the alternator.
- Keep the area clean. Dirt and debris around the alternator can cause overheating. Use a brush to clean the engine bay periodically.
- Watch for warning signs. If you see dim lights or a dead battery again, check the alternator right away. Early detection prevents further damage.
- Follow your maintenance schedule. Regular vehicle maintenance catches small problems before they become big ones.
The alternator on the 2013 Hyundai Elantra typically lasts about 80,000 to 120,000 miles. Proper care helps it reach the upper end of that range. When you take care of the charging system, the whole powertrain benefits.
When to Call a Professional
There is no shame in calling a mechanic. Some situations call for expert help. If you feel unsure about any step, it is perfectly fine to visit a trusted shop.
You should call a professional if the alternator is hard to reach or if you notice additional engine problems. Sometimes a failing alternator is a symptom of a bigger issue in the electrical system. A trained technician can diagnose the root cause.
Also, if you do not have the right tools or a safe workspace, professional help is the smart choice. A mechanic has the lifts, diagnostic tools, and experience to do the job quickly and correctly. Many shops offer free charging system tests too.
Remember, using the heater or air conditioning puts extra load on the alternator. If you notice issues after your repair, it might be worth checking the overall electrical health of the vehicle. For more on how your cooling system interacts with the engine, read our article on does turning on the heater cool the engine.
Conclusion
Replacing the alternator on a 2013 Hyundai Elantra is one of the most rewarding DIY repairs you can do. It saves you money, builds your car knowledge, and keeps your vehicle running strong. With the right tools, a little patience, and this guide, you can handle the job confidently.
Always start by recognizing the warning signs. Gather your tools and parts before you begin. Follow each step carefully and test the results. The charging system is the heartbeat of your electrical system, and a healthy alternator means peace of mind on every drive.
Take your time, stay safe, and enjoy the satisfaction of a job well done. Your 2013 Hyundai Elantra will thank you with reliable starts and a strong electrical system for miles to come.
Frequently Asked Questions
How much does it cost to replace an alternator on a 2013 Hyundai Elantra?
The alternator part itself costs between $150 and $350 for a 2013 Hyundai Elantra. Labor at a shop typically runs $100 to $200. Doing it yourself saves the labor cost entirely and only requires the price of the part.
Can I drive with a bad alternator on my Elantra?
You can drive short distances with a failing alternator, but the battery will eventually drain and the car will stall. It is not safe for long trips. Replace the alternator as soon as you notice symptoms to avoid getting stranded.
How long does alternator replacement take on a 2013 Hyundai Elantra?
Most DIYers finish the job in about one and a half to two hours. The process is straightforward on the Elantra since the engine bay is accessible. First-time repairers might take a little longer, and that is perfectly fine.
What causes an alternator to fail on a Hyundai Elantra?
The most common causes are age, worn bearings, diode failure, and excessive electrical load. Driving with a weak battery or a loose serpentine belt also shortens the alternator lifespan. Regular maintenance helps prevent premature failure.
Do I need to replace the serpentine belt when I replace the alternator?
Not always, but it is a good idea if the belt shows any wear. A new alternator with an old belt can still cause problems if the belt slips or cracks soon after. Inspect the belt carefully and replace it if needed.
Can a bad alternator damage the battery on my Elantra?
Yes, absolutely. A failing alternator does not charge the battery properly, which causes the battery to drain repeatedly. Over time, this deep cycling kills the battery completely. Replacing the alternator early protects your battery investment.