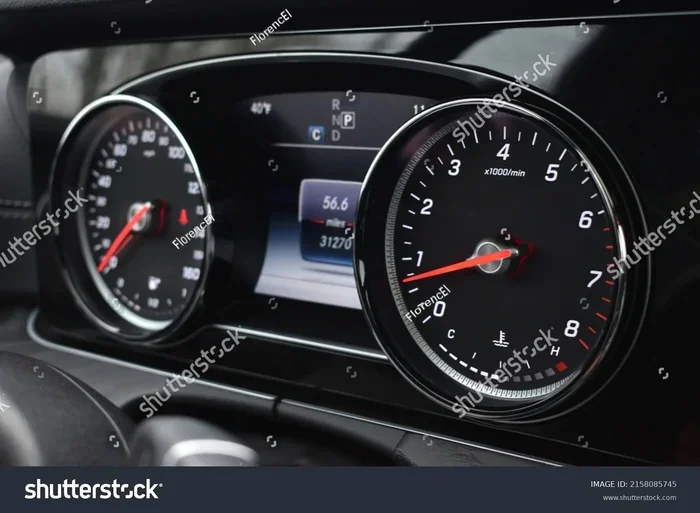
How to Change Digital Odometer Mileage for Beginners
Changing digital odometer mileage is a task many car owners face when replacing a broken instrument cluster or correcting an error. This guide walks you through the entire process in simple, beginner-friendly steps. You will learn the right tools to use, the legal boundaries to respect, and how to avoid costly mistakes. Whether you are a DIY mechanic or just curious, this article has everything you need to know about digital odometer mileage adjustment done the safe and legal way.
Have you ever needed to replace a cracked dashboard or a faulty instrument cluster and wondered what happens to your mileage? Maybe your speedometer stopped working, and you had to swap out the whole unit. Now you are left with a blank odometer or a reset number that does not match reality. If you have ever searched for how to change digital odometer mileage, you are not alone. This is one of the most common questions in the automotive repair world, especially among DIY enthusiasts and home mechanics.
Changing digital odometer mileage might sound intimidating, but it is actually a straightforward process once you understand the basics. The key is knowing when it is appropriate, what tools you need, and how to stay on the right side of the law. In this guide, we will walk you through everything step by step. No jargon. No confusion. Just clear, practical advice that works for beginners and seasoned gearheads alike.
Before we dive in, let us be clear about something important. Adjusting your odometer for the purpose of misleading a buyer is illegal in most countries and states. This guide is for legitimate repair and maintenance purposes only. We want to help you fix your vehicle correctly, not cut corners. With that said, let us get into it.
Key Takeaways
- Know Your Reason: Only adjust mileage for legitimate purposes like instrument cluster replacement or error correction.
- Use the Right Tools: A mileage correction tool, diagnostic scanner, and basic hand tools are essential.
- Follow Legal Rules: Odometer fraud is a serious crime. Always document changes and follow your local laws.
- Sync With the ECU: The mileage must match across all modules, not just the dashboard.
- Keep Records: Document every change for transparency and future resale value.
- Start Simple: Begin with a test vehicle or practice on older models before working on modern CAN bus systems.
- When in Doubt, Seek Help: Professional mechanics can handle complex adjustments safely.
📑 Table of Contents
- Understanding Digital Odometers: How They Work
- Legitimate Reasons to Adjust Digital Odometer Mileage
- Tools and Equipment You Will Need
- Step-by-Step Guide to Changing Digital Odometer Mileage
- Common Mistakes to Avoid
- Legal Considerations You Must Know
- When to Call a Professional
- Final Thoughts on Changing Digital Odometer Mileage
Understanding Digital Odometers: How They Work
Before you can change anything, you need to understand how a digital odometer actually works. Unlike old-school mechanical odometers that use physical gears, digital odometers rely on electronic signals and stored data. This knowledge makes the whole process much less mysterious.
How Digital Odometers Track Miles
A digital odometer gets its reading from the vehicle’s control module, often called the ECU or PCM. This module counts wheel rotations and converts them into miles or kilometers. The data travels through a network of wires, often called the CAN bus system, to reach your dashboard display.
Here is a simple way to think about it. Your car has a brain that constantly counts how far the wheels have turned. That brain sends the number to your dashboard, where it shows up as the mileage you see on the instrument cluster. The odometer number is not just stored in the cluster itself. It is also saved in the ECU and sometimes in other modules too.
Digital vs Mechanical Odometers
Older vehicles used mechanical odometers. These relied on a cable connected to the transmission. The cable spun a series of gears inside the dashboard, turning the numbers on the display. These were simple but prone to wear and tear.
Digital odometers, on the other hand, use electronic sensors and memory chips. They are more accurate and harder to tamper with accidentally. But they also mean that changing the mileage requires a different approach. You cannot just pop off a cover and turn a wheel anymore. You need to work with the vehicle’s electronic systems.
Legitimate Reasons to Adjust Digital Odometer Mileage
Not every mileage adjustment is shady. In fact, there are several perfectly valid reasons you might need to change the reading on your digital odometer. Let us look at the most common ones.
Instrument Cluster Replacement
This is the number one reason people need to adjust their mileage. When your instrument cluster fails or gets damaged, you have to replace it. A new or rebuilt cluster comes with a zero reading or a default number. If you just bolt it in, your mileage will show zero or a wrong number.
To fix this, you need to transfer the correct mileage from the old cluster to the new one. This is not fraud. It is simply restoring the accurate reading that was already on your vehicle. The mileage should reflect the true distance the car has traveled, regardless of which cluster is installed.
Correcting Mileage Errors
Sometimes, a glitch or a power loss can cause the odometer to display incorrect numbers. Maybe the battery died and the ECU lost its stored mileage data. Or perhaps a wiring issue caused a misread. In these cases, correcting the mileage is just part of normal repair work.
Another common scenario is after a transmission swap or engine replacement. Some owners want to ensure the mileage reflects only the new component’s usage, but this gets tricky legally. In most cases, the odometer should still show the vehicle’s true total mileage.
Restoring a Broken Display
Sometimes the odometer digits go dark or start flickering. The car still drives fine, but you cannot read the mileage. Replacing the cluster or repairing the display requires syncing the correct number back in. This is another legitimate reason for a mileage adjustment.
Tools and Equipment You Will Need
Having the right tools makes the job much easier and safer. Here is a list of what you will need to change digital odometer mileage the proper way.
- Mileage Correction Tool: This is the most important piece of equipment. A quality mileage correction device connects to your vehicle’s OBD2 port and allows you to read and adjust the mileage stored in the ECU and cluster. Popular brands include KWP2000, MaxiSYS, and several dedicated odometer correction tools.
- OBD2 Diagnostic Scanner: Even if your correction tool has a scanner built in, having a standalone OBD2 scanner is helpful. It lets you read error codes and verify that all systems are communicating properly after the change.
- Basic Hand Tools: Screwdrivers, pliers, trim removal tools, and a socket set. You will need these to remove the instrument cluster from the dashboard.
- Vehicle Service Manual: Every car is different. Having the service manual for your specific make and model helps you understand the removal process and the location of connectors.
- Pen and Paper or a Camera: Document everything. Take photos before you disconnect anything. Write down wire positions and connector locations.
- Anti-Static Wrist Strap: Digital odometer systems are sensitive to static electricity. An anti-static strap protects the electronic components from damage.
Step-by-Step Guide to Changing Digital Odometer Mileage
Now for the part you have been waiting for. Here is a detailed walkthrough of the process. We will use a general approach that applies to most modern vehicles, but always check your specific service manual for model-specific details.
Step 1: Read the Current Mileage
Before you make any changes, you need to know what the current mileage is. Plug your OBD2 scanner into the diagnostic port, which is usually located under the dashboard on the driver’s side. Turn the ignition to the “on” position without starting the engine. Read the current mileage from the ECU and write it down.
This number is your reference point. You will need it to set the new cluster to the correct reading. Do not skip this step. If you forget the current mileage, you could end up with an incorrect reading that is hard to fix.
Step 2: Remove the Instrument Cluster
Turn off the ignition and remove the key. Use your trim removal tools to carefully take off the dashboard bezels and covers around the instrument cluster. There are usually a few screws or bolts holding the cluster in place. Remove them gently.
Once the cluster is loose, pull it straight out just enough to access the wiring harness. Disconnect the electrical connectors by pressing the release tabs. Do not yank the wires. Take a photo of the connections before you disconnect them so you can reference them later.
Step 3: Access the Odometer Memory
With the cluster removed, you need to access the odometer data stored on the circuit board. Most modern clusters store this data in an EEPROM chip or a similar non-volatile memory component. The mileage correction tool will connect to this chip, either through the OBD2 port or by connecting directly to the cluster.
If you are using a dedicated mileage correction tool, follow the manufacturer’s instructions to establish a connection. Most tools will guide you through the process with on-screen prompts. The tool reads the current mileage and allows you to input a new value.
Step 4: Enter the Correct Mileage
Using the mileage correction tool, enter the correct mileage you recorded in Step 1. Double-check this number. A single digit off can cause problems during vehicle inspections or when you go to sell the car.
Some tools allow you to write the new mileage directly to the cluster. Others require you to send the data to the ECU as well. Make sure you update both locations so the readings are synchronized. A mismatch between the cluster and the ECU can trigger warning lights and error codes.
Step 5: Reinstall the Instrument Cluster
Once the mileage has been updated, reconnect all the electrical connectors to the cluster. Make sure each connection clicks into place securely. Slide the cluster back into the dashboard and secure it with the screws or bolts you removed earlier.
Replace the dashboard bezels and covers. Turn the ignition to the “on” position and check that the odometer displays the correct mileage. Start the engine and verify that all gauges are working properly.
Step 6: Clear Error Codes and Test Drive
Use your OBD2 scanner to clear any error codes that may have appeared during the process. Take the car for a short test drive. Pay attention to the speedometer, odometer, and any warning lights on the dashboard.
If everything looks good, you have successfully completed the mileage adjustment. If the odometer still shows incorrect numbers, go back and verify that you wrote the data to all the correct modules.
Common Mistakes to Avoid
Even with the best intentions, mistakes happen. Here are some common errors beginners make when changing digital odometer mileage and how to avoid them.
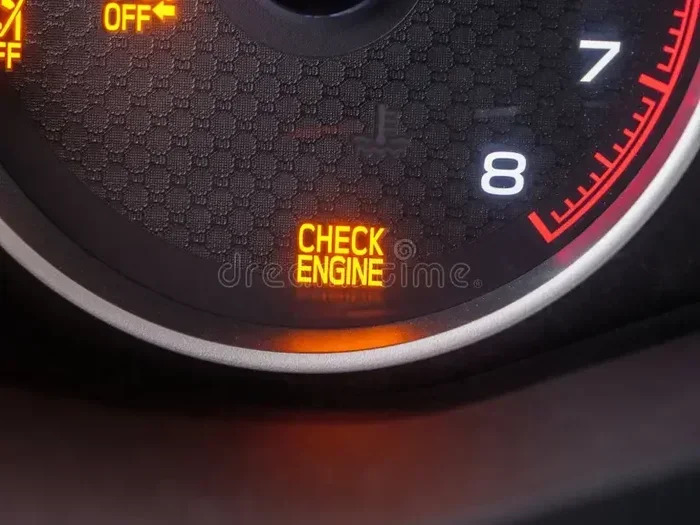
- Skipping the ECU Update: Many people update only the cluster and forget the ECU. This creates a mismatch that triggers the check engine light and fails inspections.
- Using a Cheap or Incompatible Tool: Not all mileage correction tools work with every vehicle. Make sure your tool supports your car’s make, model, and year before you start.
- Not Backing Up Data: Always back up the original mileage and any stored data before making changes. If something goes wrong, you will need a starting point to recover from.
- Rushing the Process: Take your time. Rushing leads to disconnected wires, incorrect readings, and potential damage to the electrical system.
- Forgetting to Document: Keep a written record of the original mileage, the new mileage, the date of the change, and the reason for the adjustment. This documentation is valuable for future reference and resale.
- Ignoring Warning Lights After the Change: If a warning light appears after the adjustment, do not ignore it. Use your scanner to diagnose the issue and fix it before driving the car regularly.
Legal Considerations You Must Know
This is the most important section of the entire guide. The laws around odometer adjustments are strict, and violating them can result in heavy fines, legal action, and even criminal charges.
In the United States, the Federal Odometer Act makes it illegal to disconnect, reset, or alter an odometer with the intent to change the mileage reported. However, there are exceptions. If you are adjusting the odometer to reflect the correct reading after a repair or replacement, and you document the change properly, you are generally within the law.
Most states require you to report odometer corrections on the vehicle title when you sell the car. You must disclose the actual mileage and note if there has been a discrepancy. Failure to do so can result in lawsuits and penalties.
In the European Union, the UK, Australia, and many other countries, similar laws exist. Odometer fraud, also known as bogus mileage or clocking, is a serious offense. The penalties can include fines, imprisonment, and a permanent criminal record.
Here are some key legal tips to keep in mind:
- Always keep receipts and records of any mileage adjustments.
- Disclose any odometer corrections when selling a vehicle.
- Never adjust mileage to make a vehicle appear to have fewer miles than it actually does.
- Consult a legal professional if you are unsure about the laws in your jurisdiction.
- When in doubt, have a certified mechanic perform the adjustment and document it for you.
The bottom line is simple. Use this knowledge responsibly. Adjusting your odometer for legitimate repair purposes is fine. Using it to deceive someone is not.
When to Call a Professional
Not every mileage adjustment is a DIY job. Some situations call for professional help, and that is perfectly okay. If your vehicle has a complex CAN bus system or advanced digital instrumentation, the process may be more involved than a simple adjustment.
You should also consider calling a professional if you are uncomfortable working with the vehicle’s electrical system. Modern cars have sensitive computers and sensors that can be damaged by improper handling. A certified mechanic or dealership technician has the training and equipment to handle complex adjustments safely.
Another reason to seek professional help is if the mileage adjustment needs to be documented for legal purposes. Professionals can provide a certified record of the work, which adds credibility and protects you in future transactions.
Final Thoughts on Changing Digital Odometer Mileage
Changing digital odometer mileage does not have to be a scary or confusing process. With the right tools, the right knowledge, and the right attitude, even a beginner can handle this common repair task. The key is to approach it with care, respect for the law, and a commitment to doing it the right way.
Remember to always read the current mileage before making any changes. Use a quality mileage correction tool that is compatible with your vehicle. Update both the cluster and the ECU to keep the readings synchronized. Document everything. And most importantly, never adjust mileage to mislead anyone.
Whether you are replacing a broken instrument cluster, correcting an error, or restoring a damaged display, this guide has given you the foundation you need. Take your time, follow the steps carefully, and you will have a correctly calibrated odometer in no time. Happy repairing, and drive safely.
Frequently Asked Questions
Is it legal to change digital odometer mileage?
Yes, it is legal when done for legitimate repair purposes, such as replacing a faulty instrument cluster or correcting an error. However, it is illegal to adjust mileage with the intent to deceive a buyer or hide a vehicle’s true condition. Always document changes and follow your local laws.
What tools do I need to change digital odometer mileage?
You will need a mileage correction tool, an OBD2 diagnostic scanner, basic hand tools for removing the instrument cluster, and your vehicle’s service manual. An anti-static wrist strap is also recommended to protect sensitive electronic components.
Can I change the odometer mileage myself?
Yes, many car owners successfully change their digital odometer mileage as a DIY project. However, it requires the right tools and a good understanding of your vehicle’s electronic systems. If you are not comfortable with the process, a professional mechanic can handle it for you.
What happens if the odometer reading is wrong after a cluster replacement?
If the mileage is incorrect after replacing the instrument cluster, the vehicle may fail inspections and the odometer reading will not reflect the true condition of the car. You will need to use a mileage correction tool to sync the correct reading with the new cluster and the ECU.
How do I sync the odometer with the ECU after a change?
Most mileage correction tools allow you to write the new mileage to both the instrument cluster and the ECU simultaneously. Follow the tool’s instructions carefully to ensure both modules are updated. Afterward, use an OBD2 scanner to verify there are no error codes.
What is the difference between odometer rollback and a legitimate mileage adjustment?
Odometer rollback is the illegal practice of reducing the mileage to make a vehicle appear less used. A legitimate mileage adjustment restores the correct reading after a repair, such as replacing a broken instrument cluster. The intent and documentation make all the difference between the two.
=== CONCLUSION ===
Changing digital odometer mileage is a task that many car owners face at some point, whether due to a broken instrument cluster, an error correction, or a dashboard repair. With the right approach, the right tools, and a clear understanding of the legal boundaries, it is a manageable job even for beginners. The most important takeaway is to always act with integrity. Keep accurate records, update all relevant modules, and never use this knowledge to mislead anyone. Your vehicle’s mileage is a reflection of its true history, and keeping it accurate protects you, your buyers, and everyone on the road.