Can You Replace a Key Fob Cover With These Simple Steps
Yes, you can replace a key fob cover yourself with just a few basic tools and a little patience. This guide walks you through every step, from choosing the right replacement cover to snapping it back together. Whether your fob is cracked, worn, or just outdated, you will save money and time by doing it at home.
Have you ever dropped your car keys and watched the cover crack right open? It happens to the best of us. A damaged key fob cover is more than just an eyesore. It can expose the delicate electronics inside to dust, moisture, and further damage.
The good news is that you can replace a key fob cover without spending a fortune. You do not need to be a tech expert or a professional mechanic. With the right replacement cover and a few simple tools, you can have your fob looking and working like new in no time.
This guide covers everything you need to know. We will walk you through choosing the right replacement, gathering your tools, and following each step carefully. By the end, you will feel confident tackling this repair on your own. Let us get started.
Key Takeaways
- DIY Replacement Is Easy: Most people can swap out a key fob cover in under 30 minutes with household tools.
- You Save Money: Replacing a cover yourself costs a fraction of what a dealership or locksmith would charge.
- Choose the Right Cover: Make sure your replacement cover matches your car model and key fob type.
- Avoid Common Mistakes: Using the wrong tools or forcing pieces apart can damage the internal electronics.
- Maintenance Extends Life: Simple care habits keep your new key fob cover looking and working great for years.
- Know When to Get Help: If the internal electronics are damaged, a professional may be the better choice.
📑 Table of Contents
- Why You Might Need to Replace a Key Fob Cover
- Tools and Materials You Will Need
- Step-by-Step Guide to Replacing a Key Fob Cover
- Common Mistakes to Avoid When Replacing a Key Fob Cover
- Tips for Maintaining Your New Key Fob Cover
- When to Seek Professional Help Instead
- Benefits of Replacing Your Key Fob Cover Yourself
- How to Choose the Right Key Fob Cover Replacement
- Conclusion
Why You Might Need to Replace a Key Fob Cover
Key fob covers take a beating every day. They sit in pockets, bags, and cupholders. Over time, wear and tear becomes impossible to ignore. Understanding why covers fail can help you prevent future damage.
Daily Wear and Tear
The most common reason people need a key fob replacement cover is simple daily use. Every time you pull your fob out of a pocket, it rubs against keys, coins, and other hard objects. The plastic shell slowly weakens. Tiny cracks form. Eventually, those cracks grow into full splits.
Here are the most common signs your cover needs replacing:
- Cracks or splits along the seam of the fob
- Discoloration from sun exposure or friction
- Loose parts that wobble when you shake the fob
- Scratches and scuffs that make the fob look old
- Broken buttons caused by a weakened shell
Accidental Damage
Sometimes the damage happens all at once. A dropped fob on a hard floor can crack the cover instantly. Sitting on your keys in the back pocket is another classic culprit. Water damage from a trip through the washing machine can also ruin a cover beyond repair.
When damage is severe, replacing the entire key fob housing makes more sense than trying to patch it. A fresh cover protects the internal components and restores the fob to its original look.
Aesthetic and Functional Reasons
Not every cover replacement is about damage. Some people simply want an upgrade. Aftermarket covers come in colors, materials, and designs that the original manufacturer never offered. Swapping to a waterproof key fob cover or a rugged metal shell can add both style and protection.
Functionally, a worn cover can make it harder to press the buttons. The shell flexes too much. This means the internal contact points do not align properly. A tight, well-fitting replacement solves this problem immediately.
Tools and Materials You Will Need
Before you start, gather everything you need. Having the right tools on hand makes the process smooth and prevents frustrating delays. You do not need anything fancy, but a few specific items will make a big difference.
Essential Replacement Parts
The most important item is, of course, your replacement key fob cover. These are widely available online and at auto parts stores. Make sure you buy the correct model for your vehicle. Check your car manual or look up your fob model number before ordering.
Here is what to look for when buying a replacement:
- Exact model match for your car make and year
- Material type (plastic, silicone, metal, or hybrid)
- Button layout that matches your original fob
- Battery compartment compatibility
- Key ring attachment style
Basic Tools for the Job
You do not need a professional toolbox. A few common household items will do the trick perfectly.
- Small flathead screwdriver for prying open the fob
- Plastic pry tool (or an old credit card) to avoid scratching
- Tweezers for handling small screws and springs
- Soft cloth for cleaning inside the fob
- Isopropyl alcohol for wiping down contacts
- CR2032 battery if you also need a replacement
Optional but Helpful Extras
A few extra items can make your replacement experience even better. A key fob case opener kit is inexpensive and very useful. A small tray or magnetic mat keeps tiny parts from rolling away. Some people also like to have a drop of super glue nearby, just in case a clip breaks during disassembly.
Pro tip: lay out all your tools on a clean surface before you begin. This keeps you organized and prevents you from losing any small components.
Step-by-Step Guide to Replacing a Key Fob Cover
Now for the fun part. Replacing a key fob shell replacement is straightforward once you know the process. Follow these steps carefully and you will have a brand new fob in no time.
Step 1: Remove the Internal Electronics
Start by flipping your fob over. Locate the small seam where the two halves of the fob meet. Insert your plastic pry tool or flathead screwdriver gently into the seam. Work your way around the entire edge, applying even pressure. Do not force anything. The two halves should pop apart with a satisfying click.
Once open, carefully lift out the internal circuit board. Set it on a clean, soft surface. Take note of how the battery sits and how the buttons are connected. A quick photo with your phone can be very helpful for reassembly later.
Step 2: Remove the Old Cover
With the electronics removed, you can now focus on the old cover. Most fob covers are held together by small clips or screws. If your fob uses clips, gently pry them loose with your plastic tool. If it uses screws, use the appropriate screwdriver to remove them.
Set the old cover aside. You will notice it has a specific shape that matches the circuit board. Your new replacement cover will follow the same pattern.
Step 3: Clean the Internal Components
This is a step many people skip, but it is important. Use your soft cloth and a small amount of isopropyl alcohol to clean the inside of both cover halves. Wipe down the circuit board gently. Remove any dust, debris, or residue that has built up over time.
Cleaning the contacts on the battery terminals is also a great idea. Dirty contacts can cause your fob to malfunction even after a fresh cover replacement.
Step 4: Install the New Cover
Take your new key fob replacement cover out of the packaging. Place the circuit board inside the new shell. Make sure the buttons align correctly with the button pads on the board. The battery should sit snugly in its compartment.
If your fob uses screws, replace them now. If it uses clips, press the two halves together firmly until you hear each click. Work slowly and evenly around the entire fob. Do not rush this step.
Step 5: Test Your Fob
Once everything is assembled, it is time to test. Press each button and make sure it responds properly. Test the lock, unlock, trunk, and panic buttons if your fob has them. Stand near your car and confirm the signal reaches the vehicle.
If a button does not work, open the fob again and check the button alignment. Sometimes a slight shift during assembly causes a button to stick. Adjusting it usually fixes the problem immediately.
Step 6: Reinsert the Key Blade
If your fob has a physical key blade, reinsert it now. Slide it into the designated slot and make sure it locks into place. Test the key blade by unlocking your car manually. Everything should feel smooth and secure.
And that is it. You have successfully replaced your key fob cover. It should look brand new and function perfectly.
Common Mistakes to Avoid When Replacing a Key Fob Cover
Even simple jobs come with pitfalls. Knowing what to avoid saves you time, money, and frustration. Here are the most common mistakes people make when they replace a key fob cover.
Using Metal Tools on Plastic Clips
This is the number one mistake. Metal screwdrivers can easily scratch or crack the plastic clips that hold your fob together. Always use a plastic pry tool or an old credit card. These tools provide enough leverage without damaging the shell.
Forcing the Fob Open
If the two halves are not coming apart easily, stop and reassess. You may be pushing in the wrong spot. Look for the exact seam line. Some fobs have hidden release buttons that you need to press first. Forcing open a sealed fob can break the internal electronics.
Buying the Wrong Cover Model
Not all key fob covers are the same. A cover designed for a Toyota Camry will not fit a Honda Civic. Always double-check your vehicle make, model, and year before ordering. When in doubt, check the part number on your original fob and match it exactly.
Skipping the Cleaning Step
Old dust and grime can interfere with button function. Skipping the cleaning step might seem harmless, but it can lead to sticky or unresponsive buttons after your replacement. A quick wipe takes only a few seconds and makes a big difference.
Rushing the Reassembly
It is tempting to snap the fob back together quickly. But rushing the reassembly can cause misaligned buttons, loose covers, or broken clips. Take your time. Press each section firmly and evenly. A careful reassembly lasts much longer than a rushed one.
Tips for Maintaining Your New Key Fob Cover
Replacing your cover is only half the battle. Proper maintenance keeps your new cover looking great and functioning well for years to come. These simple habits make a huge difference.
Clean Your Fob Regularly
Wipe down your fob once a week with a soft, slightly damp cloth. This removes oils, dirt, and grime that build up from daily handling. For a deeper clean, use isopropyl alcohol on a cotton swab to reach into the button crevices.
Avoid Extreme Temperatures
Leaving your fob in a hot car or out in freezing temperatures can warp the plastic cover over time. Keep your fob in a pocket or bag when possible. Extreme heat is especially damaging to the internal battery and circuit board.
Use a Protective Case
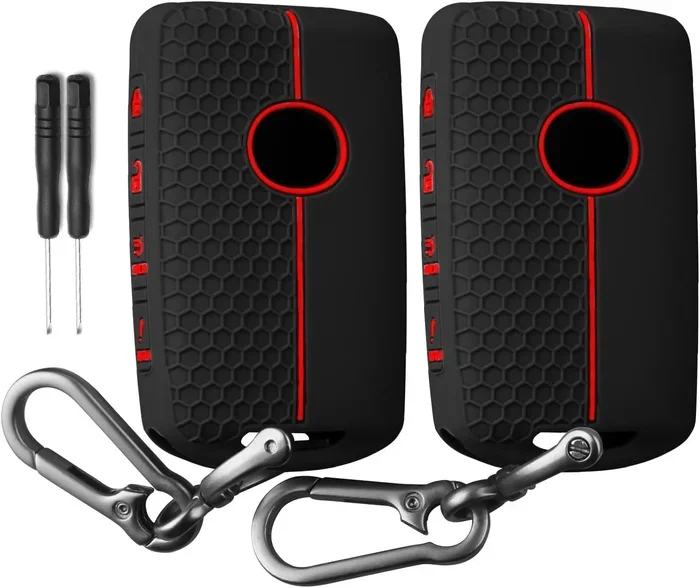
If you are hard on your keys, consider adding a protective key fob case over your new cover. These silicone sleeves add an extra layer of shock absorption. They are inexpensive and available in many colors and styles.
Replace the Battery Proactively
A dying battery puts extra strain on the fob’s internal components. Replace the battery every two to three years, even if it still works. This prevents corrosion and keeps your fob performing at its best.
Store It Safely
When you are not using your fob, store it in a safe, designated spot. A small dish or hook near your front door works perfectly. Avoid tossing it into a junk drawer where it can get scratched, bent, or lost among other items.
When to Seek Professional Help Instead
Replacing a key fob cover is a simple DIY project for most people. But there are situations where professional help is the smarter choice. Knowing the difference saves you from making things worse.
Internal Electronics Are Damaged
If your fob stops working after a drop or water exposure, the problem is likely internal. A cracked cover is one thing. But a damaged circuit board or broken antenna is a completely different issue. A professional locksmith or dealership can diagnose and repair internal electronics safely.
You Cannot Find a Replacement Cover
Some older or rare vehicle models have key fobs that are no longer in production. If you cannot find a replacement cover after searching multiple sources, a professional may be able to suggest custom solutions or alternative repair options.
Your Fob Requires Programming
Modern key fobs often need to be programmed to your vehicle after certain repairs. If your fob has a push-button start or smart key system, replacing the cover might trigger a programming requirement. A dealership or certified locksmith can handle this quickly and correctly.
You Are Not Comfortable Doing It Yourself
There is absolutely no shame in asking for help. If you feel unsure about disassembling your fob, a locksmith or auto repair shop can do it for you. Many offer affordable key fob services. The cost is usually much lower than a full fob replacement.
Benefits of Replacing Your Key Fob Cover Yourself
Choosing a DIY approach to replace key fob cover parts comes with several clear advantages. Understanding these benefits can motivate you to try it yourself.
Cost savings are the biggest advantage. A replacement cover typically costs between five and twenty dollars. A dealership or locksmith might charge fifty to one hundred dollars or more for the same job. You keep the savings and get the satisfaction of a job well done.
Convenience is another major benefit. You do not need to schedule an appointment or drive to a shop. You can fix your fob on your own time, in your own space. It takes less time than a trip to the dealership.
Learning experience is a bonus many people overlook. Once you know how your fob is built, you can handle minor repairs and maintenance on your own in the future. This knowledge builds confidence and self-reliance.
Customization options open up when you do it yourself. You can choose from thousands of aftermarket covers in every color, material, and design imaginable. Your fob becomes a personal accessory that reflects your style.
How to Choose the Right Key Fob Cover Replacement
Not all replacement covers are created equal. Choosing the right one ensures a perfect fit and long-lasting performance. Here is what to consider before you buy.
First, identify your exact fob model. Look for a part number on the back of the fob or check your vehicle owner manual. Match this number when shopping for a replacement. An exact match guarantees proper fit and function.
Next, decide on the material. Plastic covers are the most common and affordable. They come in many colors and styles. Silicone covers offer a softer grip and better shock absorption. Metal covers are the most durable but can interfere with the fob signal if not designed properly.
Finally, read customer reviews before purchasing. Reviews give you real-world insights into fit, quality, and durability. Look for covers with consistently positive feedback and a high rating. This small step can save you from buying a poor-quality replacement.
Conclusion
Can you replace a key fob cover? Absolutely. With the right replacement part, a few basic tools, and this step-by-step guide, you can handle the job in under 30 minutes. The process is simple, affordable, and incredibly satisfying when you see your fob look brand new again.
Remember to take your time, avoid common mistakes, and maintain your new cover properly. A little care goes a long way toward keeping your key fob replacement cover looking and working great for years to come.
Do not let a cracked or worn fob cover bother you any longer. Gather your tools, order your replacement, and get started today. Your fob will thank you for it.
Frequently Asked Questions
How long does it take to replace a key fob cover?
Most people complete the replacement in 15 to 30 minutes. The exact time depends on your fob model and your experience level. If it is your first time, give yourself about 45 minutes to be safe.
Can I use any key fob cover for my vehicle?
No, you must match the cover to your specific fob model. Check your vehicle make, model, and year before purchasing. Using the wrong cover will not fit properly and may damage the internal electronics.
Do I need any special tools to replace a key fob cover?
No special tools are needed. A small flathead screwdriver, a plastic pry tool, and a pair of tweezers are all you need. Most people already have these items at home.
Will replacing the cover affect my key fob’s signal?
No, a properly fitted replacement cover will not affect the signal. However, a metal cover that is not designed for your fob model could interfere. Stick with plastic, silicone, or rubber covers for reliable signal performance.
How much does a replacement key fob cover cost?
Replacement covers typically cost between five and twenty dollars online. Aftermarket options are even more affordable. This is a fraction of what you would pay a dealership or locksmith to do the same job.
What should I do if my fob still does not work after replacing the cover?
If the fob still does not work, the problem is likely internal. Check the battery first and replace it if needed. If the issue persists, the circuit board or antenna may be damaged. In that case, consult a professional locksmith or auto repair shop for diagnosis and repair.