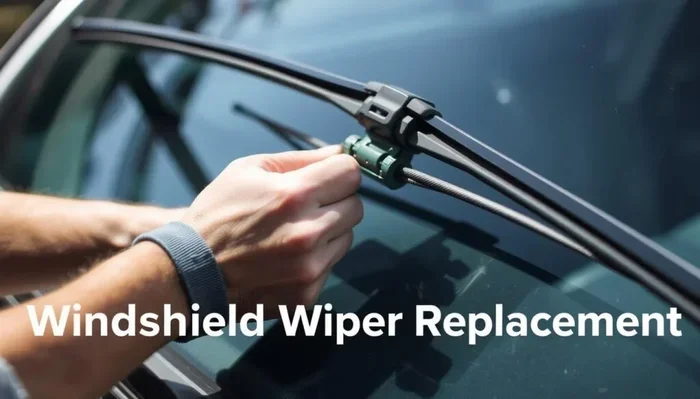
How Do I Remove My Windshield Wipers Without Damage
Removing your windshield wipers is a simple DIY task that anyone can do with the right tools and a little patience. Whether you need to replace worn blades, store your car for winter, or clean your windshield thoroughly, knowing the proper removal technique protects both the wiper arms and your glass. This guide walks you through every step so you can remove windshield wipers safely and confidently.
Windshield wipers are one of those parts you barely notice until they stop working well. When it is time to replace them or just give your windshield a good cleaning, you need to know how to remove windshield wipers the right way. Many people worry about breaking something during the process, but the truth is that it is much simpler than it looks.
In this guide, we will walk you through every step of wiper blade removal for all common wiper types. You will learn how to identify your connector, avoid costly mistakes, and get the job done in minutes. Whether you are a complete beginner or just need a refresher, this article has everything you need.
Let us be clear about something important right away. Removing windshield wipers without damage comes down to two things: knowing the right technique and being gentle. You do not need special tools or mechanic experience. You just need a little patience and the right information. That is exactly what we are going to give you.
Key Takeaways
- Know Your Wiper Type: Different wiper systems require different removal methods — hook, pin, and side-lock connectors all work differently.
- Gentle Pressure Is Key: Never force the wiper blade off. Using too much strength can bend the wiper arm or crack your windshield.
- Prepare Before You Start: Have the right tools ready, lift the wiper arm first, and protect your windshield with a towel before removal.
- Avoid Common Mistakes: Skipping the protective towel, pulling at the wrong angle, or forgetting to lower the arm back onto the glass are frequent errors.
- Reinstallation Matters Too: Proper removal sets you up for easy reinstallation. Listen for the click and make sure the blade is secure.
- Regular Maintenance Helps: Cleaning your wipers and checking for wear extends their life and makes future removal easier.
- When in Doubt, Consult Your Manual: Your vehicle owner’s manual has specific guidance for your make and model.
📑 Table of Contents
- Why You Might Need to Remove Your Windshield Wipers
- Understanding Your Windshield Wiper Type
- Tools You Will Need for Safe Wiper Removal
- Step-by-Step Guide to Removing Windshield Wipers
- Common Mistakes to Avoid When Removing Windshield Wipers
- How to Reinstall Your Windshield Wipers
- How Cold Weather Affects Your Windshield Wipers
- When to Replace Your Windshield Wipers
- Expert Insights on Wiper Maintenance
- Final Thoughts on Removing Windshield Wipers Without Damage
Why You Might Need to Remove Your Windshield Wipers
There are several reasons why you would need to take your wipers off. Understanding the reason helps you choose the right approach and avoid unnecessary steps.
Replacing Worn Wiper Blades
The most common reason is simple wear and tear. Wiper blades have rubber squeegees that degrade over time. When they leave streaks or skip across the glass, it is time for a wiper replacement. Most wiper blades last between six and twelve months, depending on how often you use them and what weather conditions they face.
Winter Storage and Seasonal Changes
Some people remove their wipers during winter to prevent ice from damaging the rubber. Cold temperatures make the rubber brittle, and frozen wipers can tear easily. If you live in a place with harsh winters, taking the blades off is a smart windshield care practice. It also makes it easier to clear ice from your windshield without pulling on the wiper arms.
Deep Windshield Cleaning
Occasionally, you just need full access to your windshield. Maybe there is stubborn grime near the base of the wiper arms. Perhaps you are applying a rain-repellent treatment. Whatever the reason, removing the wipers gives you complete access to the glass surface.
Replacing the Wiper Arm or Connector
Sometimes the problem is not the blade but the arm itself. A bent wiper arm applies uneven pressure, which causes streaking. In that case, you need to remove the entire assembly to install a new wiper arm or replace the connector piece.
Understanding Your Windshield Wiper Type
Not all wipers attach the same way. Before you start removing anything, you need to identify what kind of wiper connector your vehicle uses. The connector is the small mechanism where the blade meets the wiper arm. Here are the three most common types.
Hook-Style Connector
The hook-style connector is the most common type found on older vehicles and many modern cars. It has a small curved metal piece that hooks onto a tab on the wiper arm. To remove a hook-style blade, you need to squeeze a small tab or release a latch on the connector. Once you release it, the blade slides right off the arm.
Pin-Style Connector
Pin-style connectors use a small pin that slides through a hole in the blade adapter. These are common on many Japanese and European models. To remove a pin-style wiper, you push the pin out from the side or back of the connector. The blade then lifts away from the arm. Some pin connectors require you to press a small button while pulling the blade downward.
Side-Lock Connector
Side-lock connectors are common on many newer vehicles. They have a small lever or clip on the side that locks the blade in place. To remove a side-lock wiper, you flip the lever to the open position and pull the blade toward you. These connectors are popular because they make wiper installation quick and easy.
Quick Tip: Find Your Connector Type
The easiest way to identify your connector type is to look at the area where the blade meets the arm. Check your vehicle owner’s manual if you are unsure. You can also look up your specific make and model online. Most auto parts stores carry adapters for every major connector type, so you can always find a replacement that matches.
Tools You Will Need for Safe Wiper Removal
One of the best things about removing windshield wipers is that you do not need many tools. Here is a simple list of what you should have ready before you start:
- New wiper blades (if you are replacing them) — make sure you get the correct wiper size for your vehicle
- A soft towel or cloth to protect your windshield
- A pair of gloves to keep your hands clean and protected
- Your vehicle owner’s manual for model-specific guidance
- A small flat-head screwdriver (only if your connector requires it)
That is it. You do not need a mechanic’s toolkit or any special equipment. The towel is probably the most important item on this list. It prevents the wiper arm from snapping back onto the windshield and cracking the glass.
Step-by-Step Guide to Removing Windshield Wipers
Now that you know your connector type and have your tools ready, let us walk through the removal process step by step. Follow these instructions carefully, and you will have your wipers off in under five minutes.
Step 1: Lift the Wiper Arm Away from the Windshield
Start by gently lifting the wiper arm away from the windshield. Pull it up until it stands upright on its own. Be careful during this step. Wiper arms have a spring inside that keeps them pressed against the glass. If you let the arm snap back, it can crack your windshield or scratch the glass surface.
Pro tip: Place a folded towel between the wiper arm and the windshield before you lift it. This cushions the arm if it slips and prevents any damage to your glass. This is one of the most overlooked steps, and it can save you from an expensive windshield repair.
Step 2: Locate the Connector Mechanism
Look closely at the point where the wiper blade meets the wiper arm. You will see the connector mechanism. Depending on your vehicle, this could be a hook, a pin, or a side-lock. Take a moment to study how it is assembled before you try to remove it. If you are unsure, refer to your owner’s manual or look up a quick video for your specific model.
Step 3: Release the Connector
Now it is time to release the connector. The method depends on your connector type:
- Hook-style: Find the small release tab or latch on the connector. Press or squeeze it while gently pulling the blade downward. The blade will slide off the hook.
- Pin-style: Push the pin inward or press the release button. While holding it, pull the blade straight down to detach it from the arm.
- Side-lock: Flip the side lever to the unlocked position. Then pull the blade toward you and slide it off the arm.
Important: Never pull the blade away from the arm with force. If it does not release easily, double-check that you have found the correct release mechanism. Forcing it can bend the wiper arm or break the connector.
Step 4: Remove the Blade From the Arm
Once the connector is released, gently slide the blade off the arm. Set the old blade aside. If you are replacing it, have your new blade ready. If you are just removing it for cleaning or storage, place the blade somewhere safe where it will not get damaged.
Step 5: Lower the Wiper Arm Back Onto the Windshield
This step is just as important as the removal itself. Slowly lower the wiper arm back down onto the windshield. Do not let it snap into place. Gently guide it down so the rubber foot rests flat on the glass. If you removed the towel earlier, you can now remove it too.
Common mistake: Many people forget to lower the wiper arm back down after removal. Leaving the arm standing upright for an extended period can damage the spring mechanism inside the arm. Always lower it back gently when you are done.
Common Mistakes to Avoid When Removing Windshield Wipers
Even though the process is straightforward, people still make mistakes that can lead to damage. Here are the most common errors and how to avoid them.
Forcing the Connector Release
The biggest mistake is using too much force. Every wiper connector has a specific release method. If you do not know how yours works, take the time to figure it out before you start pulling. Forcing a stuck connector can break the tab, bend the arm, or crack the windshield.
Skipping the Protective Towel
We mentioned this earlier because it is that important. A towel between the wiper arm and the windshield prevents scratches and cracks. Windshield glass is tough, but the metal wiper arm is tougher. A sudden snap-back can chip or crack your glass, which leads to an expensive repair or full replacement.
Removing Both Wipers at Once
It is tempting to remove both wipers at the same time, especially if you are replacing both blades. However, removing one at a time helps you stay organized. You can compare the old and new blades, make sure you have the right size, and avoid mixing up the driver and passenger sides. If you remove both at once, you might end up installing the wrong blade on the wrong side.
Ignoring the Wiper Arm Spring
Wiper arms are spring-loaded. When you lift them, the spring is under tension. If you release the arm suddenly, it can whip back onto the windshield with significant force. Always control the arm as you lower it. A slow, steady motion is all you need.
Not Checking for Corrosion
When you remove the wiper blade, take a quick look at the wiper arm and connector. If you see rust or corrosion, it is worth addressing before installing new blades. Corrosion can prevent the new blade from fitting properly and can cause streaking or chattering during use. A quick wipe with a cloth and some WD-40 can work wonders.
How to Reinstall Your Windshield Wipers
Once you have completed your task — whether that is replacing the blades or cleaning the windshield — it is time to put the wipers back. Reinstallation is essentially the reverse of removal, but there are a few extra things to keep in mind.
Start by lifting the wiper arm away from the windshield again. Attach the new or cleaned blade by aligning the connector with the arm’s attachment point. Push or slide the blade into place until you hear or feel a click. This click confirms that the connector is locked in properly.
Gently lower the wiper arm back onto the windshield. Make sure the blade sits flat against the glass and is not at an odd angle. An improperly seated blade will chatter, streak, or leave uneven lines across your windshield.
Quick tip: After reinstallation, run your wipers on a low setting for a few seconds. This helps the blade settle into its natural position and lets you check for proper contact with the glass. If you hear squeaking or see streaking, lift the blade and reseat it.
Also, keep in mind that removing and reinstalling wipers is similar to other DIY car maintenance tasks you might do at home. If you have ever changed your oil or swapped out a car air filter, the process is very similar in terms of approach — simple, methodical, and low-risk. In fact, if you have ever changed your car air filter yourself, you already have the hands-on confidence to handle wiper removal with ease.
How Cold Weather Affects Your Windshield Wipers
Cold weather is one of the biggest enemies of windshield wipers. When temperatures drop, the rubber on your wiper blades becomes stiff and less flexible. This can cause cracking, tearing, and poor contact with the windshield. In freezing conditions, wipers can actually freeze to the glass, making removal much more difficult.
If you live in a cold climate, you might consider removing your wipers during the winter months. This prevents them from freezing to the windshield and reduces wear on the rubber. It is a simple car maintenance step that can extend the life of your blades significantly.
When you do remove wipers in cold weather, be extra gentle. The rubber is more brittle in low temperatures, and the connector may be stiff from the cold. Warm up your hands or wear gloves to maintain a firm but gentle grip. Never yank or twist the blade aggressively. If the connector feels frozen, warm it up with your hand for a minute or two before trying again.
Just as cold weather affects your wipers, it also affects other parts of your vehicle. For example, have you ever wondered how long a car can sit in cold weather without damage? Cold temperatures can impact your battery, fluids, and rubber components throughout the car, not just the wipers. Understanding these effects helps you take better care of your vehicle year-round.
When to Replace Your Windshield Wipers
Knowing when to replace your wipers is just as important as knowing how to remove them. Here are the clear signs that it is time for a new set of wiper blades:
- Streaking: Your wipers leave visible streaks across the windshield, even after cleaning the glass.
- Skipping: The blade skips or bounces across the windshield instead of gliding smoothly.
- Squeaking: You hear a squeaking or squealing noise during operation.
- Visible Wear: The rubber edge looks cracked, chipped, or rolled.
- Incomplete Coverage: The blade does not cover the full width of the windshield.
- Age: It has been more than six to twelve months since your last replacement.
If you notice any of these signs, do not wait. Worn wipers reduce your visibility, which is a safety hazard. Replacing them is an inexpensive and easy DIY task that takes just a few minutes once you know the process.
For those who prefer professional help, many dealerships and auto parts stores offer free wiper installation with purchase. But if you are comfortable doing it yourself, you save time and money. Plus, you get the satisfaction of handling your own car maintenance tasks.
Expert Insights on Wiper Maintenance
We spoke with a few automotive experts about best practices for wiper maintenance and removal. Here is what they had to say:
Clean your wiper blades regularly. A simple wipe-down with a damp cloth removes dirt and grime that accelerates rubber wear. Do this once a month, and your blades will last longer.
Lift your wipers in winter. If you live in a snowy climate, lifting the blades away from the windshield prevents them from freezing to the glass. This also makes it easier to clear snow from your windshield.
Never use your wipers on a dry windshield. Running wipers without washer fluid causes friction that damages the rubber. Always wet the glass first, and use quality wiper fluid for the best results.
Replace wipers in pairs. Even if only one blade looks worn, replacing both at the same time ensures even performance across your windshield. Mismatched blades can cause uneven streaking.
These small habits add up over time. They keep your wipers performing at their best and make the removal process smoother whenever you need it.
Final Thoughts on Removing Windshield Wipers Without Damage
Removing your windshield wipers does not have to be intimidating. With the right knowledge and a little care, you can complete the task quickly and safely. The key is to understand your connector type, go slowly, and protect your windshield with a towel.
Remember that proper wiper maintenance is an essential part of keeping your vehicle in good shape. Clean blades, correct size, and proper installation all contribute to better visibility and safer driving. Whether you are a seasoned DIYer or tackling your first car maintenance task, this guide gives you everything you need to succeed.
Take a few minutes to familiarize yourself with your wiper system now. When the time comes to actually remove or replace your blades, you will be glad you did the homework. Your windshield — and your wallet — will thank you.
Frequently Asked Questions
Can I remove my windshield wipers by hand without any tools?
Yes, in most cases you can remove windshield wipers entirely by hand. The connector release mechanism is designed to be operated without tools. You simply need to locate the release tab, button, or lever and follow the proper steps for your connector type. A soft towel and a pair of gloves are the only extras you might want.
What happens if I accidentally break the wiper arm while removing the blade?
Breaking a wiper arm is uncommon if you follow the proper steps, but it can happen if you apply too much force. If the arm breaks, you will need to replace the entire wiper arm assembly. This is more involved than a blade replacement but is still a manageable DIY fix for most vehicle models. Consult your owner’s manual for specific instructions.
How do I know which wiper size I need for my vehicle?
Your vehicle owner’s manual lists the correct wiper size for both the driver and passenger sides. You can also check the packaging of your current wiper blades or look up the size online using your vehicle’s make, model, and year. Using the correct wiper size ensures proper coverage and prevents streaking.
Is it safe to remove windshield wipers during winter?
Yes, removing wipers during winter is a common practice that many drivers follow. It prevents the blades from freezing to the windshield and reduces rubber wear caused by ice. Just be sure to lower the arm back gently and store the removed blades in a safe place indoors.
Can I reuse my old wiper blades after removing them?
It depends on the condition of the blades. If the rubber is still in good shape with no cracking or tearing, you can reinstall them. However, worn blades will not perform well even if you reattach them. It is generally best to replace blades that show visible signs of wear.
How often should I replace my windshield wiper blades?
Most automotive experts recommend replacing wiper blades every six to twelve months. Factors like climate, frequency of use, and exposure to sunlight all affect blade longevity. If you notice streaking, skipping, or squeaking, it is time for a replacement regardless of the timeline.
=== CONCLUSION ===
Removing your windshield wipers without damage is a straightforward task that anyone can master with the right guidance. You now know how to identify your connector type, use the proper removal technique, avoid common mistakes, and reinstall your blades correctly. These skills come in handy whether you are replacing worn blades, cleaning your windshield, or preparing your car for winter storage.
Remember the essentials: go slow, use a protective towel, never force the connector, and always lower the arm back down gently. These simple habits protect your windshield, your wiper arms, and your wallet. With regular wiper maintenance and timely blade replacements, you will enjoy clear visibility and safe driving in all weather conditions.