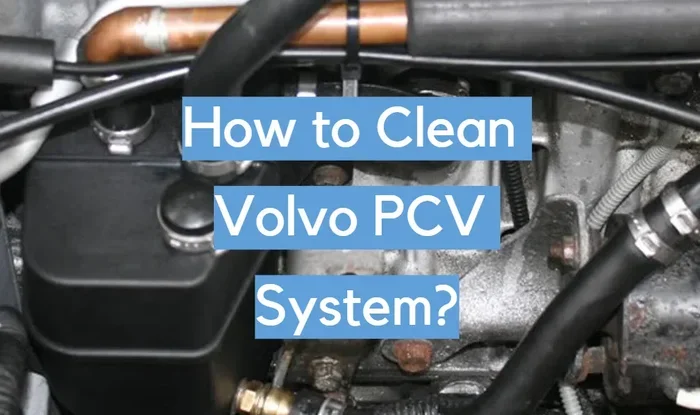
How to Clean the Volvo PCV System Step by Step Guide
Keeping your Volvo PCV system clean is essential for engine health and performance. This step-by-step guide walks you through the entire cleaning process, from gathering tools to reassembly. You will learn how to identify clogs, clean each component properly, and prevent future buildup.
Your Volvo is built to last, but even the best engines need regular care. One part that often gets overlooked is the PCV system. Short for Positive Crankcase Ventilation, this system handles gases that escape from your engine’s crankcase. When it gets clogged, your car can develop serious problems. If you have been wondering how to clean the Volvo PCV system, you are in the right place.
This guide breaks down the entire process into simple, easy-to-follow steps. You do not need to be a mechanic to handle this job. With the right tools and a little patience, you can keep your Volvo engine running like new. Let us dive in and walk through everything you need to know.
Key Takeaways
- Regular PCV cleaning prevents engine damage: A clogged system can cause oil leaks, rough idle, and reduced fuel economy.
- You can do this at home: Basic tools and about an hour of time are all you need.
- Know the warning signs: Excessive smoke, oil consumption, and check engine lights often point to PCV issues.
- Prevention is key: Simple maintenance habits can extend the life of your PCV system significantly.
- Replace worn parts when needed: Cleaning helps, but some components may need full replacement over time.
- Follow the steps carefully: Rushing the process can lead to leaks or improper reassembly.
📑 Table of Contents
Understanding the Volvo PCV System
Before you start cleaning, it helps to understand what the PCV system does. Many Volvo owners skip this step, but knowing how the system works makes the job much easier. The PCV valve is the heart of this system. It routes crankcase gases back into the intake manifold. From there, those gases get burned in the combustion chamber.
This process does two important things. First, it prevents pressure from building up inside the crankcase. Second, it reduces harmful emissions. When the system works well, your engine performance stays strong and your oil stays cleaner longer.
What Happens When the PCV System Gets Clogged
Over time, oil residue and oil sludge build up inside the PCV components. This gunk sticks to the valve, hoses, and separator. As it accumulates, airflow gets restricted. The crankcase pressure starts to rise, which causes a chain of problems.
A clogged PCV valve can lead to oil leaks, rough idle, and even engine oil consumption issues. Some drivers notice their car idling unevenly or see blue smoke from the exhaust. If you have experienced any of these symptoms, a dirty PCV system is a likely culprit.
It is also worth noting that a blocked PCV system can sometimes cause issues that look like bigger problems. For example, excessive crankcase pressure can blow out your valve cover gasket. This leads to oil leaks that might send you running to the mechanic unnecessarily. Keeping the system clean saves you money and headaches.
One thing to keep in mind is that Volvo maintenance schedules do not always list PCV cleaning as a required service. That does not mean you should skip it. Many owners only discover the problem once symptoms become obvious. Staying proactive is always the better approach.
Common Warning Signs of a Dirty PCV System
How do you know it is time to clean your PCV system? Watch for these signs:
- Excessive blue or white smoke from the exhaust
- Oil leaks around the valve cover or gaskets
- Rough or uneven idle
- Increased oil consumption between changes
- Check engine light coming on
- Sluggish engine performance or hesitation
- Oil smell coming from the engine bay
If you notice any of these issues, it is a good idea to inspect your PCV system. Sometimes the problem is as simple as a clogged hose. Other times, the valve itself may be stuck. Either way, cleaning the system often resolves the issue.
Some of these symptoms overlap with other engine problems. For instance, if your car is not starting but the battery is fine, you might want to check the PCV valve as part of your diagnostic process. A stuck-open PCV valve can create a vacuum leak that disrupts the air-fuel mixture. This can make starting difficult.
Tools and Materials You Will Need
Gathering everything before you start makes the job much smoother. You do not need anything fancy or expensive. Here is what you will need:
- PCV valve cleaner or carburetor cleaner spray
- A set of basic wrenches and screwdrivers
- Clean rags or shop towels
- A small container for catching fluid
- Compressed air or a hand pump
- Replacement PCV valve (if needed)
- New hose clamps (optional but recommended)
- Safety gloves and eye protection
Having all your tools ready before you begin saves time and frustration. You do not want to be halfway through the job and realize you are missing something. Also, make sure you work in a well-ventilated area. The cleaning solvents can produce strong fumes, so open your garage door or work outdoors if possible.
Pro tip: Take photos of the PCV system before you disconnect anything. This makes reassembly much easier, especially if you are not familiar with the layout of your specific Volvo model. A few pictures on your phone can save you a lot of confusion later.
Step-by-Step Cleaning Process
Now for the main event. Here is exactly how to clean the Volvo PCV system from start to finish. Follow each step carefully and do not rush through the process.
Step 1: Locate the PCV Components
Open your hood and find the valve cover. The PCV valve is usually attached to the top or side of the valve cover. Follow the rubber hose connected to it. This hose routes the crankcase gases toward the intake manifold. On most Volvo models, you will also find an oil separator nearby. This component catches oil mist before it enters the intake system.
Take your time locating every part of the system. Different Volvo models may have slightly different layouts. Look for the breather hose, the PCV valve housing, and any connecting lines. If you are unsure, consult your owner’s manual or a Volvo diagnostic guide for your specific model year.
Step 2: Remove the PCV Valve and Hoses
Once you have identified all the parts, it is time to disconnect them. Start by carefully removing the hose clamps that secure the rubber hoses. Gently pull the hoses off the fittings. Be careful not to crack or tear any brittle rubber, especially on older Volvos.
Next, unscrew or pull out the PCV valve. It usually twists out or lifts straight up from its housing. Set aside all the parts in an organized way. Placing them on a clean rag in the order you removed them helps during reassembly.
At this stage, you should also check the breather hose for any cracks or damage. If the hose is worn, it is a good idea to replace it while you are at it. A new hose costs very little and prevents future problems.
Step 3: Clean Each Component Thoroughly
This is the most important step. Each piece needs individual attention. Start with the PCV valve. Spray carburetor cleaner into both ends and shake out any loose debris. If the valve is stuck open or closed, try working it back and forth while spraying. Sometimes the tiny passage inside gets completely blocked by oil sludge.
For the hoses, spray cleaner inside them and use compressed air to blow out any remaining residue. Hold each hose up to the light and check for blockages. If you cannot see light through the hose, it is too far gone and should be replaced.
The oil separator also needs a good cleaning. Remove any accumulated oil and sludge from the inside. Use a clean rag to wipe down all surfaces. If your separator has a filter element, check whether it is reusable or disposable. Some filters need replacing rather than cleaning.
Let all the parts dry completely before moving to the next step. This is important because moisture can mix with remaining oil residue and create new buildup faster. Give it at least 15 to 20 minutes in a dry, well-ventilated spot.
Step 4: Reassemble and Test the System
Once everything is clean and dry, it is time to put it all back together. Start by reinstalling the PCV valve into its housing. Make sure it seats properly and moves freely. Reconnect all the hoses and tighten the clamps securely.
Do not overtighten the clamps, especially on rubber fittings. Tighten just enough to create a snug seal without cracking the material. Double-check every connection before you start the engine.
Start your Volvo and let it idle for a few minutes. Listen for any unusual sounds, such as hissing or whistling, which could indicate a vacuum leak. Check under the hood for any fresh oil leaks. Take a short test drive and pay attention to how the engine feels.
If everything sounds smooth and the idle feels steady, you have done the job correctly. Your engine performance should feel noticeably better after a clean PCV system. Many owners report improved throttle response and a smoother ride right away.
Keep in mind that if you notice persistent issues after cleaning, there may be other underlying problems. Sometimes a clogged PCV system is a symptom of a larger issue, such as worn piston rings or a failing valve cover gasket. In those cases, a professional inspection is worth the investment.
Preventing Future PCV System Buildup
Cleaning your PCV system is only half the battle. The other half is preventing buildup from happening again too quickly. A few simple habits can go a long way in protecting your Volvo engine care routine.
Regular Maintenance Tips
- Change your engine oil on schedule using the recommended grade
- Check the PCV valve during every oil change
- Inspect hoses for cracks or wear at least twice a year
- Avoid prolonged idling, which increases oil residue buildup
- Use high-quality oil that resists sludge formation
- Keep up with your Volvo maintenance schedule
Oil quality matters more than many people realize. Cheap or incorrect oil breaks down faster and produces more sludge. This sludge is the main enemy of your PCV system. Investing in quality oil and filters pays off in the long run.
Another helpful habit is to give your engine a brief warm-up drive regularly. Short trips around the neighborhood do not always allow the engine to reach full operating temperature. This can cause moisture and fuel to mix with the oil, accelerating sludge formation. A longer drive once or twice a week helps burn off these contaminants.
When to Replace vs. Clean
Not every PCV component can be saved through cleaning. Here is a simple way to decide:
- Clean: PCV valve (if not stuck or damaged), rubber hoses (if not cracked), oil separator housing
- Replace: Cracked or brittle hoses, stuck valves that do not move, clogged oil separator filters, worn gaskets
A good rule of thumb is that if a part looks damaged or does not function properly after cleaning, replace it. A new PCV valve costs very little compared to the engine damage a faulty one can cause. Do not try to save a few dollars at the expense of your engine’s health.
It is also important to know that some Volvo models are more prone to PCV issues than others. Older Volvos with higher mileage tend to develop more buildup. If you drive a high-mileage Volvo, consider inspecting the PCV system every 30,000 miles as a preventive measure.
Common Mistakes to Avoid
Even with the best intentions, people make mistakes when cleaning their PCV system. Here are some pitfalls to watch out for:
- Skipping the oil separator: Many people focus only on the valve and forget the separator. This is a mistake because the separator catches a lot of the sludge that causes clogs.
- Using too much cleaning solvent: More is not better. Excess solvent can leave residue that worsens the problem.
- Reusing damaged hoses: A cracked hose will leak and defeat the purpose of cleaning. Always replace compromised rubber.
- Not checking for vacuum leaks after reassembly: A loose connection can cause the same symptoms you were trying to fix.
- Ignoring other symptoms: If cleaning the PCV system does not solve your problem, there may be another issue. A dirty cabin filter can sometimes mimic PCV symptoms by restricting airflow, so do not assume it is always the PCV system.
Another common mistake is rushing the drying process. People often reassemble parts that are still damp, which leads to rapid buildup again. Take the time to let everything dry fully. Patience is your best friend in this job.
One more thing to watch out for: do not confuse a PCV issue with other engine problems. For example, if you notice your engine oil level showing low on the dashboard, it could be related to a PCV leak or it could be a separate issue entirely. Always diagnose carefully before assuming the PCV system is the cause.
When to Seek Professional Help
Most drivers can handle a PCV cleaning as a DIY job. However, there are situations where professional help makes sense. If your Volvo has very high mileage and the engine shows signs of significant wear, a mechanic can provide a deeper inspection. They may find issues like worn piston rings or internal engine damage that cleaning alone cannot fix.
Also, if you have cleaned the PCV system but still experience rough idle, stalling, or excessive oil consumption, it is time to see a professional. These symptoms could point to more serious engine problems that require specialized tools and expertise to diagnose.
Some Volvo owners also prefer having a dealer or certified mechanic handle the job if their vehicle is still under warranty. Always check your warranty terms before performing DIY repairs. In some cases, having a professional do the work protects your warranty coverage.
Final Thoughts
How to clean the Volvo PCV system is a skill every Volvo owner should have in their toolkit. It is a simple job that delivers real results. A clean PCV system means better engine performance, lower oil consumption, and fewer unexpected repairs. The entire process takes about an hour and costs very little in supplies.
Do not wait until problems become severe. Regular PCV maintenance keeps your Volvo running strong for years to come. Whether you are a seasoned DIYer or a first-time home mechanic, this is one job you can confidently tackle. Your engine will thank you for it.
Remember, the key to a healthy Volvo is staying proactive. Clean the PCV system on schedule, watch for warning signs, and never ignore unusual engine behavior. These small habits add up to big savings and a much happier driving experience.
Frequently Asked Questions
How often should I clean my Volvo PCV system?
Most Volvo owners should clean their PCV system every 30,000 to 50,000 miles. However, if you drive in stop-and-go traffic or extreme heat, you may need to clean it more frequently. Regular inspections during oil changes help you stay ahead of buildup.
Can a clogged PCV system cause my Volvo to overheat?
Yes, a severely clogged PCV system can contribute to overheating. When crankcase gases cannot vent properly, excess pressure builds up inside the engine. This pressure can push past gaskets and seals, leading to oil leaks and reduced cooling efficiency. If you notice overheating alongside PCV symptoms, address both issues promptly.
What happens if I ignore a clogged PCV valve?
Ignoring a clogged PCV valve can lead to serious engine problems over time. The buildup of crankcase pressure can blow out gaskets, increase oil consumption, and even damage internal engine components. What starts as a simple cleaning job can turn into an expensive repair if left unattended.
Can I use regular carburetor cleaner to clean PCV parts?
Yes, standard carburetor cleaner works well for cleaning PCV components. It dissolves oil residue and sludge effectively. Just make sure to use it in a well-ventilated area and wear protective gloves. Avoid soaking rubber parts for extended periods, as the solvent can degrade rubber over time.
Is it normal to see a little oil in the PCV valve after cleaning?
A small amount of oil in the PCV valve is normal. The PCV system is designed to carry small amounts of oil vapor back into the intake. However, if you notice a large amount of oil or thick sludge, it may indicate a bigger problem like worn piston rings or a failing oil separator that needs further attention.
Will cleaning the PCV system improve my Volvo’s fuel economy?
Yes, cleaning the PCV system can improve fuel economy. A clogged PCV system creates a vacuum leak that disrupts the air-fuel mixture. This causes the engine to run less efficiently and burn more fuel. After a thorough cleaning, many owners notice smoother idle and better fuel mileage within a few weeks.