How Do I Change the Time on My Control Panel Quickly
Changing the time on your control panel is easier than you think. Whether you drive a Toyota, Ford, or BMW, this guide walks you through every step. You will learn how to adjust the clock on modern infotainment systems and older dashboard displays. We also cover troubleshooting tips and brand-specific instructions. By the end, you will know exactly how to set the time on any vehicle control panel in minutes.
Have you ever jumped into your car and noticed the clock on your dash is wrong? Maybe you just moved to a new time zone or your battery died over the weekend. Whatever the reason, knowing how do I change the time on my control panel is a basic skill every driver should have. The good news is that it is usually a quick and painless process. You do not need to be a mechanic or a tech expert to get it done.
Your vehicle’s control panel is the hub for many important settings. The clock is just one of them. From the dashboard display to the infotainment screen, every car handles time settings a little differently. But the core steps are similar across most makes and models. In this guide, we will break everything down into simple, easy-to-follow steps. You will also find brand-specific tips, troubleshooting advice, and expert recommendations to keep your car clock running accurately.
We have organized this article so you can jump straight to the section that applies to your vehicle. Whether you drive a sedan, SUV, or truck, you will find the information you need. Let us get started and fix that clock once and for all.
Key Takeaways
- Quick Access: Most vehicles let you change the time on my control panel in under five minutes through simple menu navigation.
- Brand Differences: Toyota, Honda, Ford, and European brands each have unique steps for adjusting the dashboard clock.
- Two Formats Available: You can switch between 12-hour and 24-hour time formats depending on your preference.
- Common Issues Are Fixable: A clock that resets after a battery change or fails to respond usually has a simple solution.
- Auto Sync Is a Game Changer: Many newer vehicles offer automatic time synchronization through GPS or cellular connections.
- Steering Wheel Controls Help: Some cars let you adjust the time directly from the steering wheel without touching the screen.
- Regular Checks Matter: Setting a monthly reminder to verify your car clock keeps it accurate year-round.
📑 Table of Contents
Understanding Your Vehicle Control Panel
What Does the Control Panel Do?
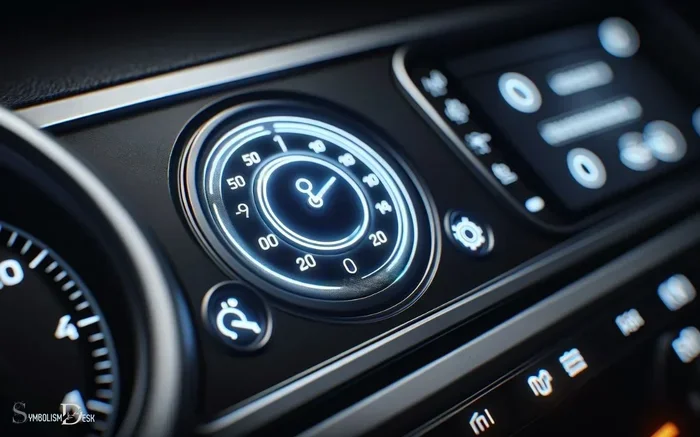
The control panel in your car is more than just a clock. It is the central hub for many vehicle settings and displays. You use it to check your fuel level, adjust the radio, set the temperature, and yes, manage the time display. In modern vehicles, the control panel often connects to the infotainment system. This means your clock settings may be tied to navigation, phone pairing, and even safety features.
Older vehicles tend to have simpler digital or analog clocks on the dashboard. These usually require pressing a single button or turning a knob to adjust the time. Newer vehicles with touchscreen displays offer more options but can feel a bit overwhelming at first. The key is knowing where to look and what buttons to press.
Why Accurate Time Matters in Your Car
You might wonder why the clock on your dash matters so much. Well, it does more than just tell you the time. Your vehicle’s clock syncs with features like navigation systems, trip logs, and even maintenance reminders. If the time is off, these features may not work correctly. For example, your GPS might give you wrong arrival estimates. Your service reminders could pop up at the wrong time. Keeping your dashboard time display accurate ensures everything in your car works as it should.
Additionally, some insurance systems and telematics devices track driving behavior based on timestamps. An incorrect clock could lead to inaccurate data. So setting the right time is not just about convenience. It is about making sure your entire vehicle system runs smoothly.
How Do I Change the Time on My Control Panel
For Modern Infotainment Systems
If your car has a touchscreen or digital infotainment system, changing the time is usually straightforward. Start by pressing the Settings button on your dashboard or screen. Look for a menu option labeled Clock, Time, or Date and Time. Once you find it, tap on the time display. A keypad or rotating dial should appear, letting you adjust the hours and minutes.
Most modern systems also let you choose between 12-hour and 24-hour formats. You may find options for auto-sync as well. This feature uses GPS or cellular data to set the correct time automatically. If your vehicle has this option, we recommend turning it on. It saves you the hassle of manual adjustments every time the seasons change or you cross time zones.
Here are the general steps for most infotainment systems:
- Press the Settings or Menu button on your screen.
- Navigate to the Clock or Time section.
- Select the current time to edit it.
- Use the up and down arrows or touch the digits to change the hours and minutes.
- Choose your preferred time format (12-hour or 24-hour).
- Tap Save or Confirm to lock in your changes.
For Traditional Dashboard Clocks
Older vehicles without touchscreen displays use a different approach. The clock is usually located on the instrument cluster behind the steering wheel. To adjust it, you typically need to press and hold a button labeled Clock, Time, or Set. While holding the button, use the arrow buttons or a knob to change the hours and minutes.
Some older models have a separate reset button that holds the clock steady while you adjust the numbers. If your car has this setup, press and hold the reset button first, then use the adjustment controls. Release the reset button once you have set the correct time.
For vehicles with analog clocks (the kind with actual hands), you usually need to remove a small cover on the clock face. Behind it, you will find a tiny knob or screw that you can turn to move the hands. This process takes a little more patience, but it works just as well.
Using Steering Wheel Controls
Many newer vehicles come equipped with steering wheel controls that let you adjust the time without taking your hands off the wheel. Look for a button labeled Menu, Settings, or Clock on the left or right steering wheel spokes. Press it, and use the up and down or left and right arrows to navigate to the clock settings.
This method is especially handy when you are stopped at a light or in a parking lot. It is quick, safe, and does not require you to touch the dashboard screen. Check your vehicle owner’s manual to confirm which steering wheel buttons control the clock on your specific model.
Step-by-Step Instructions for Popular Car Brands
Toyota and Honda Models
Toyota and Honda vehicles are among the most popular on the road, and their clock-setting processes are quite similar. For most Toyota models, you start by pressing the Menu button on the audio system. Scroll to the Clock option and press Enter. Use the tune knob or arrow buttons to adjust the time. Press the Source or Menu button again to save your changes.
Honda vehicles follow a similar pattern. Press the Menu button on the infotainment screen. Navigate to Setup and then select Clock. Use the volume knob to scroll through the hours and minutes. Press the Enter or Source button to confirm. Both brands make it easy to switch between 12-hour and 24-hour formats in the same menu.
If your Toyota or Honda has a multi-information display on the instrument cluster, you may also be able to adjust the time by pressing the Trip button on the steering wheel. Scroll through the options until you find Clock, then use the reset or arrow buttons to make changes.
Ford and Chevrolet Models
Ford vehicles with the SYNC system offer a slightly different approach. Tap the Settings icon on your touchscreen. Select the Time and Date option. You can either manually enter the time or toggle the Auto-Set feature if your vehicle has GPS capabilities. Use the on-screen keypad or the tuning dial to make adjustments. Tap Save when you are done.
Chevrolet vehicles with the MyLink or Infotainment 3 system follow a similar process. Press the Phone or Settings button on the touchscreen. Look for the Clock or Time and Date option. Use the touch screen or the steering wheel controls to navigate and adjust. Chevrolet also offers a convenient auto-sync feature on many models that connects to your phone’s time settings automatically.
For older Ford and Chevrolet models without touchscreens, look for the Clock button on the audio head unit. Press and hold it, then use the seek or tune buttons to change the time. Release the Clock button once the correct time appears.
European Brands Like BMW and Mercedes-Benz
BMW and Mercedes-Benz vehicles are known for their advanced technology, and their clock-setting processes reflect that. In BMW models, press the Menu button on the iDrive controller. Navigate to Settings and then select Time and Date. Use the iDrive knob to scroll through the options and make adjustments. BMW vehicles often include a time zone setting that automatically updates the clock based on your location.
Mercedes-Benz vehicles use the MBUX system. Tap the Settings icon on the touchscreen. Go to the Vehicle or Display section and select Time and Date. You can adjust the time manually or enable the automatic sync feature. Mercedes also lets you set your preferred time format and choose whether the clock follows your phone’s time settings through Bluetooth pairing.
Both brands offer voice commands as well. You can simply say, “Set the time to 3:30 PM” and the system will adjust the clock for you. This is one of the easiest ways to change the time on my control panel if your vehicle supports voice activation.
Setting the Right Time Format
12-Hour vs 24-Hour Format
One of the first decisions you will make when adjusting your car clock is choosing between 12-hour and 24-hour format. The 12-hour format uses AM and PM to distinguish between morning and afternoon hours. The 24-hour format runs from 00:00 to 23:59 without AM or PM indicators. Both formats display the same time, just in different ways.
Most drivers in the United States prefer the 12-hour format because it is what they see on their phones and wall clocks. However, the 24-hour format is common in many other countries and can be useful for avoiding AM/PM confusion. You can switch between the two formats in your vehicle’s clock settings menu. Look for an option labeled Time Format, Display Format, or similar.
Changing the format is usually a single tap or button press. Once you select your preferred format, the clock display will update immediately. This small change can make a big difference in how easily you read the time while driving.
Adjusting for AM and PM
If you are using the 12-hour format, make sure you set the correct AM or PM indicator. It is an easy mistake to make, especially when adjusting the time late at night or early in the morning. If your clock shows 7:00 PM when it is actually 7:00 AM, your GPS arrival times and trip logs will be completely off.
To avoid this, always double-check your AM or PM setting after making any time adjustment. Some vehicles display AM or PM next to the clock on the dashboard. Others show it only in the settings menu. If you are unsure, compare your car clock to your phone or watch to confirm the correct setting.
Troubleshooting Common Time Issues
Clock Resets After Battery Change
This is one of the most common issues car owners face. When you disconnect or replace your car battery, the clock often resets to a default time, usually 12:00. This happens because the clock relies on a small backup battery or a memory capacitor to retain its settings. When the main battery is removed, this power source drains quickly, causing the clock to forget the correct time.
The fix is simple. Just follow the steps in your vehicle’s manual to reset the clock after a battery change. Most vehicles let you adjust the time in under two minutes. If your clock keeps resetting even without a battery change, the backup battery inside the infotainment unit may need replacement. This is a quick and affordable fix that a mechanic or dealership can handle for you.
Control Panel Not Responding
Sometimes you press the clock button and nothing happens. Before you panic, try a few simple fixes. First, make sure your vehicle is in Park or the ignition is turned on. Many clock adjustment features only work when the engine is running or the accessory mode is active. If that does not help, try turning the infotainment system off and back on. A simple reboot often resolves unresponsive controls.
If the screen is frozen, you can try a hard reset. Locate the reset button on the infotainment unit (it is usually a small pinhole on the face of the unit). Press it with a paperclip or a SIM ejector tool. The system will restart, and the clock settings should become accessible again.
Time Zone Problems
If you have moved to a new time zone or traveled across state lines, your car clock may be out of sync. Most modern vehicles with GPS can detect your location and adjust the time zone automatically. If yours does not, you will need to change the time zone setting manually.
Go to your vehicle’s Settings menu, find the Time Zone option, and select your current zone. The clock should update immediately. If you frequently travel between time zones, consider enabling the auto-sync feature. This allows your vehicle to adjust the clock based on GPS location, saving you the hassle of manual changes every time you cross a border.
Expert Tips to Keep Your Car Clock Accurate
Auto Sync Features Worth Enabling
Many newer vehicles come with auto-sync features that connect your car clock to your phone, GPS, or cellular network. These features are incredibly convenient and take the guesswork out of time management. When auto-sync is enabled, your vehicle automatically adjusts for daylight saving time, time zone changes, and even network time updates.
To enable auto-sync, go to your vehicle’s Settings menu and look for Time Sync, Auto-Set, or Connected Time. Follow the prompts to connect your phone or GPS system. Once enabled, you rarely have to think about adjusting the clock again. It works silently in the background, keeping your dashboard time accurate at all times.
When to Seek Professional Help
In most cases, adjusting your car clock is a DIY task. But there are times when professional help is the right call. If your clock consistently loses or gains time, the internal clock chip may be malfunctioning. If the control panel freezes every time you try to access clock settings, there could be a deeper software issue. And if your clock resets every time you turn off the engine, the backup battery or capacitor may need replacement.
These issues are not something you need to struggle with on your own. A qualified mechanic or dealership technician can diagnose and fix the problem quickly. They have access to specialized diagnostic tools and manufacturer-specific software that can resolve even the most stubborn clock issues. Do not hesitate to seek help if the problem persists after trying the basic troubleshooting steps.
Final Thoughts
Knowing how do I change the time on my control panel is a small but valuable skill for every driver. Whether you have a modern infotainment system or a simple dashboard clock, the process is straightforward once you know where to look. We have covered the general steps, brand-specific instructions, troubleshooting tips, and expert recommendations to help you get it right every time.
Take a few minutes today to check and adjust your car clock if needed. It only takes a couple of minutes and can make a real difference in how your vehicle’s systems perform. From accurate GPS directions to reliable maintenance reminders, a correctly set clock keeps everything running smoothly. Keep this guide bookmarked for future reference, and you will never have to worry about a wrong car clock again.
Remember, your vehicle’s control panel is designed to be user-friendly. The time-setting process may vary slightly from one model to another, but the basic principles remain the same. With the steps and tips in this article, you have everything you need to master your car clock settings. Drive confidently knowing your dashboard is displaying the correct time.
Frequently Asked Questions
Can I change the time on my control panel without turning on the engine?
In most vehicles, you need the ignition in accessory mode or the engine running to access clock settings. However, some newer models with touchscreen displays allow limited menu access even when the vehicle is off. Check your owner’s manual for specific guidance on your vehicle model.
Why does my car clock keep resetting to 12:00?
This usually happens when the backup battery or memory capacitor in your vehicle has died or is weak. It is a common issue after a battery replacement or if the car sits unused for a long time. Replacing the small backup battery inside the infotainment unit or clock module typically fixes the problem permanently.
How do I switch my car clock from 12-hour to 24-hour format?
Go to your vehicle’s Settings menu, find the Clock or Time section, and look for a Time Format or Display Format option. Select 24-hour format and confirm your choice. The change takes effect immediately on your dashboard display.
Does changing the time on my control panel affect any other vehicle settings?
Generally, no. Changing the clock only affects the time display. However, if your vehicle syncs the clock with GPS, navigation, or phone features, those systems will also update to reflect the new time. This is actually helpful for keeping all your vehicle systems aligned.
Can I use my phone to set the time on my car’s control panel?
Some vehicles with Bluetooth or app connectivity allow you to sync your car clock with your phone’s time settings. Check your infotainment system’s Settings menu for options like Phone Sync, Auto Time, or Connected Time. Not all vehicles support this feature, but many newer models do.
What should I do if my control panel clock is stuck and will not change?
First, try restarting the infotainment system by holding the power button for 10 to 15 seconds. If that does not work, perform a hard reset using the small reset button on the unit. If the clock is still unresponsive, there may be a software or hardware issue that requires professional diagnosis from a mechanic or dealership technician.