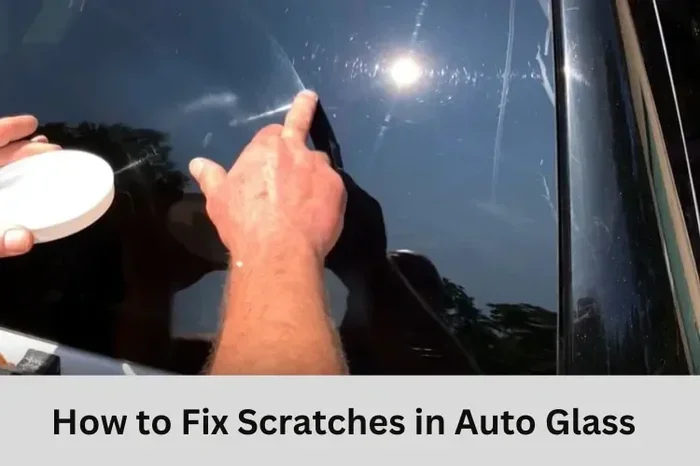
How to Remove Scratches From Car Glass Safely Today
Learning how to Remove Scratches From Car Glass is easier than most drivers think. With the right tools and a little patience, you can restore your windshield clarity at home using simple methods like the toothpaste technique or cerium oxide polishing. This guide covers everything from identifying scratch depth to preventing future damage, so your car glass stays clear and safe for years to come.
There is nothing more frustrating than looking at your car and seeing a web of scratches on the glass. Whether it is a minor fine scratch from a dirty wiper or a deeper mark from road debris, damaged glass takes away from your car’s look and can even affect visibility. If you have been searching for a way to fix this, you are in the right place. This guide will walk you through everything you need to know about how to Remove Scratches From Car Glass safely and effectively.
Car glass scratches are more common than most people realize. Daily driving exposes your windshield and side windows to dust, sand, gravel, and even harsh weather. Over time, these elements wear down the glass surface. The good news is that not all scratches are permanent. Many can be treated right at home with simple household items or affordable products from your local auto parts store. Whether you are dealing with a single annoying mark or a collection of fine lines, this article has you covered.
Before you grab any product, it is important to understand what you are working with. Not all scratches are the same, and using the wrong method can make things worse. This guide breaks down the types of scratches, the best removal techniques, the tools you need, and how to prevent future damage. By the end, you will feel confident tackling auto glass restoration on your own.
Key Takeaways
- Identify Scratch Depth First: Use a simple fingernail test to determine whether your scratches are surface-level or deep before choosing a removal method.
- DIY Methods Work for Light Damage: Toothpaste, cerium oxide, and scratch repair kits can handle most common scratches on car glass safely at home.
- Use the Right Tools: A microfiber cloth, glass polishing pad, and proper polishing compound make a huge difference in results.
- Prevent Future Scratches: Regular cleaning habits, UV protection, and proper parking can significantly reduce the risk of new scratches on your auto glass.
- Know When to Call a Pro: Deep scratches that catch your fingernail or damage the glass structure need professional attention to avoid safety risks.
- Cost Savings Are Real: DIY scratch removal can save you hundreds compared to professional auto glass repair services for minor damage.
📑 Table of Contents
- Understanding Car Glass Scratches
- Tools and Materials You Will Need
- Step-by-Step Methods to Remove Scratches From Car Glass
- Deep Scratches vs Surface Scratches: Know the Difference
- Preventing Future Scratches on Your Car Glass
- When to Seek Professional Help Instead of DIY
- Common Mistakes to Avoid When Removing Scratches
- Expert Insights on Automotive Glass Care
- Key Takeaways
- Conclusion
Understanding Car Glass Scratches
Not every scratch on your car glass is created equal. Some sit on the surface and are easy to fix. Others go deeper and require more intensive treatment. Understanding the type of scratch you have is the first and most important step in the removal process.
What Causes Scratches on Car Glass
Several everyday things can cause scratches on your car glass. Dirt and dust are the biggest culprits. When you wipe a dusty windshield with a dry cloth, tiny particles act like sandpaper and leave marks behind. Windshield wipers that are worn out or clogged with grime can also scratch the glass surface over time. Parking under trees exposes your glass to falling branches and bird droppings, which are highly acidic and can etch the surface. Road debris like gravel and sand kicked up by other vehicles is another major cause, especially on highways. Even car washes with harsh brushes can leave fine scratches if the equipment is not properly maintained.
How to Test Scratch Depth
Before you start any DIY glass repair, you need to know how deep the scratch goes. The fingernail test is the simplest and most reliable method. Run your fingernail across the scratch. If your nail catches or feels a groove, the scratch is deep and may need professional attention or a stronger removal method. If your nail glides over it smoothly, the scratch is likely surface-level and much easier to treat. You can also try the flashlight test. In a dark room, shine a bright flashlight at a low angle across the glass. Surface scratches will appear faint, while deep scratches will cast a visible shadow. This quick scratch depth test helps you choose the right approach and saves you time and effort.
Tools and Materials You Will Need
Having the right tools makes all the difference when you are working on auto glass restoration. You do not need expensive equipment for most scratch removal jobs, but using proper materials ensures safe and effective results.
Essential Supplies for Scratch Removal
Start with a high-quality microfiber cloth. These cloths are gentle on glass and do not leave lint behind. You will also need a glass polishing pad, which helps distribute the polishing compound evenly across the surface. A good polishing compound is essential for buffing out scratches. Cerium oxide is one of the most popular choices for glass scratch removal because it is specifically designed for this purpose. For lighter scratches, regular white toothpaste can work as a mild abrasive. You should also have a spray bottle filled with clean water and a few cotton swabs for applying products in tight spots. A UV protection spray for glass is a great addition to keep your glass protected after the repair.
Optional Upgrades for Better Results
If you want professional-level results, consider investing in a rotary polisher or a dual-action buffer. These tools make the buffing process faster and more even. A glass scratch remover kit that includes multiple grit levels gives you more control over the process. Some kits also come with a UV flashlight to help you inspect your work. A quality sandpaper assortment designed for glass, such as wet/dry sandpaper in grades 600, 800, and 1000, can be useful for deeper scratches. Just remember that sandpaper should only be used as a last resort and with great care. Always work with water to avoid creating new scratches.
Step-by-Step Methods to Remove Scratches From Car Glass
Now that you know what kind of scratches you are dealing with and have your tools ready, it is time to get to work. Here are three proven methods for how to Remove Scratches From Car Glass at home.
Method One: Using Toothpaste for Light Scratches
The toothpaste method is the easiest and most accessible approach for fine scratches on glass. Regular white toothpaste (not gel) contains mild abrasives that can polish out surface-level marks. Start by cleaning the glass thoroughly with a microfiber cloth and warm soapy water. Dry it completely. Put a small dot of toothpaste on the scratched area. Using a damp microfiber cloth, rub the toothpaste in small circular motions for about 30 seconds. Apply light pressure and keep the cloth moist. Rinse the area with clean water and wipe it dry. Inspect the scratch. If it is still visible, repeat the process a few more times. This method works best on very shallow scratches and should not be used on deep grooves, as it may not be effective and could spread the damage.
Method Two: Cerium Oxide for Deeper Scratches
Cerium oxide is a professional-grade polishing compound that works wonders on deeper scratches. This method is one of the most popular approaches in DIY glass repair and auto glass restoration. Start by mixing cerium oxide powder with water to create a smooth paste. Clean the glass surface thoroughly and make sure it is completely dry. Apply the paste to the scratched area using a glass polishing pad. Use a rotary polisher or hand-buff the area in steady, overlapping circular motions. Keep the pad flat and apply even pressure. Work in small sections about the size of a quarter. Continue for two to three minutes per section. Wipe away the residue with a clean, damp microfiber cloth. Inspect the area and repeat if necessary. Cerium oxide is highly effective and can restore clarity to scratches that toothpaste cannot touch.
Method Three: Scratch Repair Kits for Tough Damage
For stubborn or multiple scratches, a dedicated scratch repair kit is your best bet. These kits are specifically designed for car glass and come with everything you need. Most kits include a polishing compound, application pads, and detailed instructions. Start by reading the instructions that come with your kit carefully. Clean the glass surface and apply the compound using the provided pad. Follow the recommended buffing technique and speed. Most kits work best with a drill attachment or rotary polisher for consistent results. After buffing, clean the area and inspect your progress. Some kits include a UV-cured resin that fills in deeper scratches and hardens to create a smooth surface. This approach is excellent for scratches that have gone beyond the surface but have not compromised the structural integrity of the glass.
Deep Scratches vs Surface Scratches: Know the Difference
Understanding the difference between deep and surface scratches is critical. Treating a deep scratch with a light method will not work and could waste your time. On the other hand, using a heavy-duty compound on a surface scratch might damage the glass unnecessarily.
Identifying Surface-Level Damage
Surface-level scratches only affect the outermost layer of the glass. They do not catch your fingernail and are usually caused by dust, improper cleaning, or minor exposure to debris. These scratches respond well to the toothpaste method or a light application of cerium oxide. The glass structure remains intact, and the repair is purely cosmetic. After treating a surface scratch, applying a UV protection spray for glass can help maintain clarity and add a layer of defense against future damage.
When the Scratch Has Gone Too Deep
Deep scratches penetrate beyond the surface and into the inner layers of the glass. These scratches catch your fingernail and may even feel rough to the touch. They are often caused by impact from rocks, sharp debris, or accidents. Deep scratches on car glass can compromise the structural strength of the windshield, which is a serious safety concern. If a deep scratch is in your line of sight or spreads over time, it is best to seek professional car windshield repair services. Attempting to buff out a deep scratch at home can weaken the glass further and create new problems. A professional can assess whether the glass needs a full replacement or can be safely repaired.
Preventing Future Scratches on Your Car Glass
Once you have restored your glass to a clear, smooth state, you will want to keep it that way. Prevention is always better than cure, especially when it comes to automotive glass care.
Daily Habits That Protect Your Windshield
Simple daily habits can make a big difference. Always use a clean microfiber cloth when wiping your glass. Never wipe a dusty windshield dry. Rinse it with water first to lift particles away before cleaning. Replace your windshield wipers every six to twelve months. Worn wipers leave streaks and can drag dirt across the glass, creating new scratches. Park your car in a garage or covered area whenever possible. This protects the glass from falling branches, bird droppings, and harsh UV rays. Avoid parking under construction sites or near loose gravel. When driving on gravel roads, keep a safe distance from the vehicle ahead of you to reduce debris impact. These small habits add up and keep your glass looking great for longer.
Best Products for Glass Protection
Several products can help you maintain scratch-free auto glass. A ceramic glass coating creates a durable protective layer that repels water, dirt, and minor impacts. UV protection sprays add a barrier against sun damage that can weaken glass over time. Glass sealants are another excellent option. They fill in micro-scratches and create a smooth, hydrophobic surface. Apply these products every few months for best results. Using a quality glass cleaner that is ammonia-free also helps preserve the glass surface and prevents chemical etching.
When to Seek Professional Help Instead of DIY
While DIY methods work for most minor scratches, there are times when professional help is the smarter choice. Knowing when to stop and call an expert can save you money and keep you safe on the road.
Signs You Need a Pro
If a scratch goes all the way through the glass and you can feel it with your fingernail, it is time to see a professional. Scratches that are in your direct line of sight and affect your visibility should never be treated at home. If the scratch is accompanied by cracks or chips, the glass may be structurally compromised. In these situations, car windshield repair or even full replacement may be necessary. Also, if you have tried a DIY method and the scratch is still clearly visible after multiple attempts, a professional has access to industrial-grade tools and compounds that can handle tough damage more effectively.
Cost Considerations for Professional Repair
Professional auto glass restoration typically costs between $50 and $150 for minor scratch repair. Full windshield replacement can range from $200 to $400 depending on your vehicle and location. While these costs are higher than DIY methods, they come with warranties and professional expertise. Many insurance policies cover glass repair, which can reduce or eliminate out-of-pocket costs. Check with your insurance provider before booking a repair. For deep scratches or structural damage, the investment in professional service is well worth the safety and peace of mind it provides.
Common Mistakes to Avoid When Removing Scratches
Even with the best intentions, people make mistakes during the scratch removal process. Avoiding these common errors ensures you do not accidentally damage your glass further.
One of the biggest mistakes is using the wrong abrasive material. Steel wool, harsh scrub pads, and coarse sandpaper can create new scratches and ruin the glass surface. Always use products specifically designed for glass. Another mistake is applying too much pressure while buffing. Heavy pressure does not remove scratches faster. It generates heat that can weaken the glass and create uneven patches. Work with light, steady pressure and let the compound do the work. Skipping the cleaning step is another error many people make. If the glass is not properly cleaned before you start, trapped dirt particles will act as an abrasive and create fresh scratches during the buffing process. Finally, do not attempt to repair cracks alongside scratches. A cracked windshield needs immediate professional attention and should not be treated with DIY scratch removal methods.
Expert Insights on Automotive Glass Care
Professional auto detailers and glass technicians agree that regular maintenance is the key to long-lasting glass clarity. One expert tip is to clean your glass inside and out at least once a week. Interior glass gets overlooked, but oils from your hands and dashboard can build up and create haze over time. Another insider recommendation is to always use a separate cloth for glass cleaning. Using a cloth that was used on your car’s paint can transfer tiny particles that scratch the glass. Experts also suggest applying a rain-repellent treatment after scratch removal. This not only improves visibility in wet conditions but also makes future cleaning easier and less abrasive.
When it comes to buffing scratches, less is more. Professional technicians recommend working in small sections and checking your progress frequently. Over-buffing an area can thin the glass and reduce its strength. If you are using a rotary polisher, keep the speed below 2000 RPM and never stay in one spot for more than a few seconds. These small precautions go a long way in preserving the integrity of your auto glass while achieving a smooth, clear finish.
Key Takeaways
- Start With a Scratch Depth Test: Always check whether your scratches are surface-level or deep before choosing a removal method. This prevents wasted effort and potential damage.
- Use the Right Method for Each Scratch Type: Toothpaste works for fine scratches, cerium oxide handles moderate damage, and scratch repair kits tackle tough marks. Match the method to the severity.
- Invest in Quality Tools: A microfiber cloth, glass polishing pad, and proper polishing compound are essential for safe and effective results.
- Prevent Future Damage With Good Habits: Regular cleaning, proper wiper maintenance, and smart parking protect your glass from new scratches.
- Know When to Call a Professional: Deep scratches, cracks, and damage in your line of sight need expert attention for safety and lasting results.
- Protect Your Glass After Repair: UV protection sprays and ceramic coatings help maintain clarity and add a durable barrier against future wear.
Conclusion
Learning how to Remove Scratches From Car Glass safely is a valuable skill that saves time, money, and hassle. Whether you are dealing with a few fine scratches from daily driving or deeper marks from road debris, the methods outlined in this guide give you practical options to restore your glass clarity at home. From the simple toothpaste method to professional-grade cerium oxide polishing, there is a solution for every level of damage. The key is to identify the scratch depth first, use the right tools, and work patiently and carefully. Prevention plays an equally important role. By adopting good daily habits and using protective products, you can keep your car glass looking great for years to come. Remember, when scratches are too deep or compromise your safety, do not hesitate to seek professional help. A clear windshield is not just about appearance. It is about keeping you and your passengers safe on every drive.
Frequently Asked Questions
Can I use baking soda to remove scratches from car glass?
Baking soda is a mild abrasive and can work for very light surface scratches. However, it is not as effective as cerium oxide or a dedicated glass polishing compound. Use it only as a temporary fix for minor marks, and always test a small hidden area first to make sure it does not cause further damage.
How long does it take to remove scratches from car glass at home?
The time depends on the depth and number of scratches. Light scratches can be treated in 15 to 30 minutes using the toothpaste method. Deeper scratches that require cerium oxide or a scratch repair kit may take one to two hours, including preparation and buffing time. Patience and careful work always yield better results.
Will removing scratches from car glass affect its strength?
Surface-level scratch removal does not weaken the glass when done correctly. However, aggressive buffing or using the wrong abrasive materials can thin the glass and reduce its structural integrity. Always use products designed for glass, apply light pressure, and avoid over-buffing any single area.
How much does professional car windshield repair cost?
Professional scratch repair typically costs between $50 and $150. Full windshield replacement ranges from $200 to $400. Many insurance policies cover glass repair, so check with your provider. The cost varies based on the extent of the damage and your vehicle model.
Can deep scratches on car glass be completely removed?
Deep scratches that penetrate through the glass surface cannot always be fully removed at home. Professional technicians use industrial-grade equipment and advanced compounds that can significantly reduce the appearance of deep marks. In some cases, a full windshield replacement may be the safest and most effective solution.
How often should I protect my car glass from scratches?
You should apply protective products like ceramic coatings or UV protection sprays every three to six months. Regular cleaning with a microfiber cloth should be done weekly. Replacing windshield wipers every six to twelve months also helps prevent new scratches from forming on your auto glass.