How Do You Remove a Car Seat From the Floor Easily
Removing a car seat from the floor is easier than most people think, and you can do it at home with basic tools and a little patience. This guide walks you through every step, from gathering your equipment to safely lifting the seat out. Whether you need to remove a car seat from the floor for cleaning, replacement, or shipping, you will find clear instructions here.
There are many reasons you might need to remove a car seat from the floor. Maybe you are moving the car, cleaning underneath, or swapping out a damaged seat. Whatever the reason, the process is straightforward once you know what to do.
Many people worry that taking a seat out of the car is complicated or expensive. The truth is, you do not need a mechanic for this job. With the right tools and a bit of guidance, you can pull the seat out in under an hour. This guide will show you exactly how.
We will cover everything from the tools you need to step-by-step instructions. You will also learn about common pitfalls and how to avoid them. By the end, you will feel confident tackling this task on your own.
Key Takeaways
- Basic Tools Are All You Need: A socket wrench, ratchet, and a few common household items are enough to get the job done.
- Disconnect Wiring First: Always unplug any seat wiring harnesses before loosening bolts to avoid damage.
- Watch for Hidden Bolts: Some seats have extra fasteners under trim pieces or carpet that are easy to miss.
- Two People Make It Easier: Car seats are heavy, so having a helper prevents strain and accidents.
- Mark Your Settings: Take photos of the seat position and rail adjustments before removal for easy reinstallation.
- Check Lease Rules: If you lease your car, removing seats may count as a modification, so check your contract first.
📑 Table of Contents
- Why You Might Need to Remove a Car Seat From the Floor
- Tools and Equipment You Will Need
- Step-by-Step Guide to Removing a Car Seat From the Floor
- Common Challenges and How to Overcome Them
- Tips for Reinstalling Your Car Seat
- Safety Precautions You Should Never Skip
- How Seat Removal Differs by Vehicle Type
- When to Call a Professional
- Final Thoughts
Why You Might Need to Remove a Car Seat From the Floor
People remove car seats from the floor for all kinds of reasons. Some are practical, and others are more specific to their situation. Here are the most common ones:
- Deep Cleaning: Over time, crumbs, dirt, and spills build up under the seat. Removing it lets you clean the floor pan thoroughly.
- Seat Replacement: A worn-out or damaged seat needs to come out before you can put a new one in.
- Moving or Transporting: If you are having a car shipped from a dealership, removing heavy seats can reduce weight and make transport safer.
- Custom Modifications: Some car owners want to change the interior layout. This is more common in trucks and custom builds.
- Leasing Considerations: If you lease your vehicle, any structural changes could be a problem. It is worth checking whether you can modify a leased car before you start.
No matter your reason, the removal process follows the same basic steps. The key is to be patient and organized.
Tools and Equipment You Will Need
Before you start, gather everything you need. Having all your tools ready saves time and frustration. You do not need anything fancy, but a few specific items make the job much smoother.
Essential Tools
- Socket wrench set — for loosening the mounting bolts
- Ratchet and extensions — helps reach bolts in tight spaces
- Flathead and Phillips screwdrivers — for clips and trim pieces
- Pliers — useful for pulling clips and small fasteners
- Gloves — protects your hands from sharp edges
- flashlight — you will be working in dark spaces under the seat
Optional but Helpful Items
- A car seat removal tool kit, which includes specialized clips and adapters
- A dolly or hand truck for moving the heavy seat
- Ziploc bags and a marker to label bolts and hardware
- A camera or phone to take photos before you disconnect anything
Having these items ready before you start will make the whole process much faster. You do not want to stop halfway through because you are missing a bolt or a tool.
Step-by-Step Guide to Removing a Car Seat From the Floor
Now let us get into the actual process. Follow these steps carefully, and you will have the seat out in no time.
Step 1: Disconnect the Battery
Before you touch anything, disconnect the car battery. Some seats have electrical components like heaters or sensors. Disconnecting the battery prevents any short circuits or damage. Use a wrench to loosen the negative terminal first and set it aside.
Step 2: Take Photos and Notes
This is a step many people skip, but it is very important. Take clear photos of the seat from all angles. Note where the bolts are and how the wiring connects. These photos will be a huge help when you want to put the seat back in.
Step 3: Unplug the Wiring Harness
Look under the seat for any wiring connectors. These plug into the seat’s electrical system. Press the clip on each connector and gently pull them apart. If you are unsure which wires go where, refer to your photos from the previous step.
Step 4: Remove the Mounting Bolts
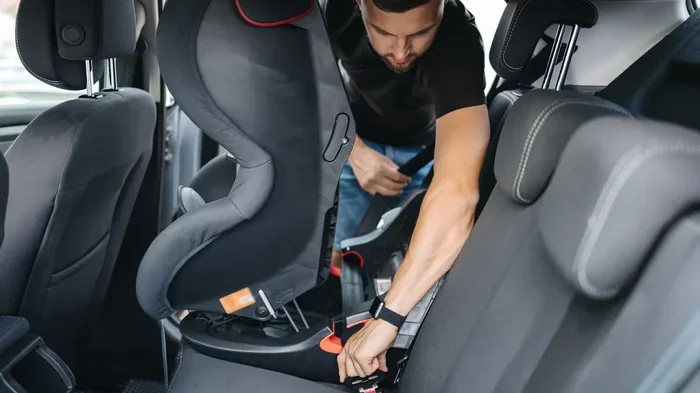
Now it is time to loosen the bolts that hold the seat to the floor. Most cars have four to six bolts. Use your socket wrench to turn them counterclockwise. Some bolts may be different sizes, so keep track of which one goes where.
Tip: Place each bolt in a labeled bag or container. This prevents confusion during reinstallation.
Step 5: Remove the Seat Rails (If Necessary)
Some seats slide on rails attached to the floor pan. If your car has these, you will need to release the rail locks. These are usually lever-style clips on the sides of the rail. Pull the lever and slide the seat forward to free it from the rails.
Step 6: Lift the Seat Out
Car seats are surprisingly heavy. A single seat can weigh between 30 and 50 pounds. Do not try to lift it alone if you can avoid it. Ask a friend to help, or use a dolly to move it safely. Tilt the seat slightly and slide it out through the door opening.
Removing a car seat from the floor does not have to be a struggle. The key is to work slowly and stay organized.
Common Challenges and How to Overcome Them
Even with a clear guide, things do not always go smoothly. Here are some common challenges you might face and how to handle them.
Bolts That Won’t Budge
Rust and corrosion can make bolts very hard to remove. If a bolt is stuck, try spraying it with a penetrating lubricant like WD-40. Let it sit for 15 minutes and try again. Never force a bolt with too much pressure, or you risk snapping it off in the floor pan.
Tight Spaces
Some car models have very tight cabin space. You may struggle to fit your hands and tools around the seat base. A short ratchet extension or a swivel socket can make a big difference in these situations.
Hidden Fasteners
Some seats have extra bolts hidden under carpet strips or plastic covers. Run your hand along the seat base and feel for any covers you need to pop off. Removing these covers often reveals additional fasteners you need to take out first.
Heavy or Awkward Seats
Bucket seats and power seats tend to be heavier than basic bench seats. If you are working alone, place one end of the seat on a sturdy surface like a workbench or tailgate. This lets you slide it out in stages rather than lifting all at once.
Electrical Connectors That Seize Up
In older cars, wiring connectors can become corroded or stuck. Do not pull hard on the wires themselves. Instead, use a small flathead screwdriver to gently release the locking tab on the connector.
If you find that the seat is part of a larger modification plan, keep in mind that modifying a leased car could affect your lease agreement. Always check the terms before making structural changes.
Tips for Reinstalling Your Car Seat
Taking the seat out is only half the job. Putting it back in correctly is just as important. A poorly reinstalled seat can be unsafe in a crash.
- Start with the photos. Use the pictures you took during removal to guide you. They will remind you of bolt positions and wiring connections.
- Clean the floor pan. Before putting the seat back, wipe down the floor pan and remove any debris or old gasket material.
- Reconnect wiring first. Plug in all electrical connectors before lowering the seat into place.
- Hand-tighten bolts first. Get all the bolts started by hand, then tighten them with the wrench. This ensures the seat sits evenly.
- Check the seat rails. Make sure the seat slides smoothly on its rails and locks securely in position.
- Reconnect the battery. Once the seat is fully installed, reconnect the battery and test any electrical features like seat heaters or power adjustments.
Taking your time during reinstallation pays off. A properly secured seat is safer and feels better when you drive.
Safety Precautions You Should Never Skip
Safety should always come first when working on your car. Here are some precautions to keep in mind.
- Work on a flat surface. Never try to remove a seat on a slope or uneven ground. The car could roll.
- Wear safety glasses. Small bolts and debris can fall into your eyes when you are working underneath the car.
- Use jack stands if needed. If you need to access the seat from underneath the vehicle, always support the car on jack stands. Never rely on a jack alone.
- Watch your back. Lifting a heavy seat improperly can cause injury. Bend at the knees and keep your back straight.
- Keep children and pets away. The work area can be hazardous with loose parts and tools on the floor.
- Work in a well-ventilated area. If you are working in a garage, open the door to keep air flowing, especially on hot days when temperatures can climb quickly.
Following these safety tips protects both you and your vehicle. A little caution goes a long way.
How Seat Removal Differs by Vehicle Type
Not all cars are the same when it comes to seat removal. The process can vary depending on the type of vehicle you drive.
Sedans
Most sedans have straightforward seat removal. The front seats typically have four to six bolts, and the rear seats may have additional brackets. Sedan seats are generally lighter and easier to handle than those in larger vehicles.
SUVs and Trucks
SUVs and trucks often have heavier seats and more complex mounting systems. Some truck seats slide on power rails with additional electrical connections. The second-row seats in SUVs may also fold down, which can give you better access to the floor area. If you are working on a truck, the vinyl wrap on the truck floor might need protection while you work to keep the interior clean.
Hybrid and Electric Vehicles
Hybrid and electric vehicles sometimes have high-voltage wiring near the seat base. Always check your owner’s manual before disconnecting anything. If you are unsure, consult a professional to avoid electrical hazards.
Understanding your specific vehicle model helps you prepare for any unique challenges. Check your owner’s manual for the seat removal section if your car has one.
When to Call a Professional
Most people can remove a car seat on their own. But there are times when it makes sense to get help. If you notice any of the following, consider calling a mechanic:
- The seat mounting points are severely rusted or damaged
- You cannot find the mounting bolts
- The seat has complex airbag wiring you are not comfortable disconnecting
- You are working on a hybrid or electric vehicle with high-voltage components
Professionals have the experience and tools to handle tricky situations safely. There is no shame in asking for help when you need it.
Final Thoughts
Removing a car seat from the floor is a task most car owners can handle themselves with basic tools and a little patience. The process is not complicated, and the satisfaction of doing it yourself is well worth the effort. You save money, learn something new, and gain confidence in working on your vehicle.
Remember to take your time, stay organized, and follow the safety precautions. Whether you are removing the seat for cleaning, replacement, or transport, this guide gives you everything you need to get the job done right. Now grab your tools and give it a try. You might be surprised how easy it really is.
Frequently Asked Questions
Can I remove a car seat by myself?
Yes, most people can remove a car seat on their own with basic tools like a socket wrench and ratchet. The process is straightforward, but having a helper makes it easier since car seats are heavy. Just take your time and follow each step carefully.
How long does it take to remove a car seat from the floor?
For most cars, the job takes between 30 minutes and one hour. If bolts are rusted or the seat is heavy, it might take a bit longer. Having all your tools ready before you start helps keep the process moving smoothly.
Do I need any special tools to remove a car seat?
No special tools are required. A standard socket wrench set, ratchet, and a few basic hand tools are all you need. Some people find a swivel socket helpful for tight spaces, but it is not essential.
Is it safe to remove the car seat while the battery is still connected?
It is not recommended. Disconnecting the battery first prevents electrical shorts and protects any seat sensors or heating elements. Always remove the negative terminal before starting any work under the seat.
Will removing the car seat void my warranty?
This depends on your warranty terms and the reason for removal. Simple seat removal for cleaning or maintenance usually does not void a warranty. However, if the removal causes damage, it could affect your coverage. Check with your dealer if you are unsure.
Can I ship my car with the seats still in place?
You can, but removing the seats reduces the vehicle’s weight and may lower shipping costs. It also prevents potential damage to the interior during transport. If you are having a car shipped from a dealership, ask them for their recommendations on seat removal before transport.