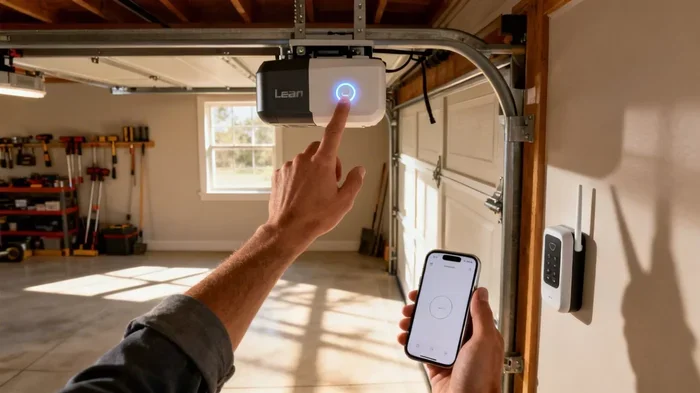
How Do You Code a Garage Door Opener And Get It Right
Learning how to code a garage door opener is easier than most people think. This guide walks you through every step, from finding the learn button to programming your remote and keypad. You will save time and money by handling the coding yourself instead of waiting for a technician. We also cover common mistakes, troubleshooting tips, and expert advice to make the process smooth.
Learning how to code a garage door opener is something every homeowner should know. Whether your remote stopped working or you just bought a new one, the process is simpler than you might expect. This guide covers everything you need to get your garage door opener up and running. You will learn how to program remotes, set up keypads, and fix common problems. By the end, you will feel confident handling the job yourself.
Most people think coding a garage door opener requires a professional. That is not always true. With the right steps, you can save time and money. This article breaks down the entire process into easy-to-follow sections. We also share tips that experts use every day.
If you have ever wondered how do you code a garage door opener, you are in the right place. Let us walk through it together.
Key Takeaways
- Coding your garage door opener is a simple DIY task that saves you money on service calls and waiting time.
- Finding the learn button on the motor unit is the first and most important step in the programming process.
- Universal remotes and keypads offer flexible options for controlling your garage door from multiple access points.
- Signal interference and weak batteries are the two most common reasons coding attempts fail.
- Rolling code technology keeps your garage door security strong by changing the access code every time you use the remote.
- Testing after programming ensures everything works before you rely on the new setup.
- Call a professional if you have an older opener with dip switches or if the motor unit shows no power.
📑 Table of Contents
Why Understanding How Do You Code a Garage Door Opener Matters
Knowing how to program your garage door opener gives you control. You do not have to wait days for a repair person. You also save money on service calls that cost anywhere from 50 to 150 dollars. When you understand the basics, small issues become quick fixes.
The Basics of Garage Door Opener Coding
Garage door opener coding connects your remote or keypad to the motor unit. The motor unit acts as the receiver. Your remote acts as the transmitter. When you press the button, a signal travels to the opener. The opener then activates the door. Modern systems use rolling code technology for added security. This means the code changes every time you use the remote. It keeps your garage door security strong against unauthorized access.
The garage door frequency used by most openers operates on 300 MHz or 310 MHz. Understanding this helps when choosing a replacement remote. Always match the frequency to your existing opener for proper garage door synchronization.
Why Most People Avoid This Task
Many homeowners skip programming because it seems complicated. They worry about pressing the wrong buttons. Some fear they might reset the entire system. In reality, most modern openers have simple learn buttons. The process usually takes less than ten minutes. Once you do it once, it becomes second nature.
Expert Insight: Professional technicians say that 90 percent of garage door remote programming calls are simple fixes homeowners can handle themselves. The only thing you need is patience and the right information.
What You Need Before You Start Coding
Before you begin, gather a few things. Having everything ready makes the process much smoother. Here is what you need to prepare.
Locate Your Garage Door Opener Model Number
Check the back of your motor unit for the model number. Write it down. This number helps you find the right programming instructions. Different brands use different methods. For example, Chamberlain and LiftMaster models often share similar steps. Genie openers may have a slightly different process. Always check your garage door manual for model-specific details.
Knowing your garage door opener model number also helps when buying replacement parts. You want to make sure any new remote or keypad is compatible with your system.
Gather the Right Tools and Information
You will need a few basic items. Here is what to have ready:
- Your new or existing garage door remote
- The garage door opener motor unit
- A ladder to reach the motor unit safely
- Your model number written down
- A fresh battery for the remote
Quick Tips: Always use a fresh battery in your remote before programming. A weak battery causes many failed programming attempts. Also, keep your owner’s manual nearby. It has specific steps for your model.
Step-by-Step Guide on How Do You Code a Garage Door Opener
Now let us walk through the actual coding process. Follow these steps carefully for the best results. How do you code a garage door opener? It starts with finding the right button and ends with a successful test.
Step 1: Find the Learn Button on the Motor Unit
The learn button is the most important part. It is usually on the back of the motor unit. Look for a small red, orange, or purple button. Some models have a square-shaped button. Press it and wait for the indicator light to turn on. This means the opener is ready to receive a new code.
Common Mistakes: Many people hold the learn button too long. A quick press is all you need. Holding it for more than six seconds can reset the entire system. If that happens, just start over from the beginning.
Step 2: Program Your Universal Remote
Once the light is on, pick up your remote. Press and hold the button you want to use. Hold it for about three seconds. The motor unit light should blink or turn off. This confirms the remote has been accepted. Release the button. Press the remote again to test it.
Universal remotes work with most opener brands. Check the packaging for compatibility before buying. Some remotes support multiple doors. This is great for homes with several garage doors. Make sure the garage door remote replacement matches your opener’s frequency for proper garage door synchronization.
Expert Insight: If you are using a universal garage door remote, look for one with auto-search technology. These remotes automatically find the right frequency. They save you from guesswork and make the garage door remote programming process much faster.
Step 3: Set Up the Keypad for Easy Access
Keypads let you enter a code instead of using a remote. They are handy for guests or if you lose your remote. To set one up, follow these steps:
- Enter your PIN on the keypad
- Press the program button
- Enter the manufacturer code (check your manual)
- Press the learn button on the motor unit
- Enter a new PIN on the keypad
- Press the enter button
The keypad light should blink to confirm the connection. Test it by entering your PIN and pressing the send button. This type of garage door keypad setup gives you keyless access and adds convenience to your daily routine.
Step 4: Test Your Garage Door Opener Thoroughly
Testing is the step most people skip. Do not make that mistake. Stand away from the door and press your remote. The door should respond within a few seconds. Try the keypad too. Check the wall control button as well. If anything does not work, repeat the programming steps.
Make sure the garage door safety sensors are aligned properly. These sensors prevent the door from closing on objects or people. Test by placing a box in the door’s path. The door should reverse when it hits the object. This is a critical safety check.
| Opener Type | Programming Method | Time Needed | Difficulty Level |
|---|---|---|---|
| Chamberlain / LiftMaster | Learn button plus remote | 5 to 10 minutes | Easy |
| Genie | Smart switch plus remote | 10 to 15 minutes | Easy |
| Craftsman | Learn button plus PIN | 5 to 10 minutes | Easy |
| Universal Remote | Dip switches or auto-search | 10 to 20 minutes | Medium |
| Keypad Setup | 10 to 15 minutes | Easy |
Common Problems When You Try to Code a Garage Door Opener
Even with clear instructions, problems can happen. Here are the most common issues and how to fix them.
Signal Interference Issues
Sometimes the remote works but the door does not respond. This often happens with signal interference. Other electronics nearby can disrupt the garage door frequency. Microwaves, wireless cameras, and even neighbor’s openers can cause problems. Move any potential interference sources away from the motor unit. Try again from a different spot in your garage.
If you live in a dense neighborhood, interference is more common. Consider upgrading to a opener with enhanced signal range. Newer models use advanced garage door security codes that resist interference better.
The Learn Button Does Not Respond
If pressing the learn button does nothing, try these fixes. First, check that the motor unit has power. Look at the outlet and the circuit breaker. Second, make sure you are pressing the right button. Some units have separate buttons for the door and the light. Third, try unplugging the opener for 30 seconds. Plug it back in and try again. This simple garage door reset often solves the problem.
Common Mistakes: Never rush through the learn button step. Waiting for the indicator light is crucial. If you press the remote too early, the code will not sync properly. Patience is your best friend during this process.
Dip Switch Programming for Older Openers
Older garage door openers use dip switches instead of learn buttons. These small switches on the back of the remote and motor unit must match exactly. Open both the remote and the motor unit housing. Set each dip switch to the same position. This type of garage door manual programming requires more precision but works reliably once set correctly.
Quick Tips: Take a photo of the dip switch positions before changing them. This gives you a reference if you need to reset them later. Also, label your remote with the garage door opener model number so you always know which settings to use.
Expert Tips to Make Coding Easier
Experienced technicians share these tips to make your life easier:
- Always program when the garage door is fully closed. This prevents accidental opening during setup and keeps you safe.
- Write down each step as you go. This helps if you need to repeat the process later or teach someone else.
- Keep a spare remote programmed at all times. It saves you from emergency trips to the store and unexpected lockouts.
- Update your keypad PIN regularly. This keeps your garage door security strong and prevents unauthorized access.
- Clean the learn button contacts with a dry cloth. Dust can prevent proper connection and cause failed programming attempts.
- Check the garage door safety sensors before programming. Misaligned sensors can interfere with the coding process and cause error lights.
Expert Insight: Many pros recommend programming during the daytime. Natural light helps you see the indicator LEDs on the motor unit clearly. It also makes it easier to read small labels on the back of the unit.
When to Call a Professional for Help
Most coding tasks are DIY-friendly. But some situations need expert help. If the motor unit shows no lights at all, there may be a wiring issue. If the door opens but does not close properly, the sensors could be misaligned. Also, call a pro if you have an older opener with dip switches. These older systems can be tricky to program. A trained technician can handle it safely and quickly.
Signs you need professional help include:
- The motor unit makes unusual grinding or humming noises
- The door reverses immediately after closing
- The remote works from far away but not from close range
- The learn button is physically damaged or missing
- You have tried multiple times and the door still does not respond
A professional garage door technician has the tools and experience to handle complex issues. They can also inspect your entire system while they are there. This is a good time to ask about garage door maintenance tips and safety upgrades.
Conclusion
Learning how do you code a garage door opener is a valuable skill for every homeowner. It saves you time, money, and the hassle of waiting for help. You now know how to find the learn button, program remotes, set up keypads, and troubleshoot common issues. With these steps, you can handle most garage door opener coding tasks on your own.
Keep this guide saved for future reference. The next time your remote stops working or you buy a new one, you will know exactly what to do. Practice makes perfect. After your first successful programming session, the process will feel much easier. Take control of your garage door system today and enjoy the convenience of a properly coded opener.
Frequently Asked Questions
How long does it take to code a garage door opener?
Most programming tasks take between five and fifteen minutes. Simple remote programming is usually done in under ten minutes. Keypad setup may take a few extra minutes. The total time depends on your opener brand and the type of device you are programming.
Can I program a garage door remote without a learn button?
Yes, older openers use dip switches instead of learn buttons. You simply match the switch positions on both the remote and the motor unit. Check your owner’s manual for the exact dip switch configuration for your model.
Why does my newly programmed remote not work?
The most common reasons are a weak battery, signal interference, or not waiting long enough for the learn button light to activate. Try replacing the battery first. Then make sure you waited for the indicator light before pressing the remote button.
Is it safe to program a garage door opener myself?
Absolutely. Programming a remote or keypad is a safe and simple process. You are not working with electrical wiring. Just make sure your garage door is fully closed during programming and follow the steps in your manual carefully.
What should I do if I lost all my garage door remotes?
Press the learn button to erase all existing codes from the system. Then reprogram your new remote from scratch. This ensures no unauthorized remotes can access your garage. It is a quick security measure every homeowner should know.
Do I need to reprogram my garage door opener after a power outage?
Usually no. Most modern openers retain their programmed codes even after a power loss. However, if the opener resets to factory settings, you will need to reprogram your remote and keypad. Check your manual for specific instructions on your model.