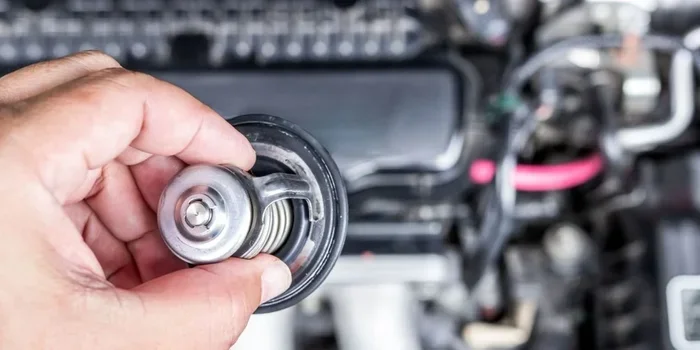
Can I Replace a Car Thermostat Myself at Home Today
Yes, you can replace a car thermostat yourself at home with basic tools and about 30 to 60 minutes of your time. This guide walks you through every step, from spotting bad thermostat symptoms to finishing the install. You will save money, learn a valuable DIY car repair skill, and keep your engine running cool.
Have you ever noticed your temperature gauge acting strange while driving? Maybe your engine runs hot, or it takes forever for the heater to blow warm air. These are classic signs of a failing thermostat. And the good news is that you can fix it yourself.
Many car owners fear DIY repairs. They think it requires a garage full of expensive tools and years of mechanical experience. But replacing a car thermostat is one of the simplest jobs you can tackle at home. It does not matter if you drive a sedan, SUV, or truck. The process is very similar across most vehicles.
In this guide, we will walk you through everything you need to know. You will learn how to spot the symptoms of a bad thermostat. We will cover the tools you need, the step-by-step installation process, and common mistakes to avoid. By the end, you will feel confident enough to do this repair yourself today.
Key Takeaways
- DIY-Friendly Task: Replacing a car thermostat is one of the easiest maintenance jobs you can do at home, even as a beginner.
- Low Cost: A new thermostat costs between $10 and $30, and you can save hundreds compared to a shop visit.
- Quick Repair: Most people finish the job in under an hour with basic hand tools.
- Prevents Engine Damage: Fixing a stuck thermostat early stops serious cooling system problems before they start.
- Common Symptoms: Overheating, erratic temperature gauge readings, and poor heater performance are clear signs your thermostat may be failing.
- Right Tools Matter: Having the correct tools and a compatible replacement part makes the job smooth and stress-free.
📑 Table of Contents
- What Does a Car Thermostat Do?
- How to Spot a Bad Thermostat
- Tools and Parts You Will Need
- Step-by-Step Thermostat Replacement Guide
- Common Mistakes to Avoid
- How Much Does It Cost to Replace a Thermostat?
- When Should You See a Professional Instead?
- How to Prevent Thermostat Problems in the Future
- Final Thoughts
What Does a Car Thermostat Do?
Before you start any repair, it helps to understand what the part actually does. The thermostat is a small valve inside your engine’s cooling system. It controls the flow of coolant through the engine. When the engine is cold, the thermostat stays closed. This lets the engine warm up quickly. Once the engine reaches its normal operating temperature, the thermostat opens up. This allows coolant to flow through the radiator and keep things cool.
Think of it like a door that opens and closes automatically. When your engine needs heat, the door stays shut. When it gets too hot, the door swings open. A working thermostat keeps your engine at the perfect temperature. It balances warmth and cooling all the time.
Why the Thermostat Matters
If your thermostat gets stuck closed, coolant cannot flow. Your engine will overheat fast. If it gets stuck open, the engine never reaches its ideal temperature. You will waste fuel and your heater will blow cold air. Either way, a bad thermostat causes real problems. That is why knowing how to replace a car thermostat yourself is such a handy skill.
How to Spot a Bad Thermostat
Catching the symptoms early saves you from expensive engine damage. A thermostat that fails does not always give loud warnings. Often, it gives subtle signs first. Here are the most common thermostat symptoms to watch for.
Overheating Engine
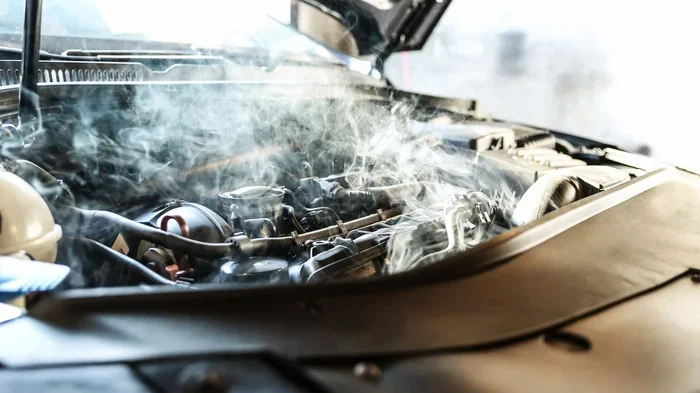
This is the most obvious sign. If your temperature gauge spikes into the red zone, the thermostat may be stuck closed. Coolant is not moving through the system, and heat builds up fast. Pull over safely and let the engine cool down. Driving with an overheated engine can cause warped heads, blown head gaskets, and other costly damage.
Temperature Gauge Reading Erratically
A thermostat that opens and closes randomly causes the temperature gauge to jump around. One minute it reads normal, and the next it climbs high. This erratic behavior means the valve inside the thermostat is not working properly. It is a clear sign you need a thermostat replacement.
Heater Not Working Properly
Your car’s heater uses hot coolant to warm the cabin. If the thermostat is stuck open, the engine never gets hot enough. The heater blows lukewarm or cold air, even on the highest setting. This is an easy-to-miss sign, especially in winter.
Coolant Leaks Near the Thermostat Housing
Over time, the gasket seal around the thermostat can wear out. You may see coolant puddles under your car or notice a sweet smell inside the engine bay. Coolant leaks near the thermostat housing mean the part needs to be replaced, and the gasket should be swapped out too.
Poor Fuel Economy
A thermostat stuck in the open position keeps the engine running too cool. When this happens, your engine computer dumps extra fuel into the mix. You will notice fewer miles per gallon at the pump. This is a subtle sign, but it adds up over time.
Tools and Parts You Will Need
One of the best things about this job is that you do not need fancy equipment. Most people already have the tools at home. Here is your shopping list before you start.
Parts
- New thermostat: Make sure it matches your vehicle’s make, model, and year. You can find the correct part number in your owner’s manual or online.
- Thermostat gasket: This seals the thermostat housing. Always replace it with a new one to prevent leaks.
- Coolant (antifreeze): You may lose some coolant during the repair. Have a gallon of the right type ready.
Tools
- Socket set and wrenches: You need a few sizes to remove the thermostat housing bolts.
- Screwdrivers: Flathead and Phillips head screwdrivers are handy for clamps and covers.
- Drain pan: You will need something to catch the old coolant when you drain it.
- Rag or paper towels: Coolant spills happen. Keep plenty of rags nearby.
- Torque wrench: This helps you tighten the housing bolts to the right specification.
- Safety gloves and glasses: Coolant is toxic and can irritate your skin. Protect yourself.
Quick Tips for Buying the Right Thermostat
Not all thermostats are the same. They come with different temperature ratings. Most cars use a 195°F or 200°F thermostat. Check your owner’s manual to confirm the right rating for your engine. Using the wrong one can cause overheating or poor warming performance. Also, buy from a trusted brand. A quality thermostat lasts longer and performs better than a cheap knockoff.
Step-by-Step Thermostat Replacement Guide
Now for the part you have been waiting for. Here is how to replace a car thermostat yourself at home. Follow these steps carefully, and you will have the job done in no time.
Step 1: Let the Engine Cool Completely
Never work on a hot engine. The cooling system is pressurized, and hot coolant can cause serious burns. Wait at least a few hours after driving, or do the job first thing in the morning before you start the car. Safety always comes first.
Step 2: Drain the Coolant
Place your drain pan under the radiator drain valve. Open the valve and let the coolant flow out completely. Some cars have a drain plug on the radiator. Others require you to remove the lower radiator hose. Check your vehicle’s manual for the best approach. Once drained, close the valve or reattach the hose.
Step 3: Locate the Thermostat
The thermostat sits between the engine and the upper radiator hose. Follow the upper radiator hose from the radiator up to the engine. You will find the thermostat housing there. It is usually held on with two or three bolts. Refer to your vehicle’s repair manual if you are unsure about the exact location.
Step 4: Remove the Thermostat Housing
Use your socket or wrench to remove the bolts holding the housing in place. Carefully lift the housing off. You may need to wiggle it a little. Set the bolts and housing aside in a safe place. Notice the old thermostat sitting inside. Take a mental note of which way it was oriented. This helps during the install.
Step 5: Remove the Old Thermostat
Pull the old thermostat out gently. Clean any old gasket material from the housing and the engine surface. Use a plastic scraper to avoid scratching the metal. A clean surface ensures a proper seal with the new gasket.
Step 6: Install the New Thermostat
Place the new thermostat into the housing. Make sure it faces the correct direction. The spring-loaded valve should point toward the engine. Set the new gasket on top of the housing. Align everything carefully before tightening. A misaligned thermostat can cause the same problems you just fixed.
Step 7: Reinstall the Thermostat Housing
Put the housing back onto the engine and hand-tighten the bolts first. Then use your torque wrench to tighten them to the manufacturer’s specification. Over-tightening can crack the housing, so be gentle but firm.
Step 8: Refill the Coolant
With the housing back in place, it is time to refill the cooling system. Pour in the new coolant slowly. This helps prevent air pockets from forming. Many people bleed the cooling system by loosening a bleed valve or squeezing the upper radiator hose while the engine runs. Check your vehicle’s manual for the specific bleeding procedure.
Step 9: Start the Engine and Test
Start the engine and let it idle. Watch the temperature gauge closely. The thermostat should open once the engine reaches operating temperature. You may see the upper radiator hose get warm as the thermostat opens. Let the engine run until the fan kicks on. Check for any leaks around the housing. If everything looks good, you are done.
Common Mistakes to Avoid
Even simple jobs can go wrong if you skip steps or make careless choices. Here are the most common mistakes people make when replacing a thermostat at home.
Forgetting to Replace the Gasket
Reusing the old gasket is a recipe for leaks. The old gasket is worn and will not seal properly. Always install a new gasket with your replacement thermostat. They cost just a few dollars and save you from a coolant leak later.
Installing the Thermostat Backwards
This sounds obvious, but it happens more than you would think. The thermostat has a specific orientation. The spring side goes toward the engine. If you install it backwards, it will not open and close correctly. Double-check the direction before you tighten everything down.
Not Bleeding the Cooling System
Air pockets in the cooling system cause overheating, even with a new thermostat. Always bleed the system properly after refilling. Some vehicles have a dedicated bleed screw. Others require you to run the engine with the radiator cap off. Taking this extra step makes a big difference.
Using the Wrong Coolant Type
Not all coolants are the same. Mixing different types can cause corrosion and clog your cooling system. Use the coolant type recommended in your owner’s manual. If you are unsure, check with your local auto parts store.
Skipping the Torque Specification
Hand-tightening the thermostat housing bolts might feel good, but it is not enough. Over-tightening can crack the housing or strip the threads. Under-tightening can cause leaks. A torque wrench is a cheap tool that makes a huge difference in the quality of your repair.
How Much Does It Cost to Replace a Thermostat?
One of the biggest advantages of doing this job yourself is the cost savings. When you take your car to a mechanic, you will pay for labor and parts. The thermostat part itself is very affordable. A quality thermostat costs between $10 and $30. The gasket adds another $5 to $10. Coolant refill runs about $15 to $30 for a gallon.
At a repair shop, labor charges can add $100 to $200 to the total. That means you could save $100 or more by doing the work yourself. Over a lifetime of car ownership, learning basic DIY car repair skills like this adds up to real savings.
Here is a quick comparison table to show the cost difference.
| Item | DIY Cost | Shop Cost |
|---|---|---|
| Thermostat | $10 – $30 | Included in labor |
| Gasket | $5 – $10 | Included in labor |
| Coolant | $15 – $30 | Included in labor |
| Labor | $0 (your time) | $100 – $200 |
| Total | $30 – $70 | $150 – $300 |
As you can see, the savings are significant. And you get the satisfaction of knowing you did the job right.
When Should You See a Professional Instead?
Replacing a thermostat is a great DIY job for most people. But there are times when it makes sense to call a professional. If you notice coolant leaking from multiple places, the problem may be bigger than a thermostat. A mechanic can inspect the entire cooling system and spot other issues.
Also, if your engine has been running hot for a while, internal damage may have already occurred. A professional can check for a blown head gasket or a cracked engine block. These are serious repairs that need expert attention. Trust your instincts. If something feels beyond your skill level, it is okay to ask for help.
How to Prevent Thermostat Problems in the Future
The best way to deal with thermostat issues is to prevent them from happening. Here are a few simple tips to keep your cooling system in great shape.
- Change your coolant on schedule: Old coolant loses its effectiveness. Follow the replacement interval in your owner’s manual.
- Check coolant levels regularly: Low coolant puts extra stress on the entire cooling system.
- Inspect hoses and connections: Look for cracks, swelling, or leaks in the radiator hoses and clamps.
- Listen to your engine: Unusual sounds or temperature changes are early warning signs. Address them quickly.
- Use the right coolant: Always use the type recommended by your vehicle manufacturer.
Taking these small steps keeps your engine running smoothly and extends the life of your thermostat and cooling system components.
Final Thoughts
So, can you replace a car thermostat yourself at home today? Absolutely. This is one of the most rewarding DIY maintenance jobs you can do. It is quick, affordable, and does not require advanced mechanical skills. With the right tools, a compatible replacement part, and this guide, you will have the job done in under an hour.
You will save money on labor costs, gain confidence in your abilities, and learn more about how your car works. The cooling system is vital to your engine’s health, and a working thermostat is at the heart of it all. Do not let a simple repair turn into a costly engine problem. Take action today and replace that thermostat yourself.
Remember, every repair you do at home builds your skills and knowledge. Start with easy jobs like this one, and you will be tackling bigger projects in no time. Your car, your wallet, and your confidence will all thank you.
Frequently Asked Questions
How do I know if my thermostat is stuck open or closed?
If the thermostat is stuck closed, your engine will overheat quickly because coolant cannot reach the radiator. If it is stuck open, your engine will take a long time to warm up and may run below its normal temperature. Check your temperature gauge and heater performance for clues about which problem you have.
Can I drive my car with a bad thermostat?
You should not drive far with a bad thermostat. A stuck-closed thermostat causes rapid overheating, which can damage your engine. A stuck-open thermostat lets the engine run too cool, reducing fuel efficiency and heater performance. Have the thermostat replaced as soon as possible.
How often should I replace my car thermostat?
Most thermostats last the lifetime of the vehicle, but they can fail at any time. It is a good idea to inspect your thermostat during cooling system service or every 50,000 miles. Replacing it proactively can prevent unexpected breakdowns.
Do I need to replace the coolant when I change the thermostat?
You do not have to, but it is a good idea. Draining some coolant is part of the thermostat replacement process anyway. If your coolant is old or dirty, this is a perfect time to flush the system and refill it with fresh coolant.
What happens if I install the thermostat upside down?
Installing the thermostat backwards prevents it from opening and closing properly. The spring-loaded valve must face the engine side. If installed incorrectly, your engine may overheat or run too cold. Always check the orientation before tightening the housing bolts.
Is it hard to find the thermostat in my car?
In most cars, the thermostat is easy to locate. It sits at the engine end of the upper radiator hose. You simply follow the hose from the radiator to the engine. If you have trouble finding it, your vehicle’s repair manual has a diagram that shows the exact location.
=== CONCLUSION ===
Replacing a car thermostat yourself is easier than most people think. With basic tools, a new thermostat, and this step-by-step guide, you can complete the repair in about an hour. You will save money, learn a valuable skill, and keep your engine running at the right temperature. Do not let a simple thermostat problem turn into an expensive repair. Grab your tools, follow the steps in this article, and get the job done today.