Harley-Davidson Wiring Diagrams Guide – Step by Step
A Harley-Davidson Wiring Diagrams Guide is the essential tool every rider needs to understand, troubleshoot, and maintain their motorcycle’s electrical system. This guide breaks down wiring schematics into simple, easy-to-follow steps, making it accessible for beginners and experienced builders alike. You will learn how to read wire colors, trace circuits, and identify common electrical problems on your Harley. Whether you are restoring a classic or upgrading a modern ride, having the right wiring knowledge saves time, money, and frustration. Follow our step-by-step approach to confidently tackle any electrical project on your motorcycle.
Owning a Harley-Davidson is more than riding. It is about understanding every part of the machine, including the electrical system that keeps it running. A Harley-Davidson Wiring Diagrams Guide is one of the most valuable resources you can have in your garage. Whether you are restoring a classic Electra Glide or building a custom Sportster, knowing how to read and use wiring diagrams changes everything.
Electrical problems are among the most common headaches for Harley owners. A flickering headlight, a dead ignition, or a blown fuse can ruin your ride. But with the right motorcycle wiring diagram, you can trace the problem and fix it yourself. This guide walks you through the entire process step by step, so you never have to guess again.
We will cover everything from the basics of electrical symbols to model-specific wiring layouts. You will learn how to identify wire colors, trace circuits, and troubleshoot common issues. By the end, you will feel confident tackling electrical projects on your Harley with your own two hands.
Key Takeaways
- Understanding wiring diagrams is essential: Every Harley owner should know how to read a basic schematic to maintain and troubleshoot their bike.
- Wire colors and symbols matter: Each color and symbol in a Harley wiring diagram has a specific meaning you need to learn.
- Step-by-step reading makes it easy: Breaking down the diagram into smaller sections helps you understand the full electrical system.
- Common problems are easy to spot: Corroded connectors, blown fuses, and loose grounds are the most frequent issues you will face.
- Model-specific diagrams exist: Different Harley models and years have unique wiring layouts, so always use the correct one.
- Safety comes first: Always disconnect the battery before working on any electrical component.
📑 Table of Contents
- What Is a Harley-Davidson Wiring Diagrams Guide?
- Understanding Your Harley’s Electrical System
- How to Read a Harley-Davidson Wiring Diagram
- Common Wiring Diagrams by Harley Model
- Step-by-Step: Reading and Using Your Wiring Diagram
- Troubleshooting Electrical Issues with Wiring Diagrams
- Where to Find the Right Wiring Diagram for Your Harley
- Key Takeaways
- FAQ
- Conclusion
What Is a Harley-Davidson Wiring Diagrams Guide?
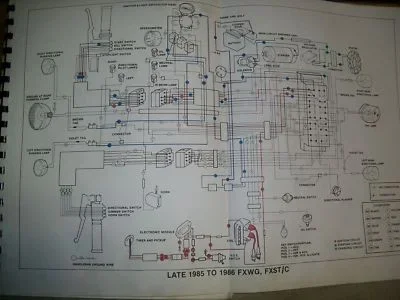
A Harley-Davidson wiring diagrams guide is a visual map of your motorcycle’s electrical system. It shows how every wire, connector, fuse, and component connects to each other. Think of it as a blueprint for the electrical heartbeat of your bike.
These diagrams use standardized symbols and color codes to represent different parts of the circuit. A line might represent a wire, while a zigzag symbol could stand for a resistor. Once you learn the language, reading a diagram becomes much easier than it looks at first glance.
Why Every Harley Owner Needs One
There are several reasons why every Harley owner should own a wiring diagram. First, it helps you diagnose problems quickly. Instead of pulling wires apart randomly, you can follow the circuit path to find the exact issue. Second, it saves you money. Many electrical repairs that seem complicated are actually simple once you see the full picture.
Third, a wiring diagram is essential for any customization project. Want to add LED headlights, a new audio system, or heated grips? You need to know how to tap into existing circuits safely. A Harley-Davidson electrical troubleshooting guide paired with a wiring diagram makes this process smooth and error-free.
Types of Wiring Diagrams You Will Encounter
Not all wiring diagrams look the same. Here are the most common types you will find for Harley-Davidson models:
- Schematic diagrams: These show the full electrical system in a simplified, symbolic format. They are the most common type you will use.
- Wiring harness diagrams: These focus on the main wire harness and show how individual wires route through the motorcycle.
- Connector pin-out diagrams: These show the specific pin assignments for each electrical connector on your bike.
- Aftermarket wiring diagrams: These are used when you install third-party accessories and need to integrate them with your existing system.
Each type serves a different purpose, but they all share the same goal: to help you understand how electricity flows through your Harley.
Understanding Your Harley’s Electrical System
Before you dive into reading diagrams, it helps to understand the basic components of your Harley’s electrical system. Every motorcycle has a few core elements that work together to power everything from the ignition to the headlights.
Key Components of the Harley Electrical System
Here are the main parts you will see on any Harley-Davidson wiring diagram:
- Battery: The power source that supplies electricity to the entire system. It is usually located under the seat or behind the side panel.
- Fuse box: This protects your electrical circuits from overloading. It contains fuses of different amperages for different systems.
- Ignition switch: This controls the flow of power to the starter and ignition system when you turn the key.
- Voltage regulator: This keeps the electrical output from the charging system at a safe level for all components.
- Stator and rotor: These generate the electrical current that charges the battery and powers the bike while running.
- Ground wires: These provide the return path for electricity and are critical for the system to work properly.
How Electricity Flows Through Your Harley
Electricity in a motorcycle follows a simple path. It starts at the battery, flows through a fuse for protection, passes through switches and relays, and reaches the component that needs power. Then it returns to the battery through the ground wire, completing the circuit.
A Harley-Davidson wiring diagrams guide shows you this entire path visually. When you can trace the flow of electricity from start to finish, diagnosing problems becomes much more intuitive. You start seeing the system as a whole rather than a confusing tangle of wires.
How to Read a Harley-Davidson Wiring Diagram
Reading a wiring diagram might feel intimidating at first, but it is really just learning a new language. Once you understand the basic rules, you can read any diagram with confidence. Let us break it down into simple steps.
Step 1: Learn the Symbols
Every wiring diagram uses a set of standard symbols to represent electrical components. Here are the ones you will see most often on a Harley-Davidson wiring diagram:
- Battery symbol: Two parallel lines of different lengths, representing the positive and negative terminals.
- Fuse symbol: A small rectangle or a line with a gap, indicating a fuse in the circuit.
- Switch symbol: A break in a line with a lever-like symbol showing the open and closed positions.
- Ground symbol: A series of horizontal lines getting shorter, pointing downward, representing the connection to the frame.
- Relay symbol: A coil with a switch symbol, showing how a small current controls a larger one.
- Light bulb symbol: A circle with a cross inside, representing a headlight, tail light, or indicator bulb.
Spend a few minutes studying these symbols before you start tracing circuits. They are the building blocks of every diagram.
Step 2: Follow the Wire Colors
Wire colors are one of the most helpful clues in any wiring diagram. Harley-Davidson uses a standardized color-coding system across most of its models. For example, red wires often carry power to the ignition system, while black wires typically serve as ground wires. Yellow wires might be for the charging system, and green wires often connect to turn signals.
When you are using a Harley-Davidson wiring diagrams guide, always cross-reference the wire colors on the diagram with the actual wires on your bike. This simple step can save you hours of confusion. Keep a small notebook or phone app where you jot down wire colors and their functions as you discover them.
Step 3: Trace the Circuit Path
Once you know the symbols and wire colors, start tracing the circuit path with your finger or a pencil. Follow the line from the power source through each component until it reaches the ground. Every connection point along the way is a potential spot where a problem could occur.
A helpful trick is to trace the circuit in both directions. Start from the battery and work forward to the component, then start from the component and work backward to the ground. If the path makes sense in both directions, you have found the correct circuit.
Quick Tips for Reading Wiring Diagrams
- Always start with a clean, high-quality diagram. Free Harley-Davidson wiring diagram PDF downloads are available from many online resources and forums.
- Use a highlighter to mark the circuit you are tracing. This keeps your eyes from jumping to unrelated wires.
- Print the diagram and keep it in your garage. Having a physical copy is much easier to reference than a small screen.
- Do not try to read the entire diagram at once. Focus on one circuit at a time.
Common Wiring Diagrams by Harley Model
Every Harley-Davidson model has its own unique wiring layout. While the basic principles are the same, the specific wire colors, connector types, and component locations vary. Here is a look at some common models and what you should know about their wiring systems.
Sportster Wiring Diagrams
Sportsters are among the most popular Harley models, and their wiring is relatively straightforward. The Sportster wiring harness is compact, which makes it easier to work with. Common Sportster models include the Forty-Eight, Iron Eighty, Forty-Eight Special, and the classic Sportster line. Most Sportsters from 2004 onward share similar wiring layouts, which makes finding a Harley-Davidson wiring diagrams guide easier.
Sportsters typically have a single fuse box located under the seat. The ignition system uses a simple kill switch and ignition coil setup. If you are working on a Sportster restoration, pay close attention to the headlight and taillight wiring, as these are the most common areas for electrical issues.
Touring Model Wiring Diagrams
Touring models like the Road King, Street Glide, and Road Glide have more complex electrical systems. These bikes come with additional features like audio systems, heated grips, ABS brakes, and cruise control. The wiring harness for a touring model can be significantly larger than that of a Sportster.
When working with a Touring Harley wiring diagram, pay special attention to the auxiliary connectors. These bikes often have multiple plug-in points for accessories. Understanding which connector controls which feature is essential for any upgrades or repairs.
Softail and Dyna Model Wiring Diagrams
Softail and Dyna models sit in the middle of the complexity spectrum. They have more wiring than Sportsters but less than Touring models. The Dyna wiring harness often includes connections for the rear shock, passenger pegs, and custom lighting setups.
A common issue with Dyna models is the ground wire connection near the rear wheel. Over time, road vibration and exposure to the elements can cause the ground to corrode, leading to flickering lights or electrical gremlins. Always check your ground connections first when troubleshooting a Dyna.
Comparison Table: Wiring Complexity by Model
| Model Type | Wiring Complexity | Common Issues | Best For |
|---|---|---|---|
| Sportster | Simple | Headlight, taillight | Beginners, restorations |
| Softail | Moderate | Ground wires, connectors | Intermediate builders |
| Dyna | Moderate | Rear ground, accessories | Custom builders |
| Touring | Complex | Multiple accessories, ABS | Advanced mechanics |
Step-by-Step: Reading and Using Your Wiring Diagram
Now that you understand the basics, let us walk through the actual process of using a Harley-Davidson wiring diagrams guide on a real project. This step-by-step approach works for any electrical task on your Harley.
Step 1: Gather Your Tools and Materials
Before you start, make sure you have everything you need. Here is a quick checklist:
- A wiring diagram specific to your Harley model and year
- A multimeter for testing voltage and continuity
- A set of wire strippers and crimping tools
- Heat shrink tubing and electrical tape
- A notebook for recording your findings
- A flashlight or headlamp for seeing inside dark areas
Having these tools ready before you start will keep the project moving smoothly. Nothing slows down electrical work like having to stop and find a tool.
Step 2: Disconnect the Battery
Safety always comes first. Before you touch any wires, disconnect the negative terminal of your battery. This prevents accidental shorts and protects both you and your motorcycle’s electrical system. Use a wrench to loosen the nut on the negative cable and carefully pull the terminal off the post.
This is a step that many people skip, but it is the single most important safety precaution in any electrical work. A short circuit can damage your motorcycle’s electronics or even cause a fire. Always disconnect the battery first.
Step 3: Identify the Circuit You Need
Open your Harley-Davidson wiring diagrams guide and find the specific circuit you are working on. If you are troubleshooting a headlight issue, locate the headlight circuit on the diagram. If you are adding a new accessory, find the circuit you plan to tap into.
Use your highlighter to mark every wire and component in that circuit. This visual focus helps you stay organized and prevents you from accidentally working on the wrong circuit.
Step 4: Trace the Wires on Your Bike
Now go to your motorcycle and start tracing the wires on the actual bike. Match the wire colors you see on the bike to the colors shown on the diagram. Follow each wire from its origin point to its destination. Check every connector along the way for signs of corrosion, damage, or loose connections.
Use your multimeter to test for voltage at different points in the circuit. This tells you exactly where the power is flowing and where it is dropping off. A sudden drop in voltage often indicates a bad connection or a damaged wire.
Step 5: Make Your Repair or Modification
Once you have identified the problem or the connection point you need, make your repair or modification. Strip the wires cleanly, use proper connectors, and seal every connection with heat shrink tubing. Never just twist wires together and tape them. That is a recipe for future electrical problems.
After completing your work, reconnect the battery and test the circuit. If everything works, you have successfully used your wiring diagram to complete the project. If not, go back to the diagram and trace the circuit again to find where things went wrong.
Common Mistakes to Avoid
- Guessing wire functions: Always verify with a multimeter. Do not assume a wire does what you think it does.
- Using the wrong diagram: Wiring diagrams vary significantly between model years. Always use the diagram that matches your exact bike.
- Ignoring ground connections: Many electrical problems are caused by poor ground connections. Always check grounds first.
- Overloading circuits: Adding too many accessories to a single circuit can blow fuses and damage the wiring.
Troubleshooting Electrical Issues with Wiring Diagrams
Electrical problems on a Harley can be frustrating, but a Harley-Davidson wiring diagrams guide turns a mystery into a solvable puzzle. Here are the most common electrical issues you will face and how to use your diagram to fix them.
No Power or Dead Battery
If your Harley will not start and you have no power at all, start by checking the battery connections. Use your multimeter to test the voltage at the battery terminals. A healthy battery should read around 12.6 volts when the bike is off. Then check the main fuse in the fuse box. A blown main fuse can cut power to the entire electrical system.
Next, trace the main power wire from the battery to the fuse box using your wiring diagram. Look for any breaks, corrosion, or loose connections along the way. This systematic approach will almost always find the root cause.
Flickering Lights
Flickering headlights or dashboard lights are a very common issue on Harley-Davidson motorcycles. The most frequent cause is a poor ground connection. On a Harley-Davidson wiring diagram, trace the ground wire for the affected light. Follow it from the bulb housing to where it connects to the frame.
Clean the ground connection point with sandpaper or a wire brush. Make sure the connection is tight and free of rust. In many cases, simply cleaning and tightening the ground connection resolves the flickering completely.
Blown Fuses
If a fuse keeps blowing, it means there is too much current flowing through that circuit. This usually indicates a short circuit or an overloaded circuit. Use your wiring diagram to identify every component on that circuit. Disconnect them one by one and test until the fuse stops blowing. The component or wire causing the short will become obvious through this process.
Accessory Not Working After Installation
If you added a new accessory and it does not work, check your wiring connections first. Make sure the power wire is connected to a switched power source and the ground wire is connected to a clean, bare metal ground point. Use your wiring diagram to verify that you tapped into the correct circuit.
Many people make the mistake of connecting accessories to circuits that are already near their maximum capacity. This can cause the original circuit to malfunction and the new accessory to underperform. Always check the amperage rating of the circuit before adding anything new.
Expert Insight: When to Call a Professional
While this guide gives you the tools to handle most electrical tasks, some situations call for professional help. If you are dealing with a complex short that you cannot locate, or if you are working on a bike with extensive aftermarket modifications that have been wired improperly, a professional Harley technician can save you time and prevent costly mistakes.
That said, the vast majority of electrical issues on a Harley can be resolved with patience, a good wiring diagram, and basic tools. The more you work with your bike’s electrical system, the more confident you will become.
Where to Find the Right Wiring Diagram for Your Harley
Finding the correct wiring diagram is the first step in any electrical project. Here are the best sources for reliable Harley-Davidson wiring diagrams:
- OEM service manuals: Harley-Davidson sells official service manuals that include detailed wiring diagrams for every model and year. These are the most accurate source available.
- Online forums: Harley communities like Harley-Davidson forums and Facebook groups often share wiring diagrams and tips for specific models.
- YouTube tutorials: Visual learners can find excellent step-by-step video guides that show how to read and use wiring diagrams in real time.
- Aftermarket wiring harness manufacturers: Companies like Dyna and SAE provide wiring harnesses with included diagrams that make installations straightforward.
Always make sure the diagram matches your specific model and year. A wiring diagram for a 2010 Road King will not match a 2020 Road King, even though they share the same name. The Harley-Davidson wiring diagrams guide approach works best when you have the exact diagram for your exact bike.
Key Takeaways
- A wiring diagram is your roadmap: It shows you exactly how every electrical component connects on your Harley.
- Learn the symbols and wire colors: These are the foundation of reading any wiring diagram confidently.
- Start with simple circuits: Practice on easy circuits like headlights before tackling complex systems like ABS or audio.
- Always disconnect the battery first: This is the most important safety rule in any electrical work.
- Check grounds first when troubleshooting: Most electrical problems are caused by poor ground connections.
- Use the right diagram for your model: Wiring layouts vary between models and years, so always verify you have the correct one.
- Practice builds confidence: The more electrical work you do, the easier it becomes.
FAQ
Do I need special tools to read a Harley-Davidson wiring diagram?
No special tools are needed to read a diagram itself. However, having a multimeter, wire strippers, and a good flashlight makes the process much easier when you are actually tracing wires on your bike. A simple digital multimeter is the single most useful tool for any Harley electrical work.
Can I use a wiring diagram from a different Harley model year?
It is not recommended. Wiring layouts can change significantly between model years, even for the same Harley model. Always use the diagram that matches your exact bike model and production year to avoid confusion and potential wiring mistakes.
Are free wiring diagrams online safe to use?
Many free diagrams are available and can be very helpful, but always verify the source. Diagrams from official Harley-Davidson service manuals or reputable forums are generally reliable. If a diagram looks incomplete or unclear, invest in the official service manual for your specific model.
What is the most common electrical problem on Harleys?
Poor ground connections are by far the most common electrical issue on Harley-Davidson motorcycles. Corrosion, loose connections, and damaged ground wires can cause a wide range of problems from flickering lights to complete electrical failure. Always check your grounds first when troubleshooting.
How do I know which wire is the power wire?
On most Harley-Davidson models, red or red-striped wires carry main power, while black wires serve as grounds. However, always verify with your specific wiring diagram and use a multimeter to confirm voltage before making any connections.
Is it hard to add aftermarket accessories using a wiring diagram?
Not at all, once you understand the basics. A Harley-Davidson wiring diagrams guide makes it straightforward to find the right circuit to tap into. Just make sure you do not overload the circuit and always use proper connectors and protection for any new wiring you add.
Conclusion
A Harley-Davidson Wiring Diagrams Guide is more than a reference document. It is a powerful tool that gives you the confidence and knowledge to understand your motorcycle at a deeper level. From reading basic symbols to tracing complex circuits, every skill you build makes you a more capable Harley owner.
Electrical work does not have to be scary. With the right diagram, the right tools, and a little patience, you can handle most electrical tasks yourself. You will save money on repairs, enjoy more successful custom projects, and develop a stronger connection with your machine.
Start with the basics. Learn the symbols, practice tracing circuits, and work on simple projects first. As your confidence grows, you can tackle more complex electrical challenges. The knowledge you gain from using a Harley-Davidson wiring diagrams guide will serve you for years to come, whether you are maintaining a classic or building a custom build. Your Harley deserves the care and attention that comes with understanding every wire that powers it.