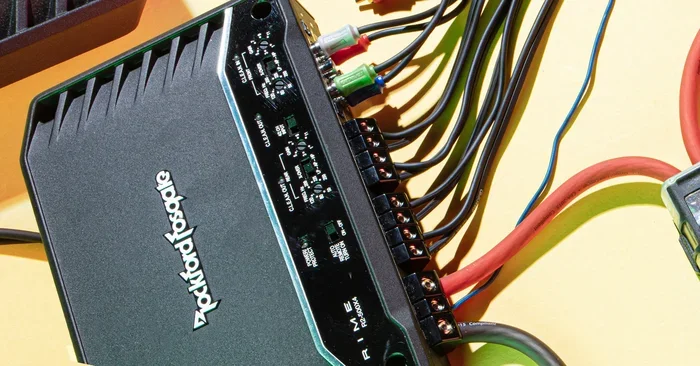
Car Amplifier Wiring Kit Everything You Need to Know
A car amplifier wiring kit is the essential set of cables and components that connects your amplifier to your vehicle’s electrical and audio system. This guide covers every aspect of choosing, installing, and troubleshooting your car amplifier wiring kit. You will learn about the different wire types, how to size them correctly, and common mistakes to avoid during amplifier installation.
If you love your car audio, you already know that a great car amplifier can transform your listening experience. But here is the thing. The amplifier is only as good as the wiring that connects it. A car amplifier wiring kit is the backbone of your entire car audio setup. Without the right cables and connections, even the most expensive amplifier will underperform.
In this guide, we will walk you through everything you need to know. From understanding what is inside a wiring kit to choosing the right size and installing it like a pro. Whether you are a beginner or a seasoned DIYer, this guide has you covered. Let us dive in.
Key Takeaways
- A complete wiring kit includes power wire, ground wire, remote wire, RCA cables, and an inline fuse.
- Choosing the right wire gauge is critical for delivering clean power and preventing overheating.
- Proper grounding prevents noise and ensures optimal performance of your car audio system.
- RCA cables carry the audio signal from your head unit to the amplifier.
- Common mistakes include undersized wires, poor grounding, and missing inline fuses.
📑 Table of Contents
What Is a Car Amplifier Wiring Kit?
A car amplifier wiring kit is a collection of cables and hardware designed to connect your amplifier to your vehicle. It typically includes several essential components that work together to deliver power and audio signals. Think of it as the nervous system of your car stereo setup.
Most kits come bundled together for convenience. This saves you the hassle of buying each cable separately. A quality amplifier wiring kit ensures that all your wires are the correct gauge and rated for the power your amplifier demands.
Core Components of a Wiring Kit
Every car amplifier wiring kit should include these essential parts:
- Power wire — This carries electrical current from your battery to the amplifier. It is usually red.
- Ground wire — This connects the amplifier to a bare metal point on the car chassis. It is usually black.
- Remote turn-on wire — This tells the amplifier to turn on and off with your head unit. It is usually blue or blue with a white stripe.
- RCA cables — These carry the low-level audio signal from your head unit to the amplifier.
- Speaker wire — This connects the amplifier output to your speakers.
- Inline fuse — This protects your wiring and amplifier from electrical surges.
- Cable ties and connectors — These help you organize and secure everything in place.
Why a Quality Wiring Kit Matters
You might be tempted to buy cheap wires or piece together your own setup. But this can cause serious problems. A proper car amplifier wiring kit ensures safe, efficient, and clean power delivery. Here is why it matters so much.
Undersized wires create resistance. Resistance generates heat. Heat can melt insulation and even cause fires. On the other hand, oversized wires are unnecessarily bulky and expensive. The right amplifier wiring kit strikes the perfect balance.
Power Delivery and Signal Quality
Your amplifier needs a consistent flow of electricity to perform at its best. A car amplifier wiring kit with the correct wire gauge ensures that power reaches the amplifier without voltage drop. Voltage drop means your amplifier does not get the full power it needs.
Similarly, the signal wire quality matters for audio clarity. Cheap RCA cables pick up interference and noise. High-quality cables in a good wiring kit keep your signal clean and your sound crisp.
Safety First
A proper car amplifier wiring kit protects your vehicle and your investment. The inline fuse in the kit prevents short circuits from reaching your battery. A solid ground connection prevents electrical faults. These safety features are not optional. They are essential.
How to Choose the Right Car Amplifier Wiring Kit
Not all wiring kits are created equal. Choosing the right one depends on your amplifier’s power rating, your vehicle type, and your audio goals. Here is how to make the best choice.
Match the Wire Gauge to Your Amplifier
The wire gauge determines how much current a wire can safely carry. Thicker wires have lower gauge numbers and can handle more power. Here is a simple reference guide:
- 4 gauge wire — Best for amplifiers up to 500 watts.
- 2 gauge wire — Best for amplifiers between 500 and 1000 watts.
- 1/0 gauge wire — Best for amplifiers between 1000 and 2000 watts.
- 2/0 gauge wire — Best for amplifiers over 2000 watts.
Always check your amplifier’s power rating before purchasing a car amplifier wiring kit. Choosing the wrong gauge is one of the most common mistakes people make.
Consider Your Vehicle Type
Sedans and compact cars have less space and shorter wire runs. SUVs and trucks need longer wires, which means slightly thicker gauges for the same power level. A car amplifier wiring kit designed for your vehicle type simplifies the installation process.
Look for Complete Kits
Complete amplifier wiring kits include everything you need in one package. You get the power wire, ground wire, remote wire, RCA cables, speaker wire, and fuse. Buying a complete kit saves time and ensures compatibility. It is the smartest choice for most car audio enthusiasts.
Step-by-Step Installation Guide
Installing a car amplifier wiring kit is easier than most people think. With the right tools and a little patience, you can do it yourself in under two hours. Here is a step-by-step walkthrough.
Step 1: Plan Your Route
Before you start cutting or drilling, plan where each wire will run. The power wire typically goes from the battery through the firewall to the amplifier. The RCA cables usually run along the same path on the opposite side to avoid interference. Map out your route in advance.
Step 2: Install the Power Wire
Run the power wire from the battery to the amplifier location. Use cable ties to secure the wire along the way. Keep it away from heat sources and moving parts. Install the inline fuse as close to the battery as possible. This is a critical safety step in any car amplifier wiring kit installation.
Step 3: Connect the Ground Wire
Find a clean, bare metal spot on the car chassis within 18 inches of the amplifier. Scrape away any paint or rust to ensure a solid connection. Attach the ground wire and tighten the bolt securely. A poor ground is the number one cause of noise and buzzing in car audio systems.
Step 4: Run the RCA Cables
Run the RCA cables from the head unit to the amplifier. Keep them away from the power wire to avoid interference. If possible, run them on the opposite side of the vehicle. The signal wire in your wiring kit should be shielded to block out unwanted noise.
Step 5: Connect the Remote Turn-On Wire
Find the remote turn-on wire from your head unit or use a fused tap from the ignition-switched power source. Connect it to the blue remote wire on the amplifier. This ensures the amplifier powers on only when you turn on your car stereo.
Step 6: Connect the Speaker Wire
Run the speaker wire from the amplifier outputs to each speaker. Match the positive and negative terminals correctly. Reversed polarity can cause sound cancellation and weak bass. This is an easy mistake to make during amplifier installation but it has a big impact on sound quality.
Step 7: Double-Check Everything
Before you power up, go through every connection one more time. Make sure the ground is tight, the power fuse is in place, and all RCA connections are secure. A thorough check prevents damage and ensures your car amplifier wiring kit performs as intended.
Common Mistakes to Avoid
Even experienced car audio enthusiasts make mistakes. Here are the most common ones when working with a car amplifier wiring kit.
- Using the wrong wire gauge. Too thin a wire causes voltage drop and overheating. Too thick a wire is hard to route and wastes money.
- Skipping the inline fuse. This is a serious safety risk. Always use the fuse that comes with your amplifier wiring kit.
- Poor grounding. A ground connection on painted or corroded metal will cause buzzing and hum. Always scrape to bare metal.
- Running RCA cables next to power wires. This creates electromagnetic interference and ruins your audio quality.
- Forgetting the remote turn-on wire. Without this, your amplifier stays on all the time and drains your battery.
- Undersized speaker wire. Thin speaker wire limits power delivery and can damage your amplifier at high volumes.
Quick Tips for the Best Results
Here are some expert tips to get the most out of your car amplifier wiring kit:
- Use a capacitor with your amplifier if you notice dimming headlights when the bass hits. This stabilizes your electrical system.
- Use oxygen-free copper (OFC) wire for the best conductivity and durability.
- Keep all connections clean and tight. Use dielectric grease on RCA connections to prevent corrosion.
- Label your wires during installation. This makes future troubleshooting much easier.
- Route wires through rubber grommets when passing through firewalls or body panels to prevent chafing.
How to Troubleshoot Common Issues
Even with a perfect car amplifier wiring kit, you might run into issues. Here is how to diagnose and fix the most common problems.
No Sound from the Amplifier
Check the RCA connections first. Make sure they are plugged in securely. Then verify that the remote turn-on wire is connected properly. A missing remote signal is the most common reason an amplifier stays silent.
buzzing or Humming Noise
This is almost always a grounding issue. Check that your ground wire is attached to clean, bare metal. If the noise persists, try moving the ground point to a different location on the chassis. Also check that your RCA cables are not running parallel to your power wire.
Amplitude Cuts Out at High Volume
This usually means your power wire is too thin for your amplifier’s power demands. Upgrade to a thicker gauge wire in your car amplifier wiring kit. Also check that your battery is in good condition and can supply enough current.
Top Brands for Car Amplifier Wiring Kits
When shopping for a car amplifier wiring kit, certain brands stand out for quality and reliability. Brands like Kicker, Rockford Fosgate, and Stinger offer well-designed kits with all the right components. These kits are tested for safety and performance. Investing in a trusted brand gives you peace of mind and better long-term results for your car audio system.
Final Thoughts
A car amplifier wiring kit is one of the most important purchases you will make for your car audio setup. It determines how safely and effectively your amplifier delivers power and sound. Take the time to choose the right kit, install it carefully, and avoid the common mistakes outlined in this guide.
With the right wiring kit and a little effort, you will enjoy cleaner bass, clearer highs, and a truly immersive car stereo experience. Your ears will thank you. So get your car amplifier wiring kit, roll up your sleeves, and get ready to upgrade your sound.
Frequently Asked Questions
What is included in a typical car amplifier wiring kit?
A standard car amplifier wiring kit includes a power wire, ground wire, remote turn-on wire, RCA cables, speaker wire, and an inline fuse. Some kits also come with cable ties, connectors, and a capacitor for added electrical stability.
How do I know what wire gauge to use for my amplifier?
Match the wire gauge to your amplifier’s power rating. Use 4 gauge for up to 500 watts, 2 gauge for 500 to 1000 watts, and 1/0 gauge for over 1000 watts. Always check your amplifier’s manual for the recommended wire size for your car amplifier wiring kit.
Can I install a car amplifier wiring kit myself?
Yes, most DIYers can install a car amplifier wiring kit with basic tools and a little patience. The process involves running wires from the battery to the amplifier, connecting RCA cables, and grounding the unit. If you are unsure, consult a professional car audio installer.
Why does my amplifier keep blowing fuses?
Blown fuses usually indicate a short circuit or an undersized power wire. Check that all connections are secure and that no wires are touching the chassis. Also verify that your car amplifier wiring kit uses the correct wire gauge for your amplifier’s power output.
Do I need a capacitor with my car amplifier wiring kit?
A capacitor is not always necessary, but it helps if your vehicle’s electrical system struggles at high volumes. It stores energy and delivers it quickly when your amplifier demands a power surge. This prevents dimming lights and protects your car audio system.
How long does it take to install a car amplifier wiring kit?
A typical installation takes one to two hours for most DIYers. The time depends on your vehicle, the complexity of the routing, and your experience level. Having all the components from a quality car amplifier wiring kit ready beforehand makes the process much faster.
=== CONCLUSION ===
A car amplifier wiring kit is the foundation of any great car audio system. It ensures safe power delivery, clean signal transmission, and reliable performance. By choosing the right kit, installing it correctly, and avoiding common pitfalls, you set yourself up for an incredible listening experience every time you hit the road.
Take your time, follow the steps in this guide, and enjoy the process of building your perfect sound setup. Your car amplifier wiring kit is the key to unlocking the full potential of your car audio system.